
Baby Lock Feet - Grooved, FlatSole & Clear Explained
I often come across students in my hands on classes who own Baby Lock machines and have a few different accessory feet but don’t understand what they are or when they should be used. All the information you need is here there is also a YouTube tutorial if you are more visual.
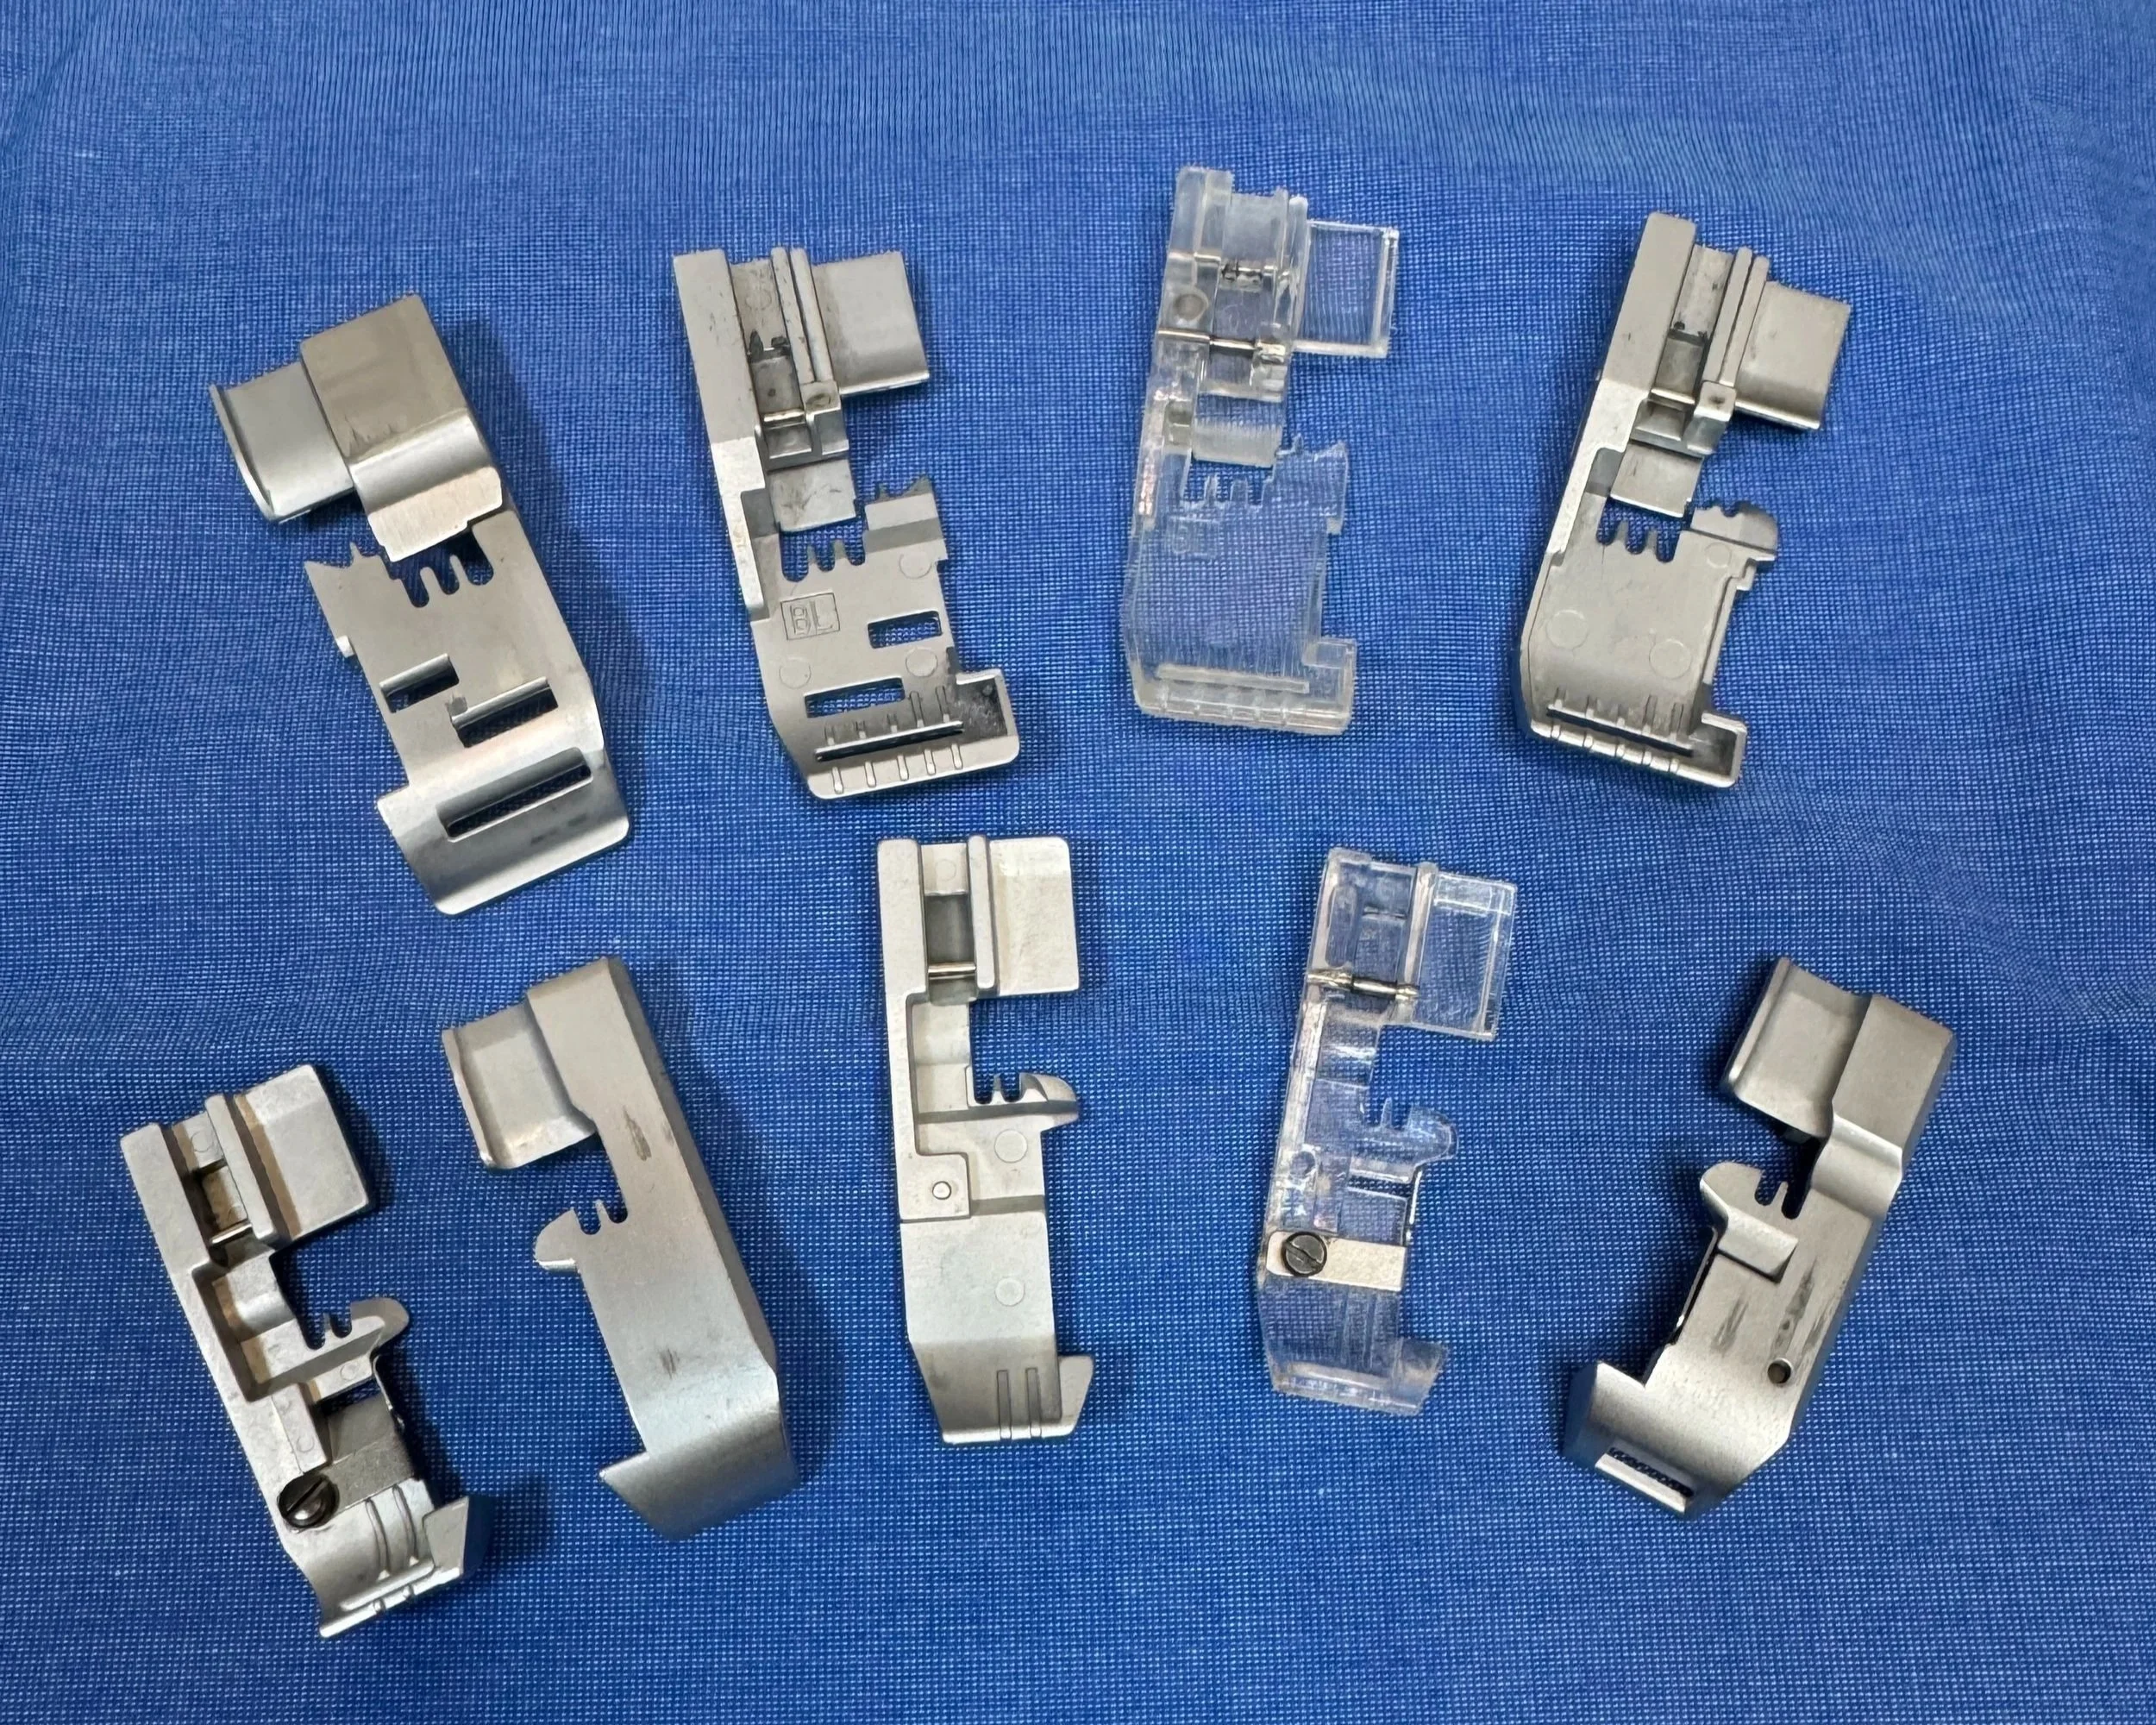
First of all - lets talk feet for Four Thread overlockers. The feet I am focusing on in this Blog are Standard/Grooved Gathering Foot, Flat Sole Foot and Clear Foot. Your machine would have come with either the grooved foot or flat sole as the basic foot.
It is important to note these feet come in two different sizes, the older model machines such as Eclipse, Imagine have a longer feed set up due to the stitch finger sliding back under the needle plate when roll hemming. On the later and more current models the stitch finger folds down, this allows the cutting blade to sit closer to the needles so these models require a shorter standard foot. It is essential if you are ordering any of these feet you know your model, there is a code on the sticker on the back of the machine which starts with BL.
The different sized feet only applies to the ones mentioned above. All the other accessory feet such as piping, gathering, elastic etc. can be used on all models.
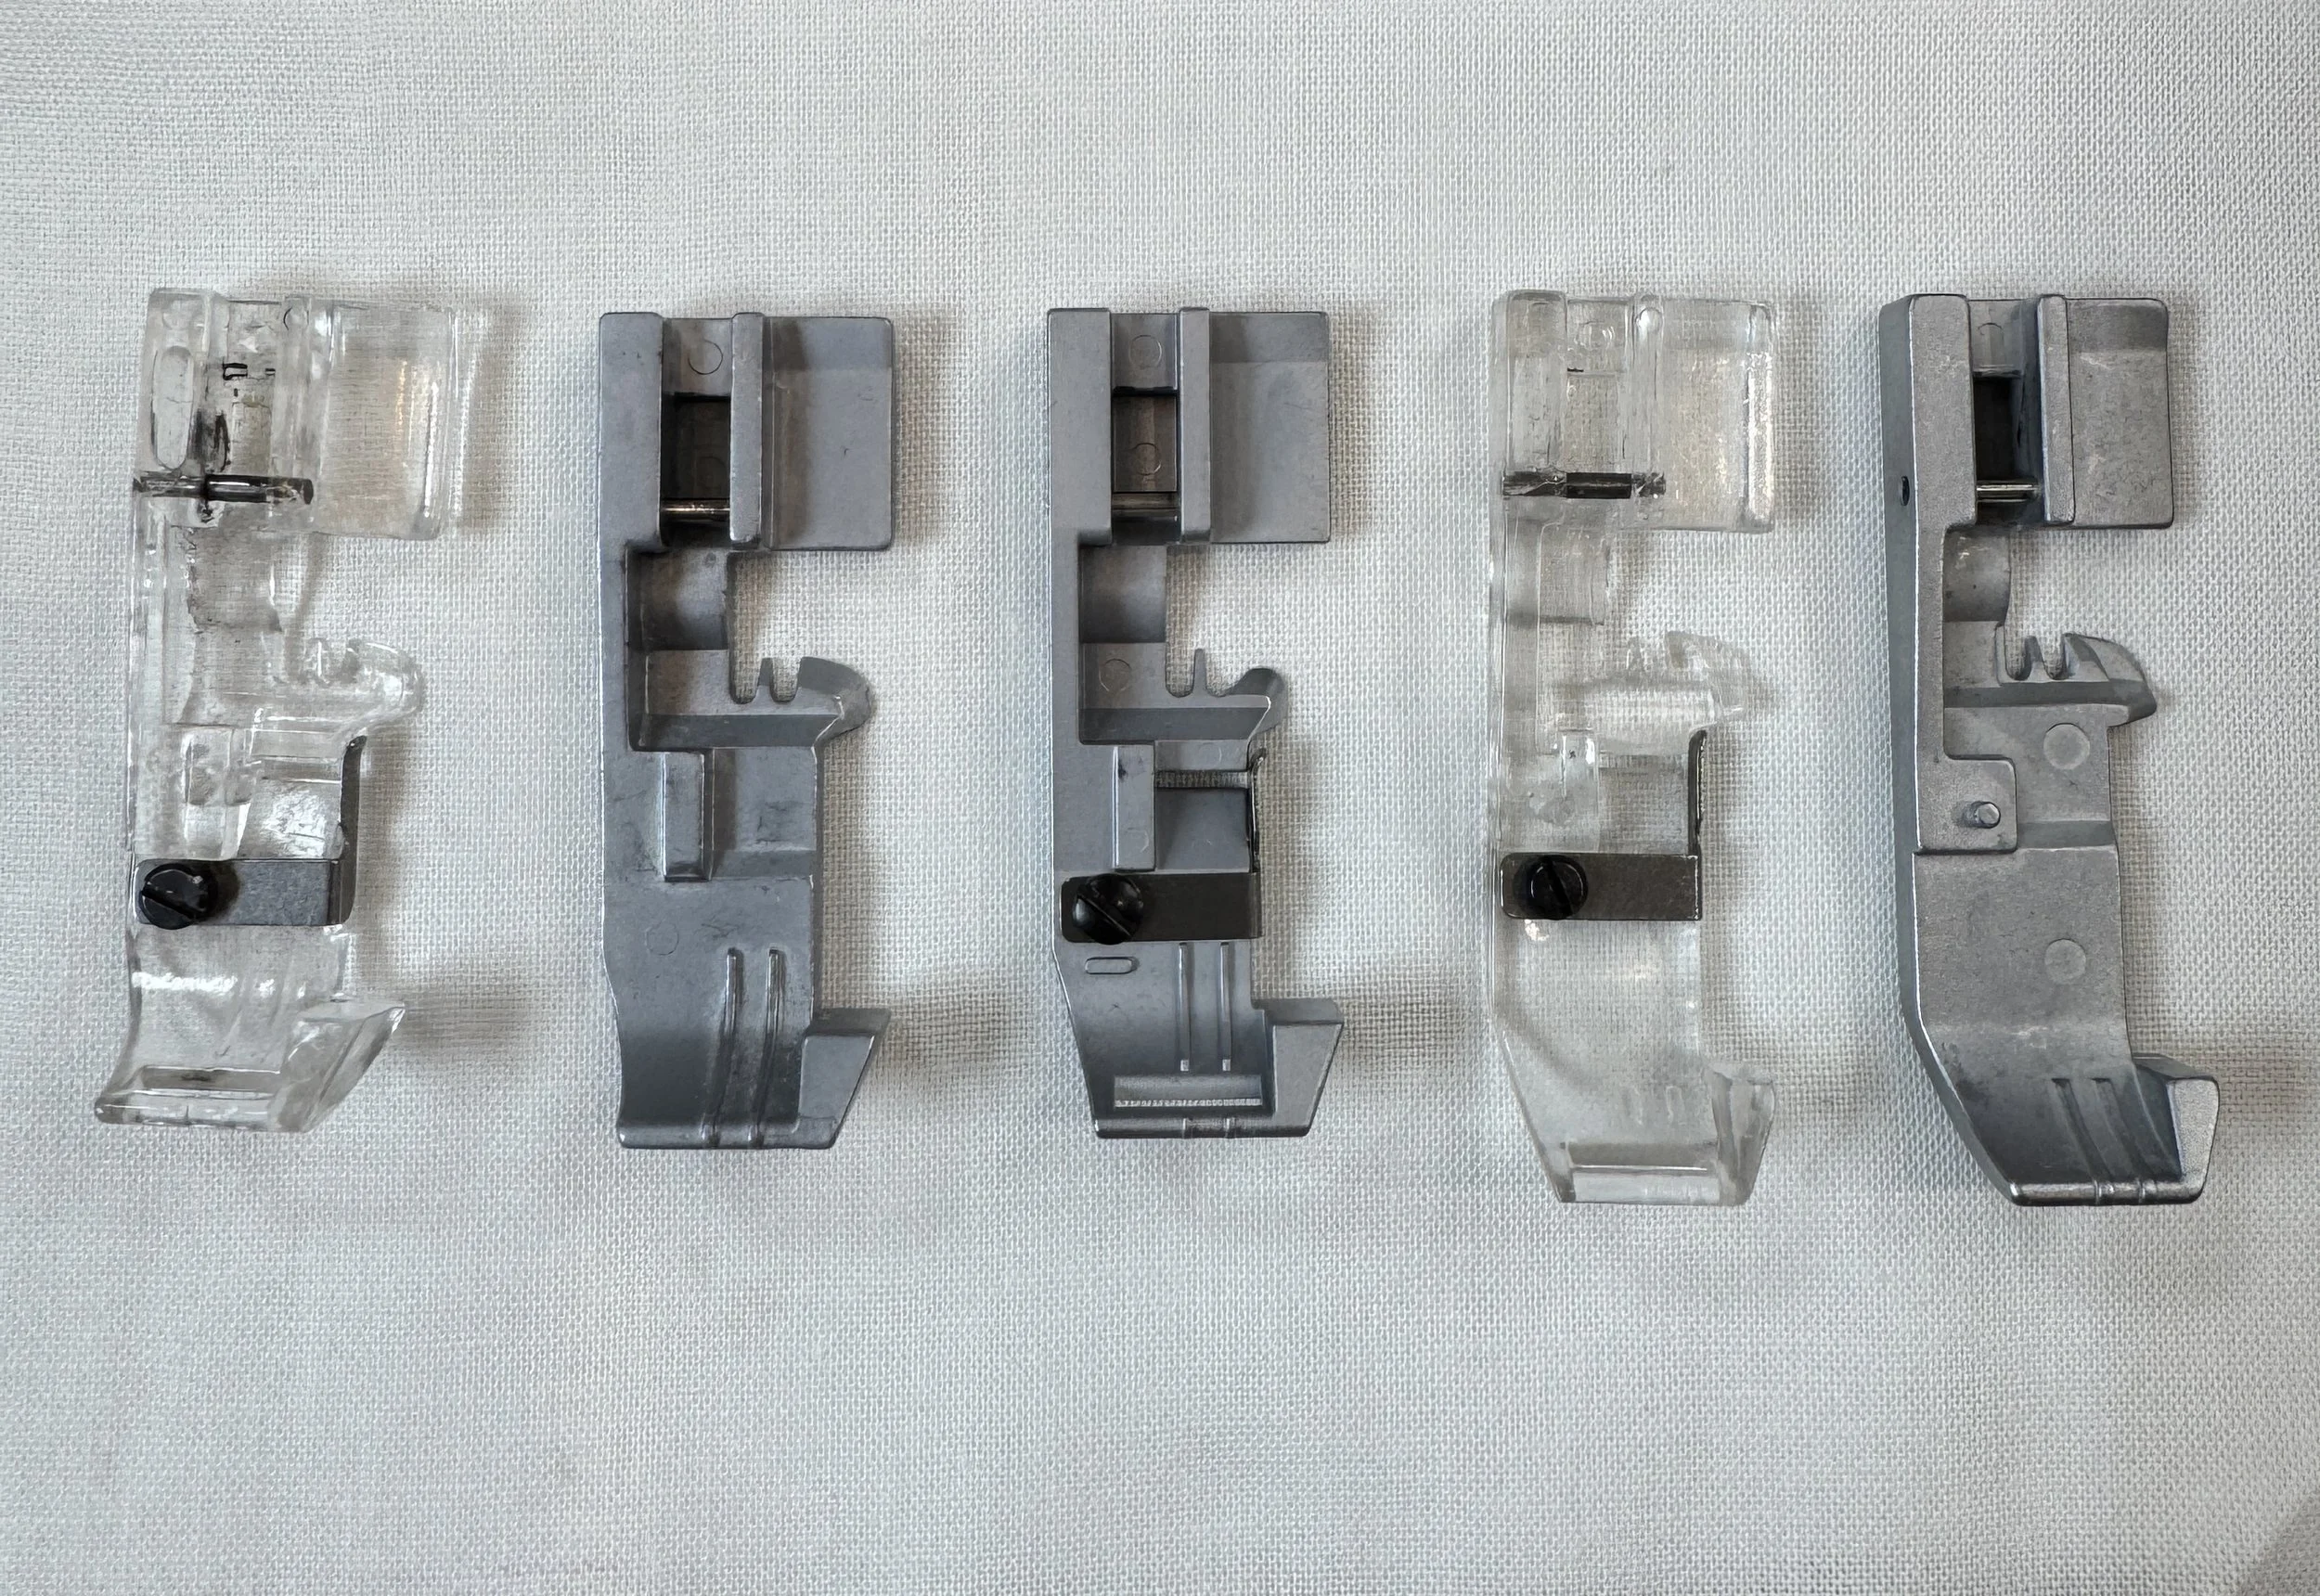
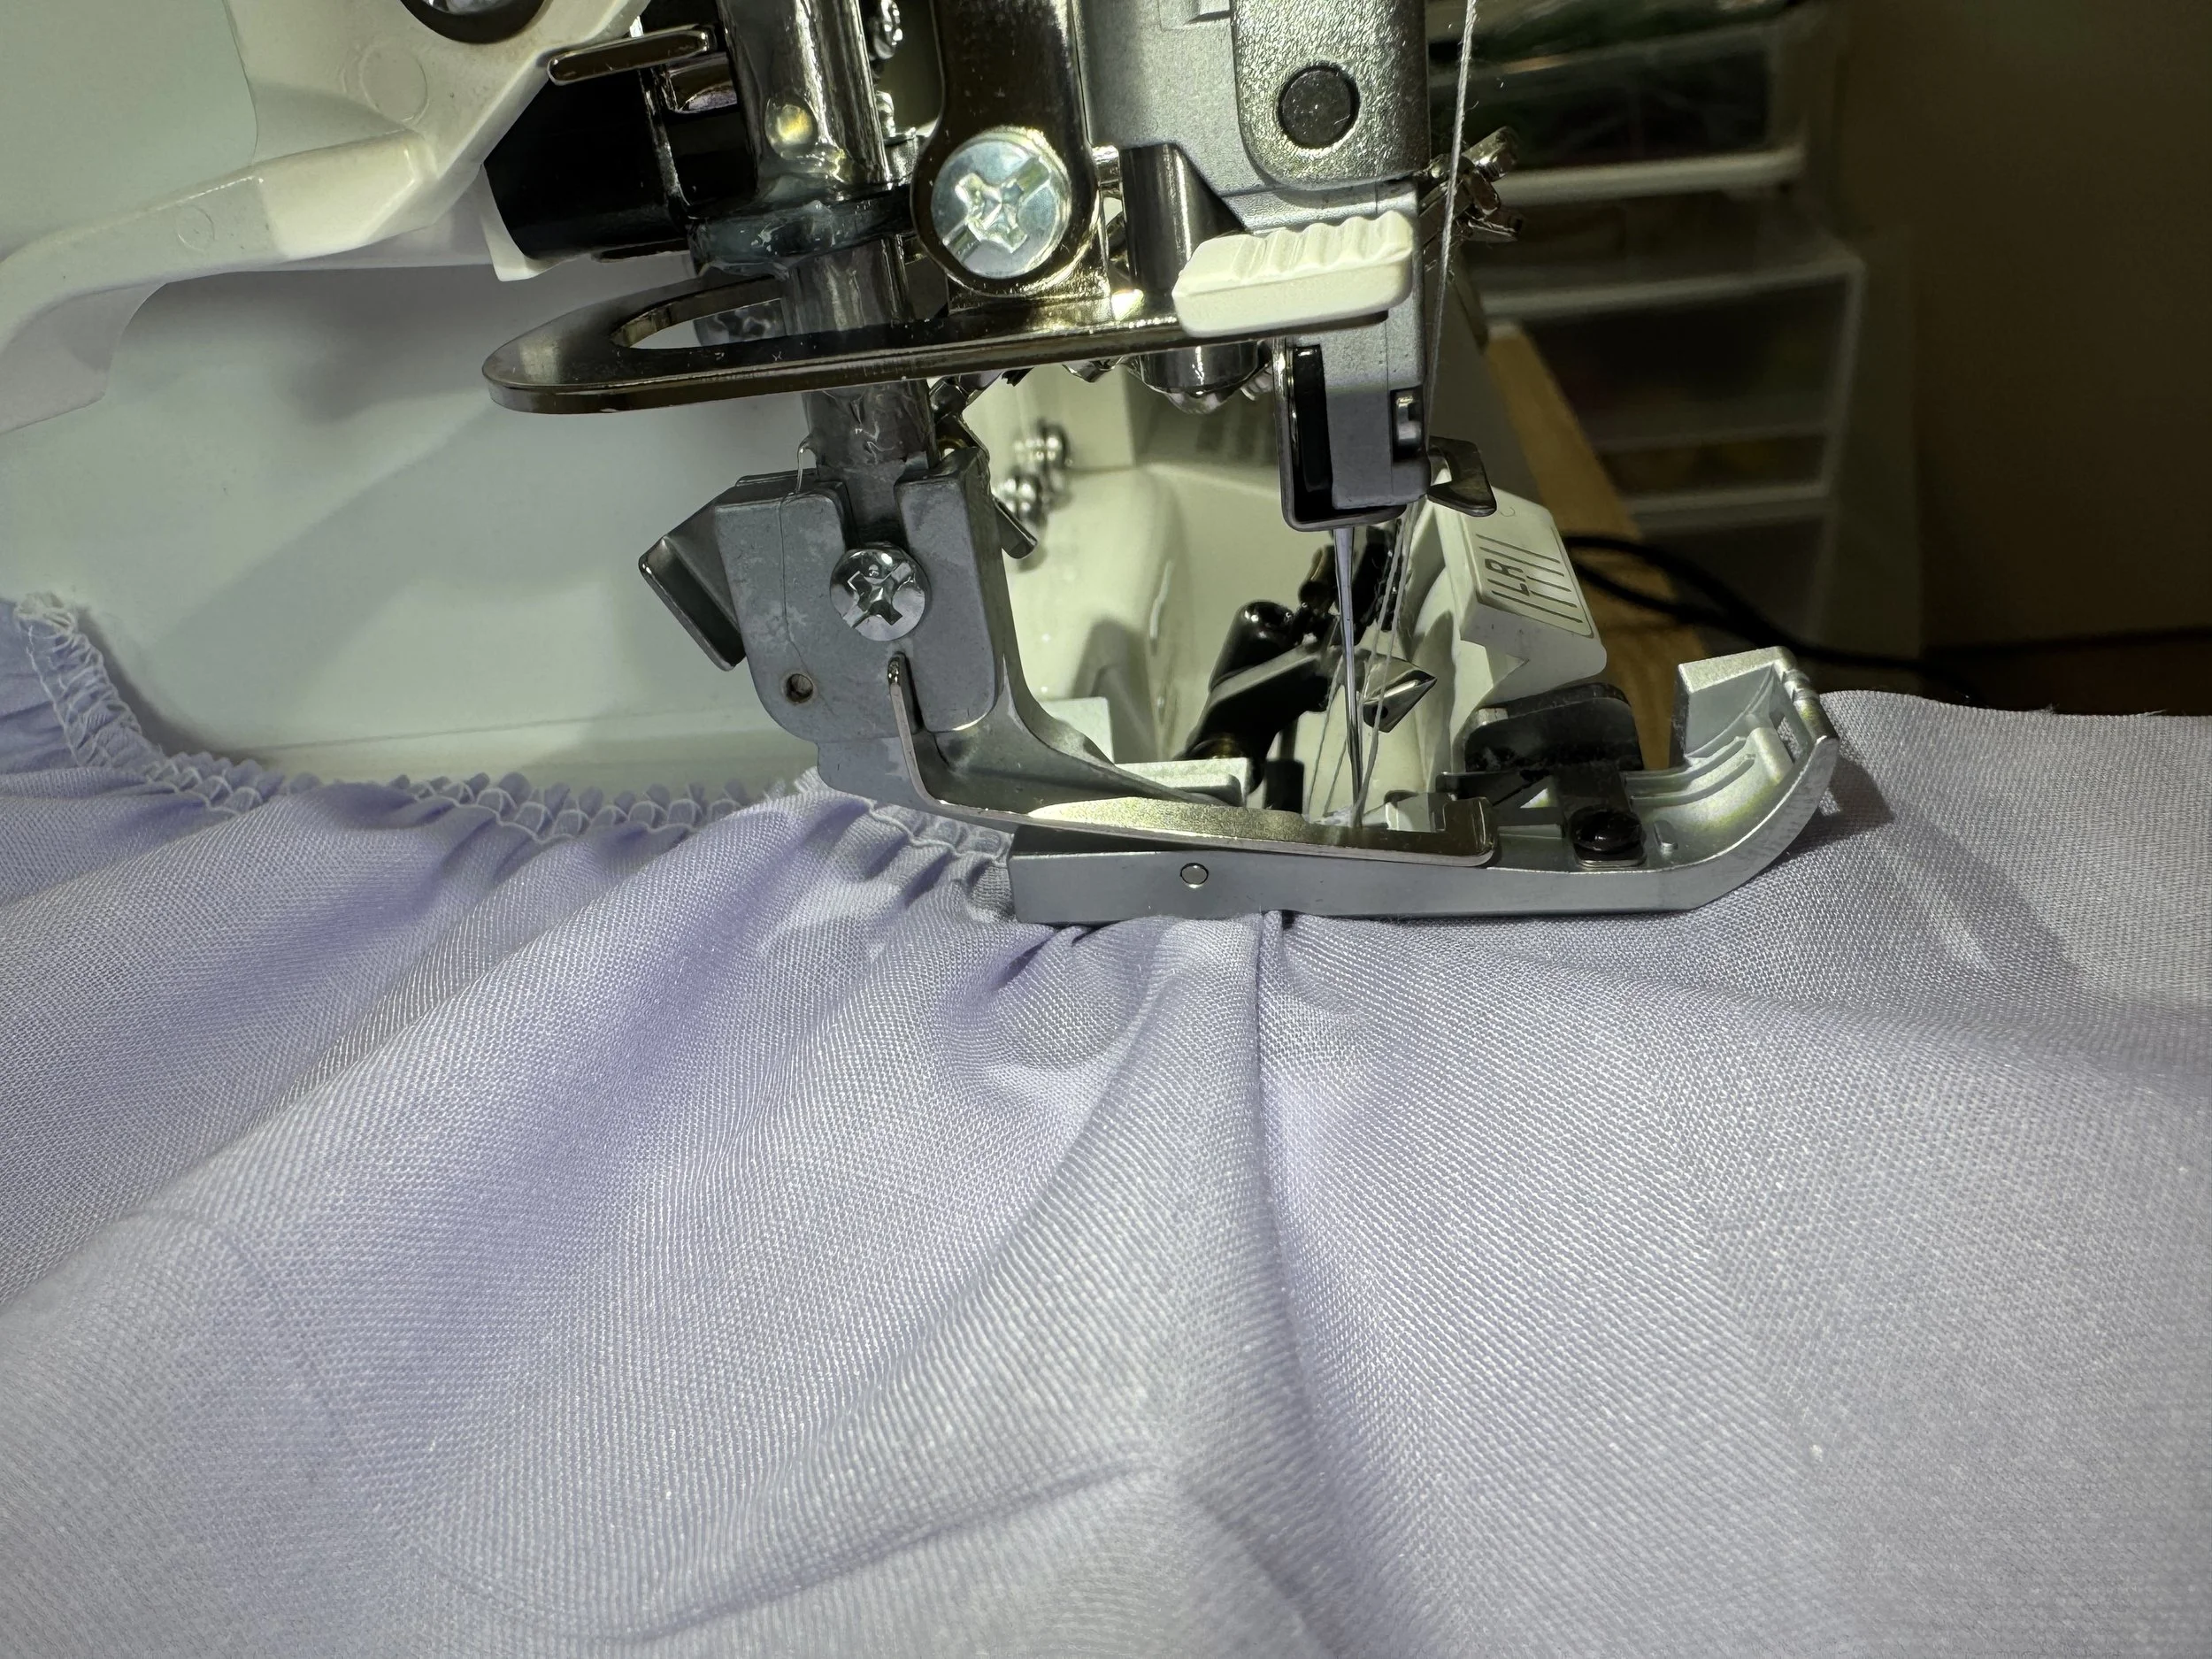
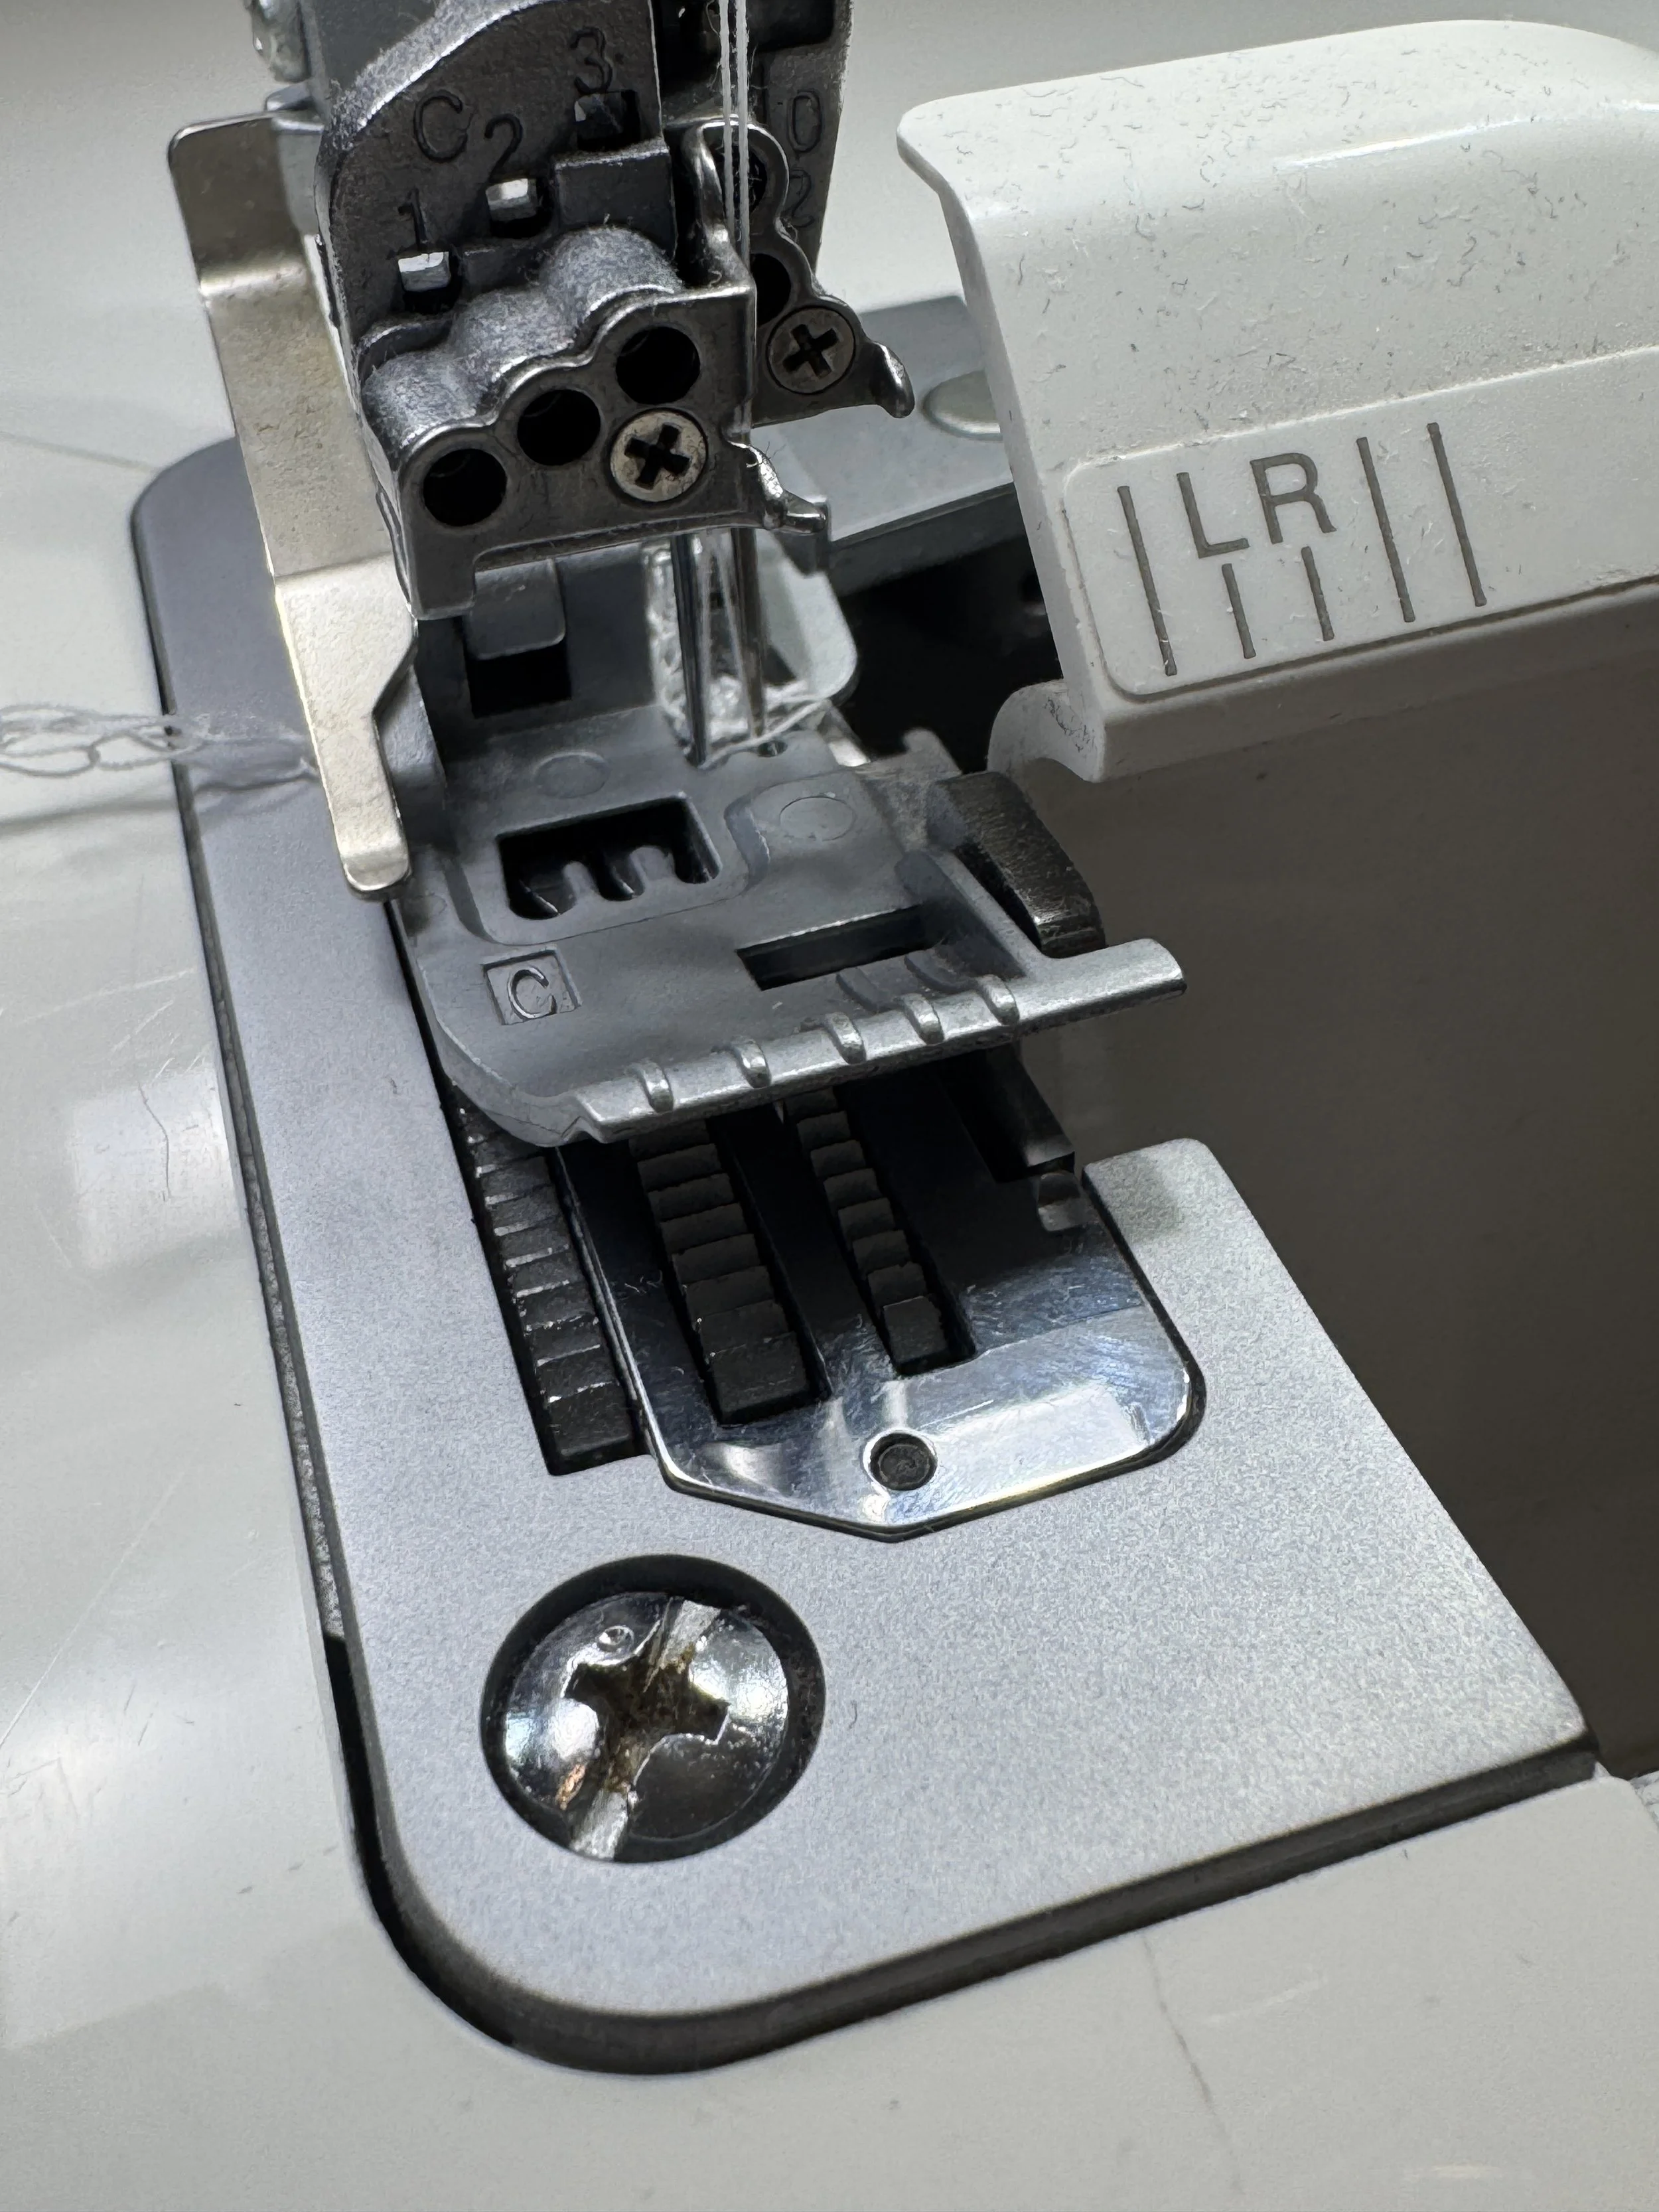
The Standard/Grooved Foot is on the left, this has the tape guide slot in the front, the flat sole foot is completely solid with no tape guide.
Underneath these feet, the grooved / cut out section is easily seen, the Flat Sole Foot is completely flat.
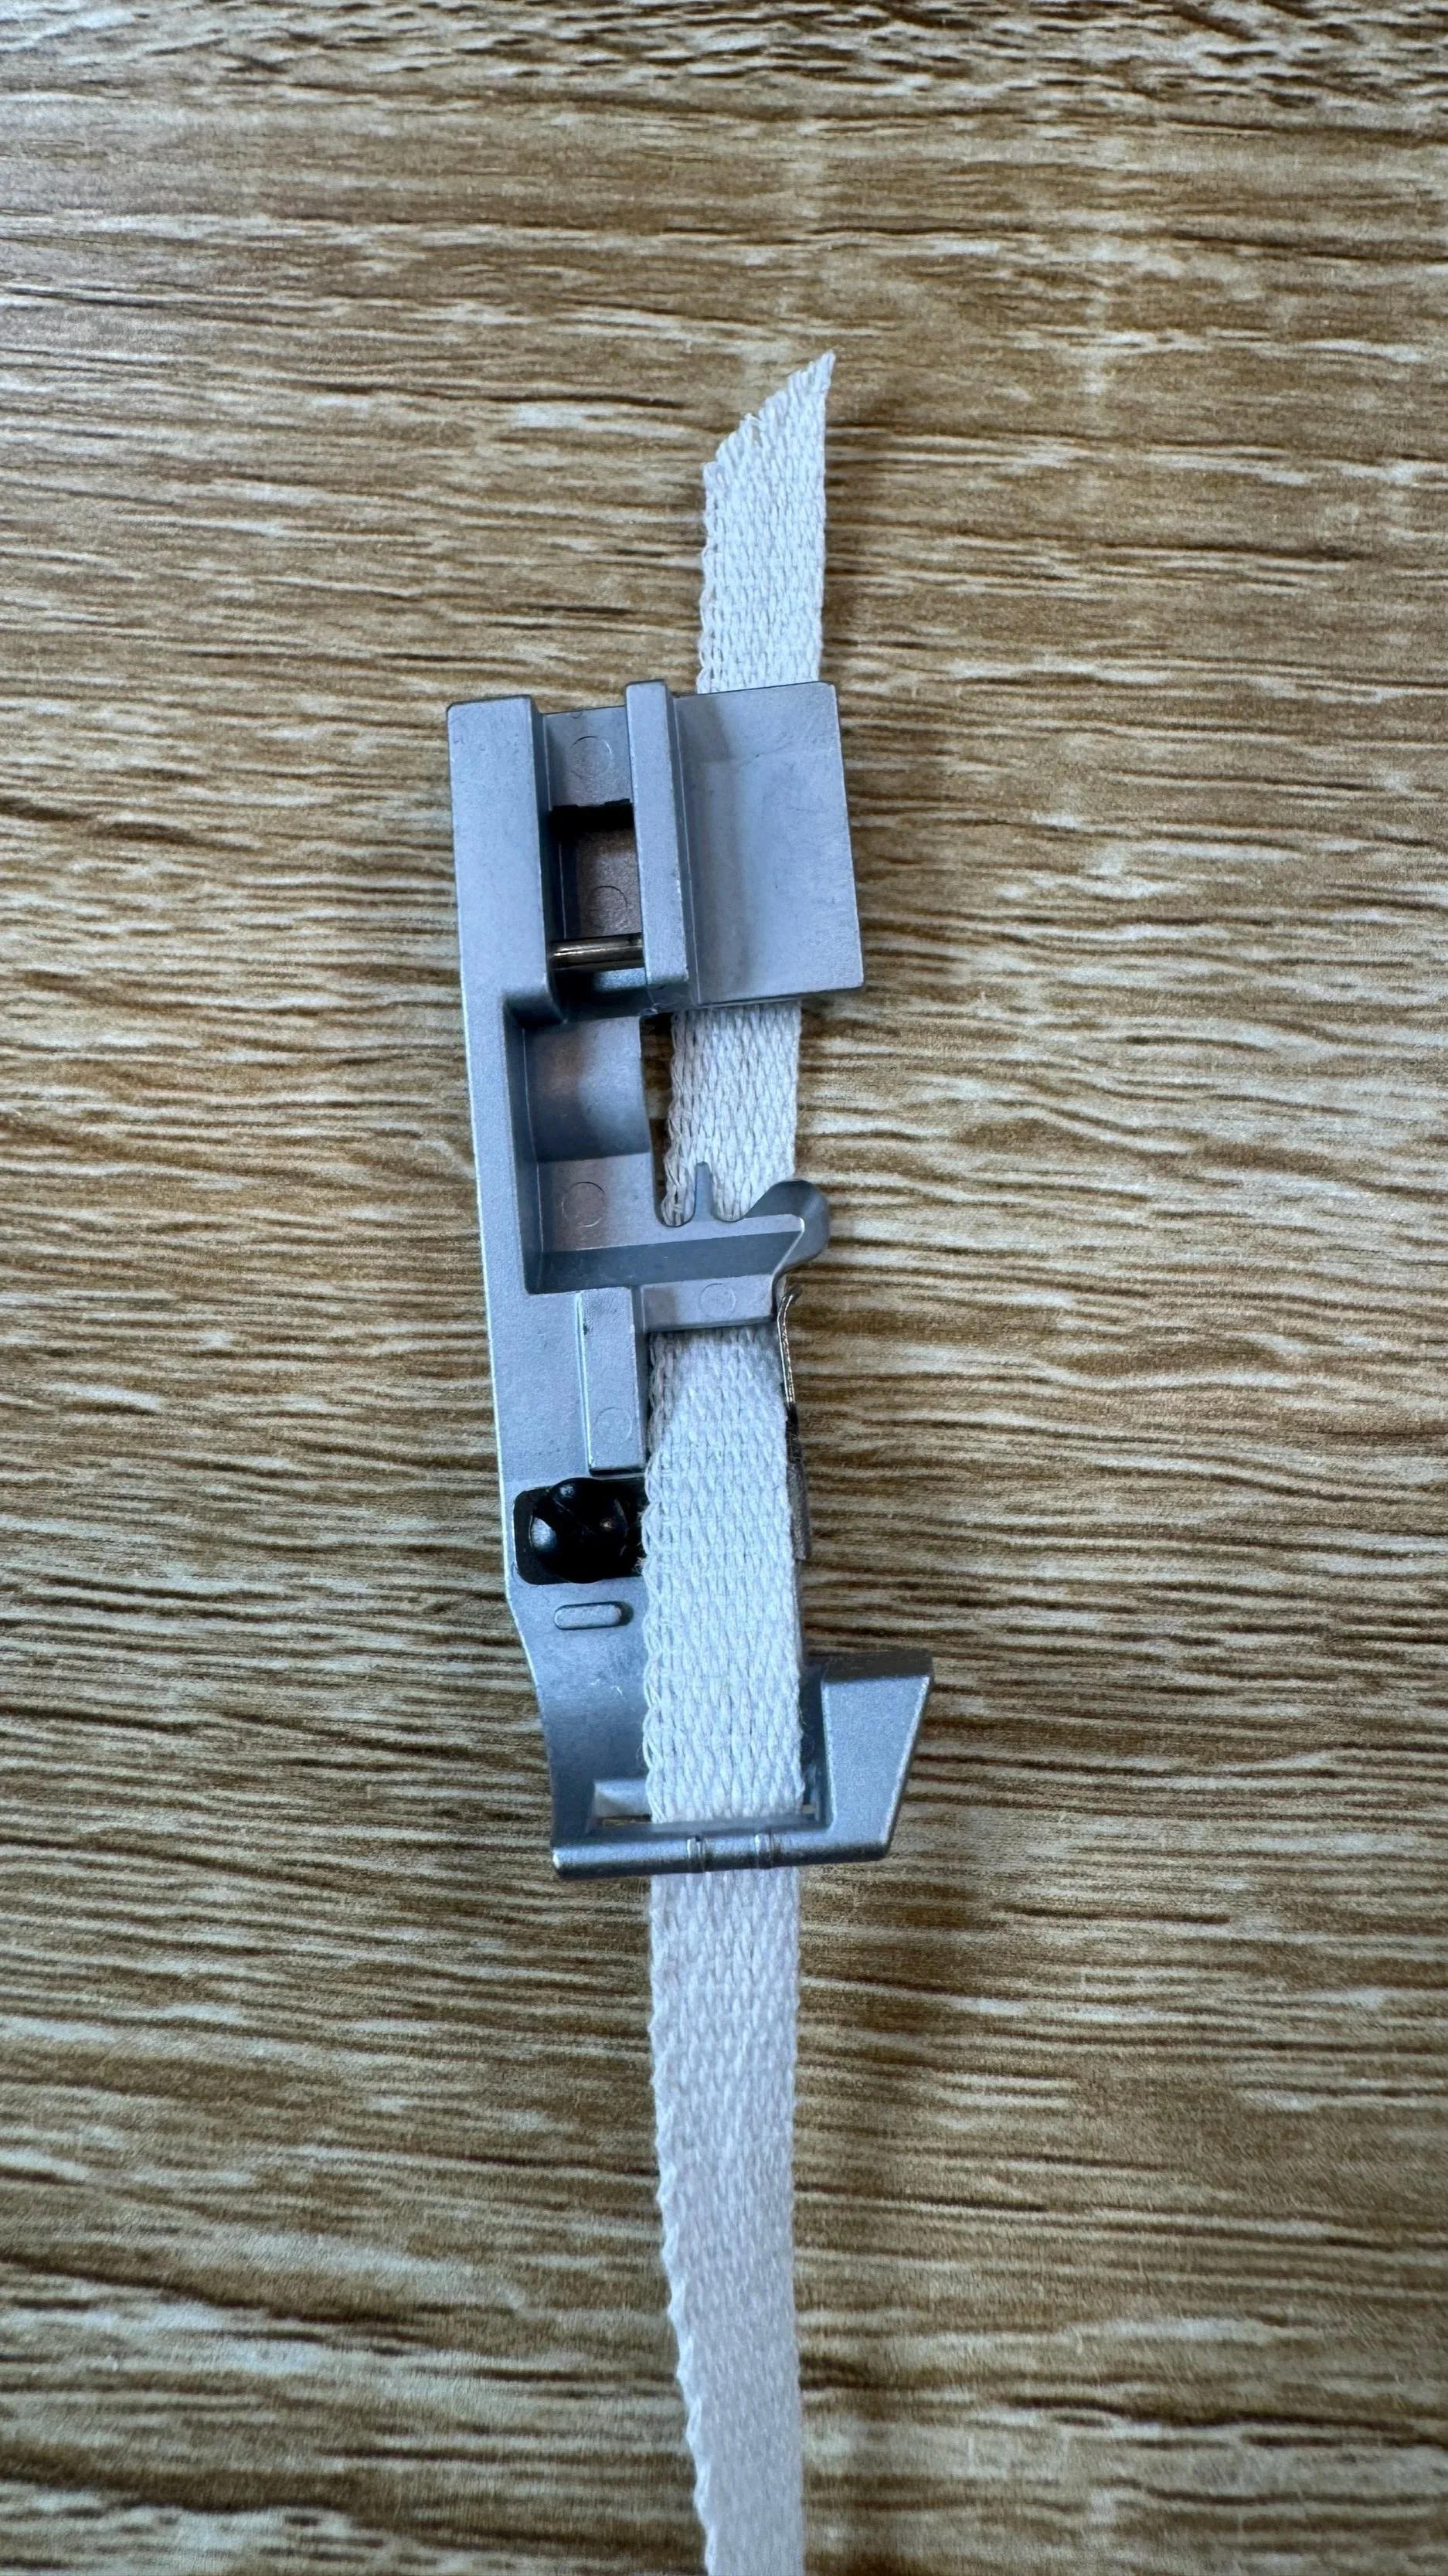
Using the tape guide section of the Standard/Grooved foot is a benefit when stabilising shoulder seams or stitching narrow elastic (no wider than 6mm), ribbon etc. The tape is protected from the cutting blade, fabric can still be trimmed
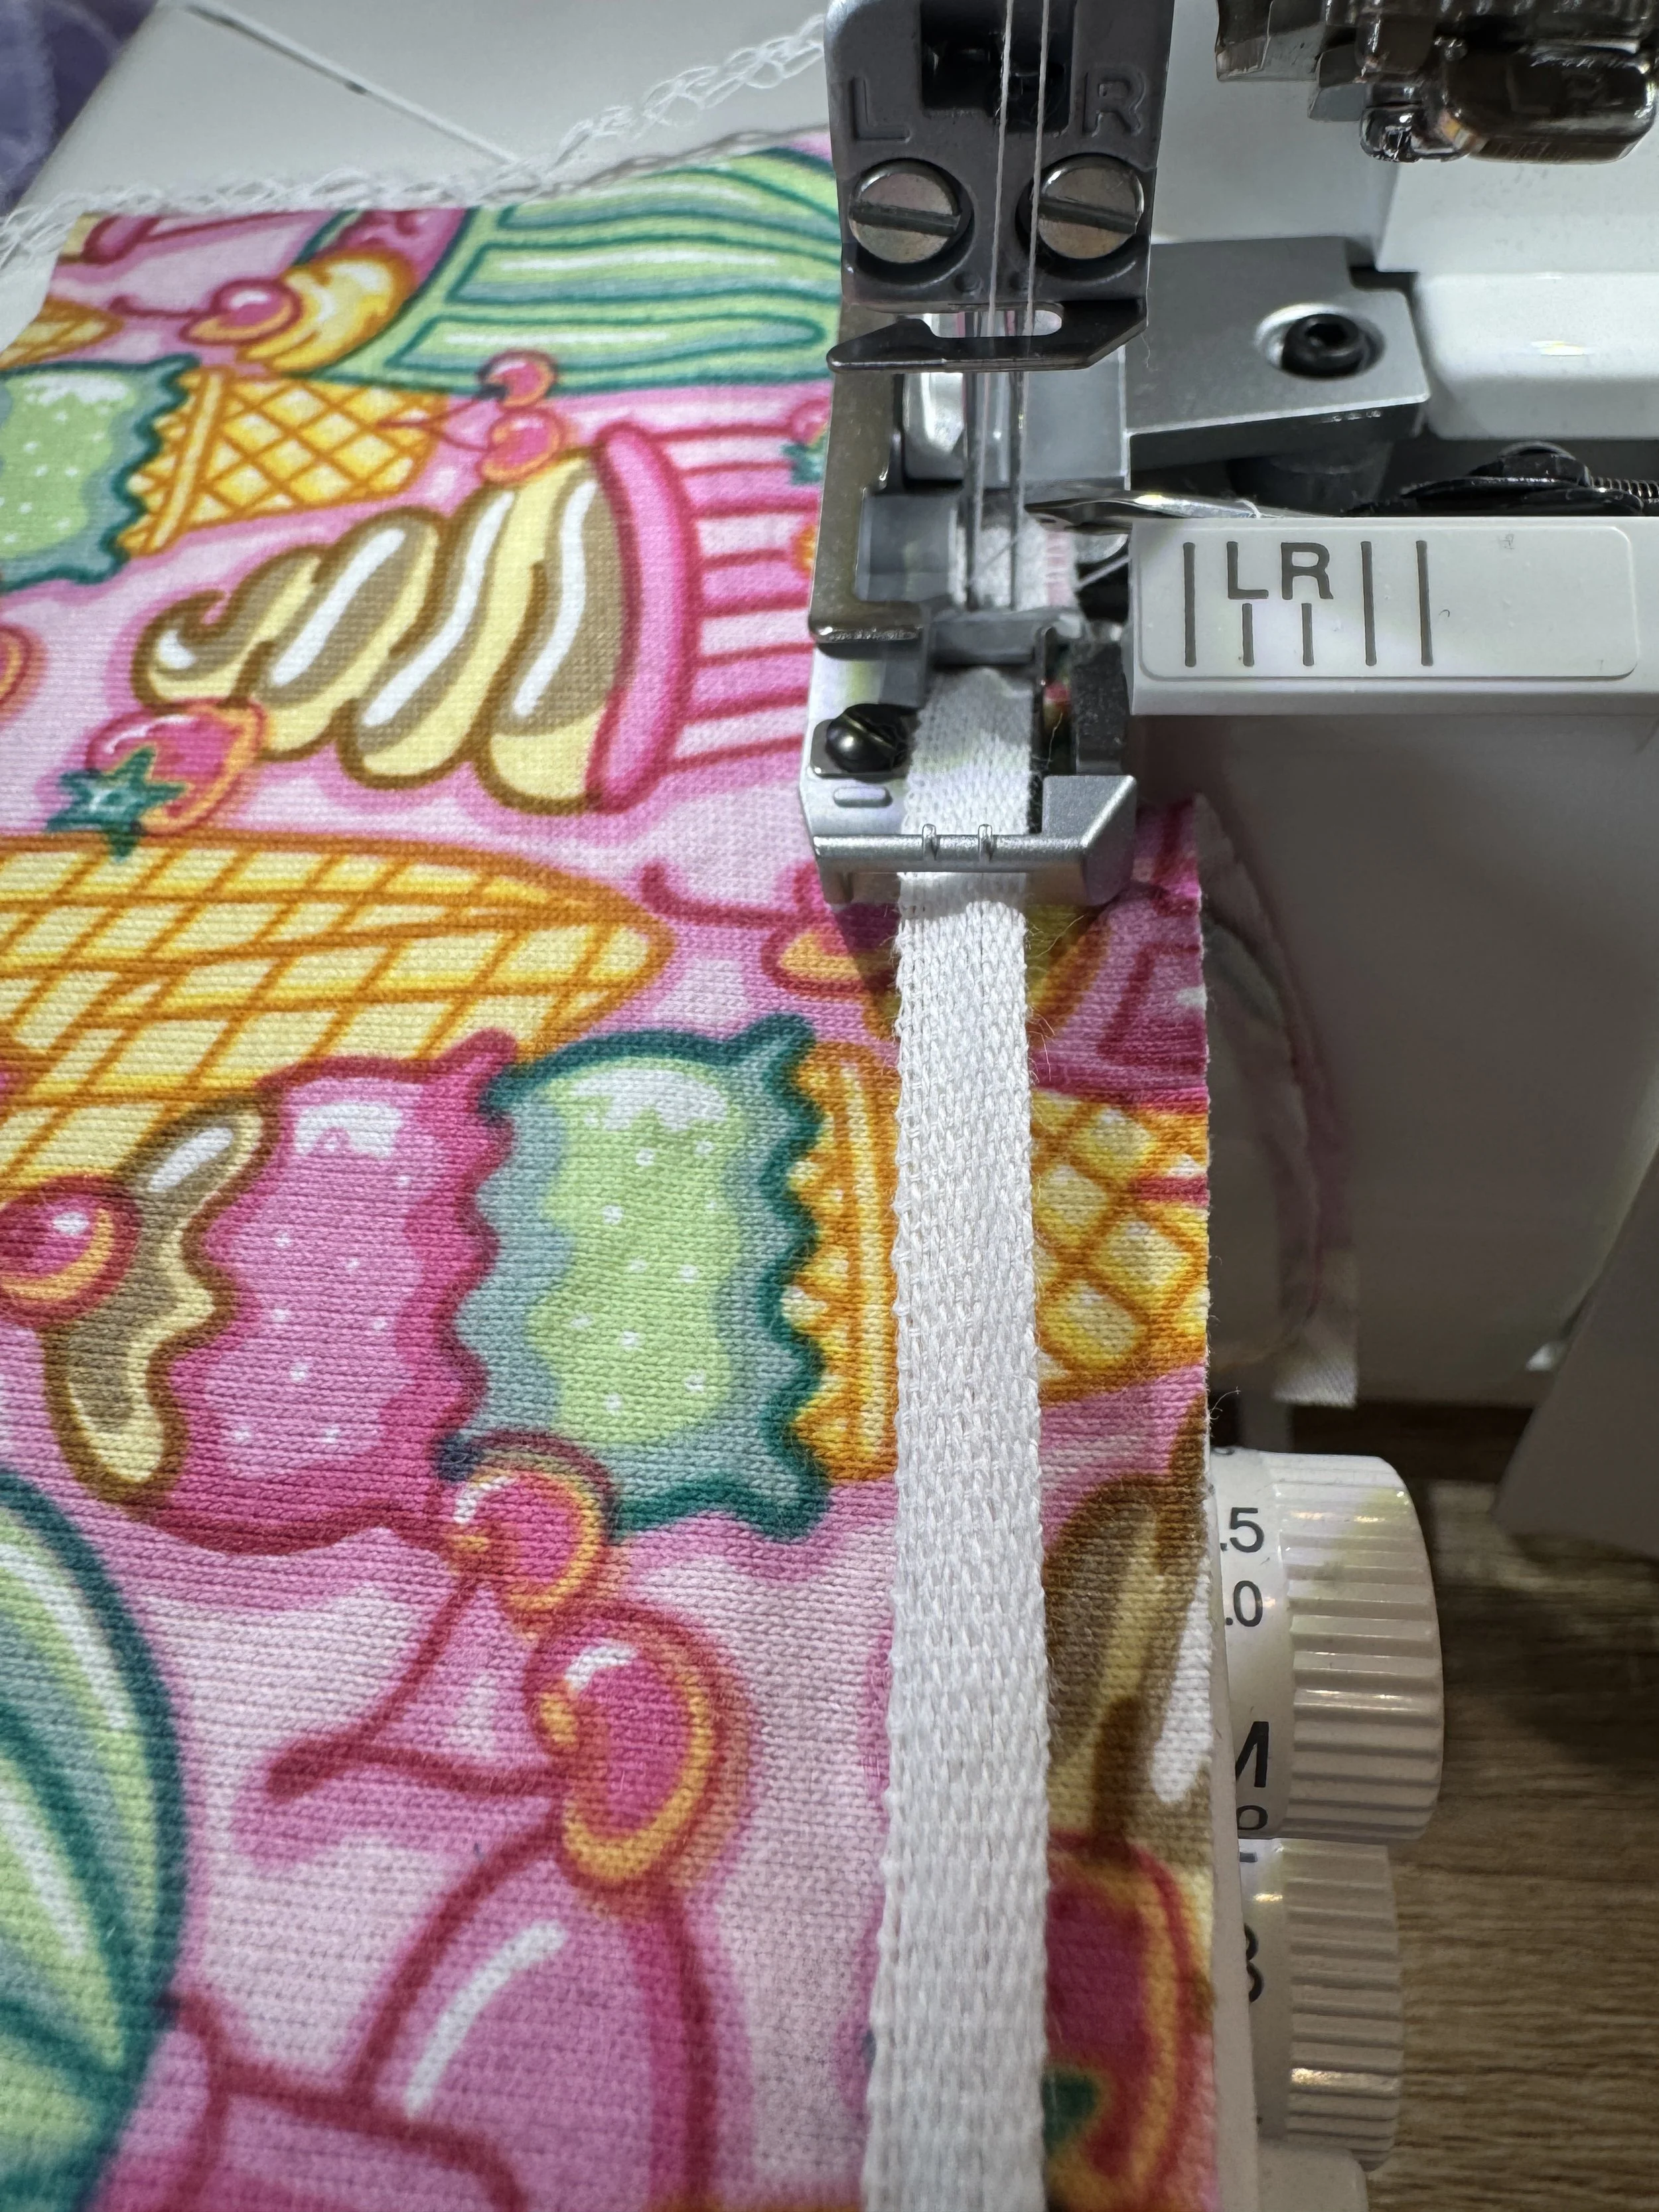
Stitching 6mm wide tape into a seam using a 4 thread overlock.
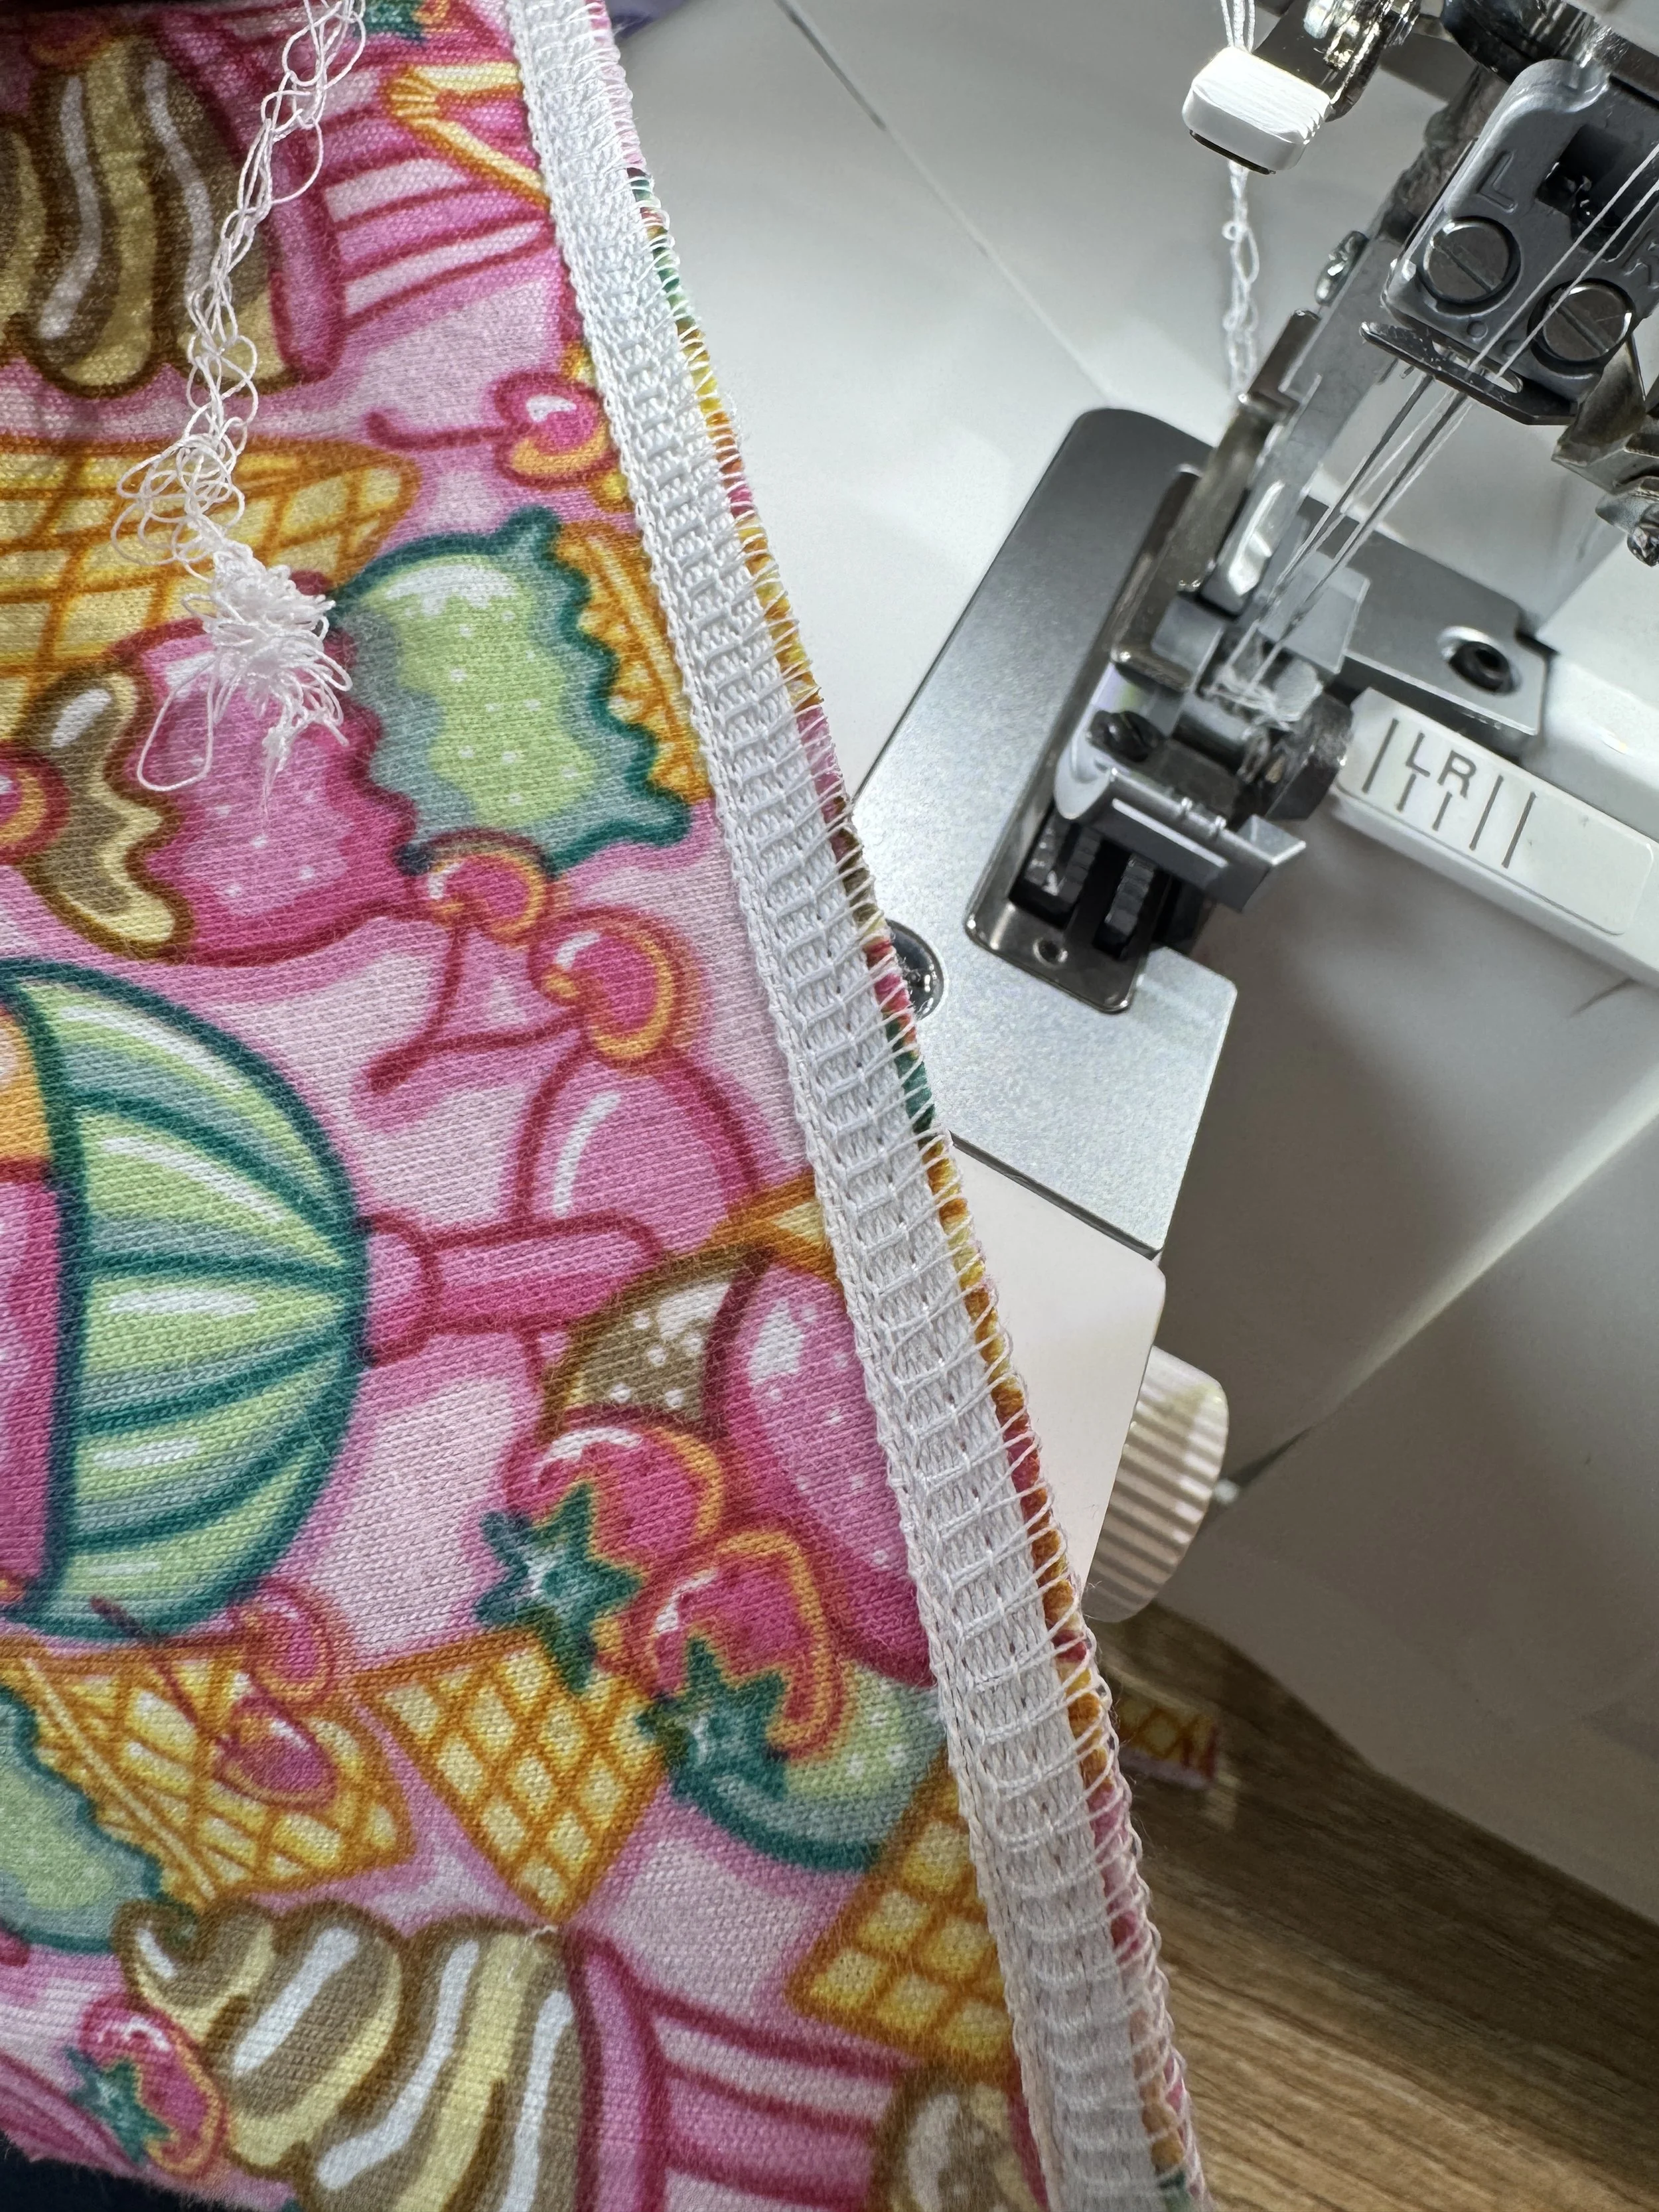
The finished seam with the tape positioned perfectly.
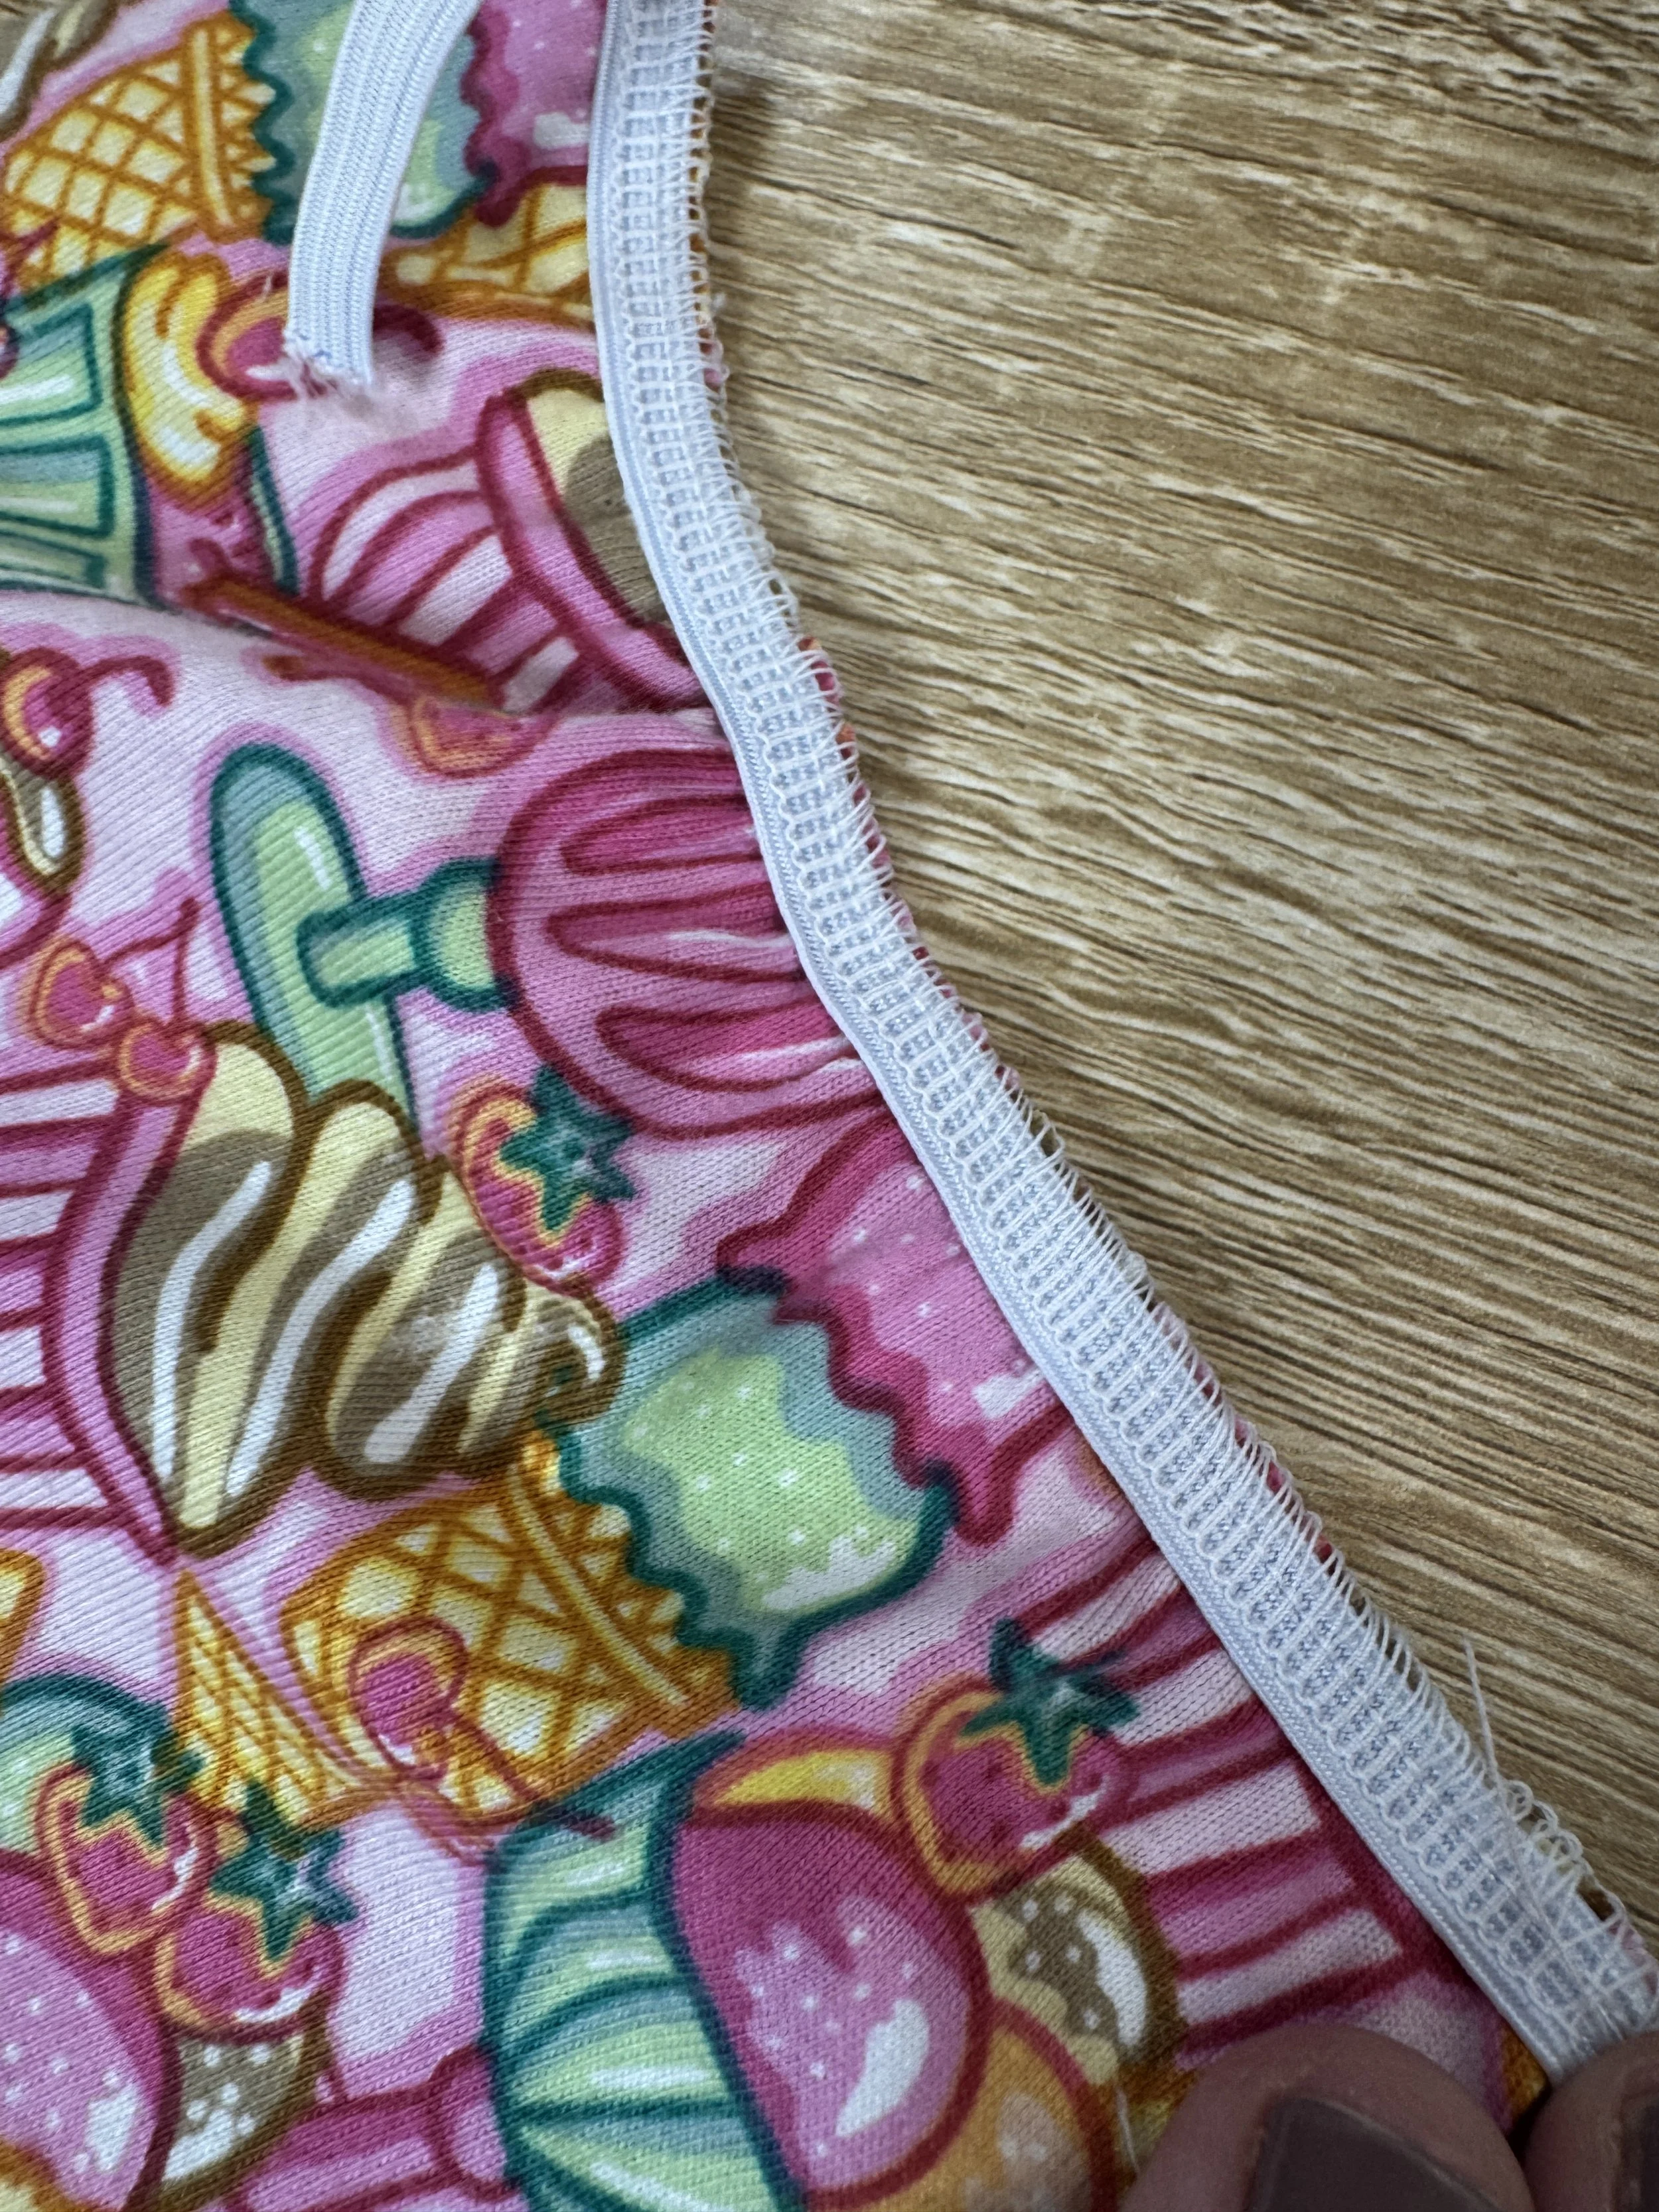
6mm wide elastic stitched on using the tape guide.
The groove allows the fabric to pleat beautifully under the foot when gathering. However this groove can be problematic when sewing thick fabrics and over intersecting seams. The fabrics can slip under the groove and separate the two layers, or the intersecting seams can get lodged in the groove and will struggle to feed. If you are seaming, use the flatsole foot and this will prevent this from happening.
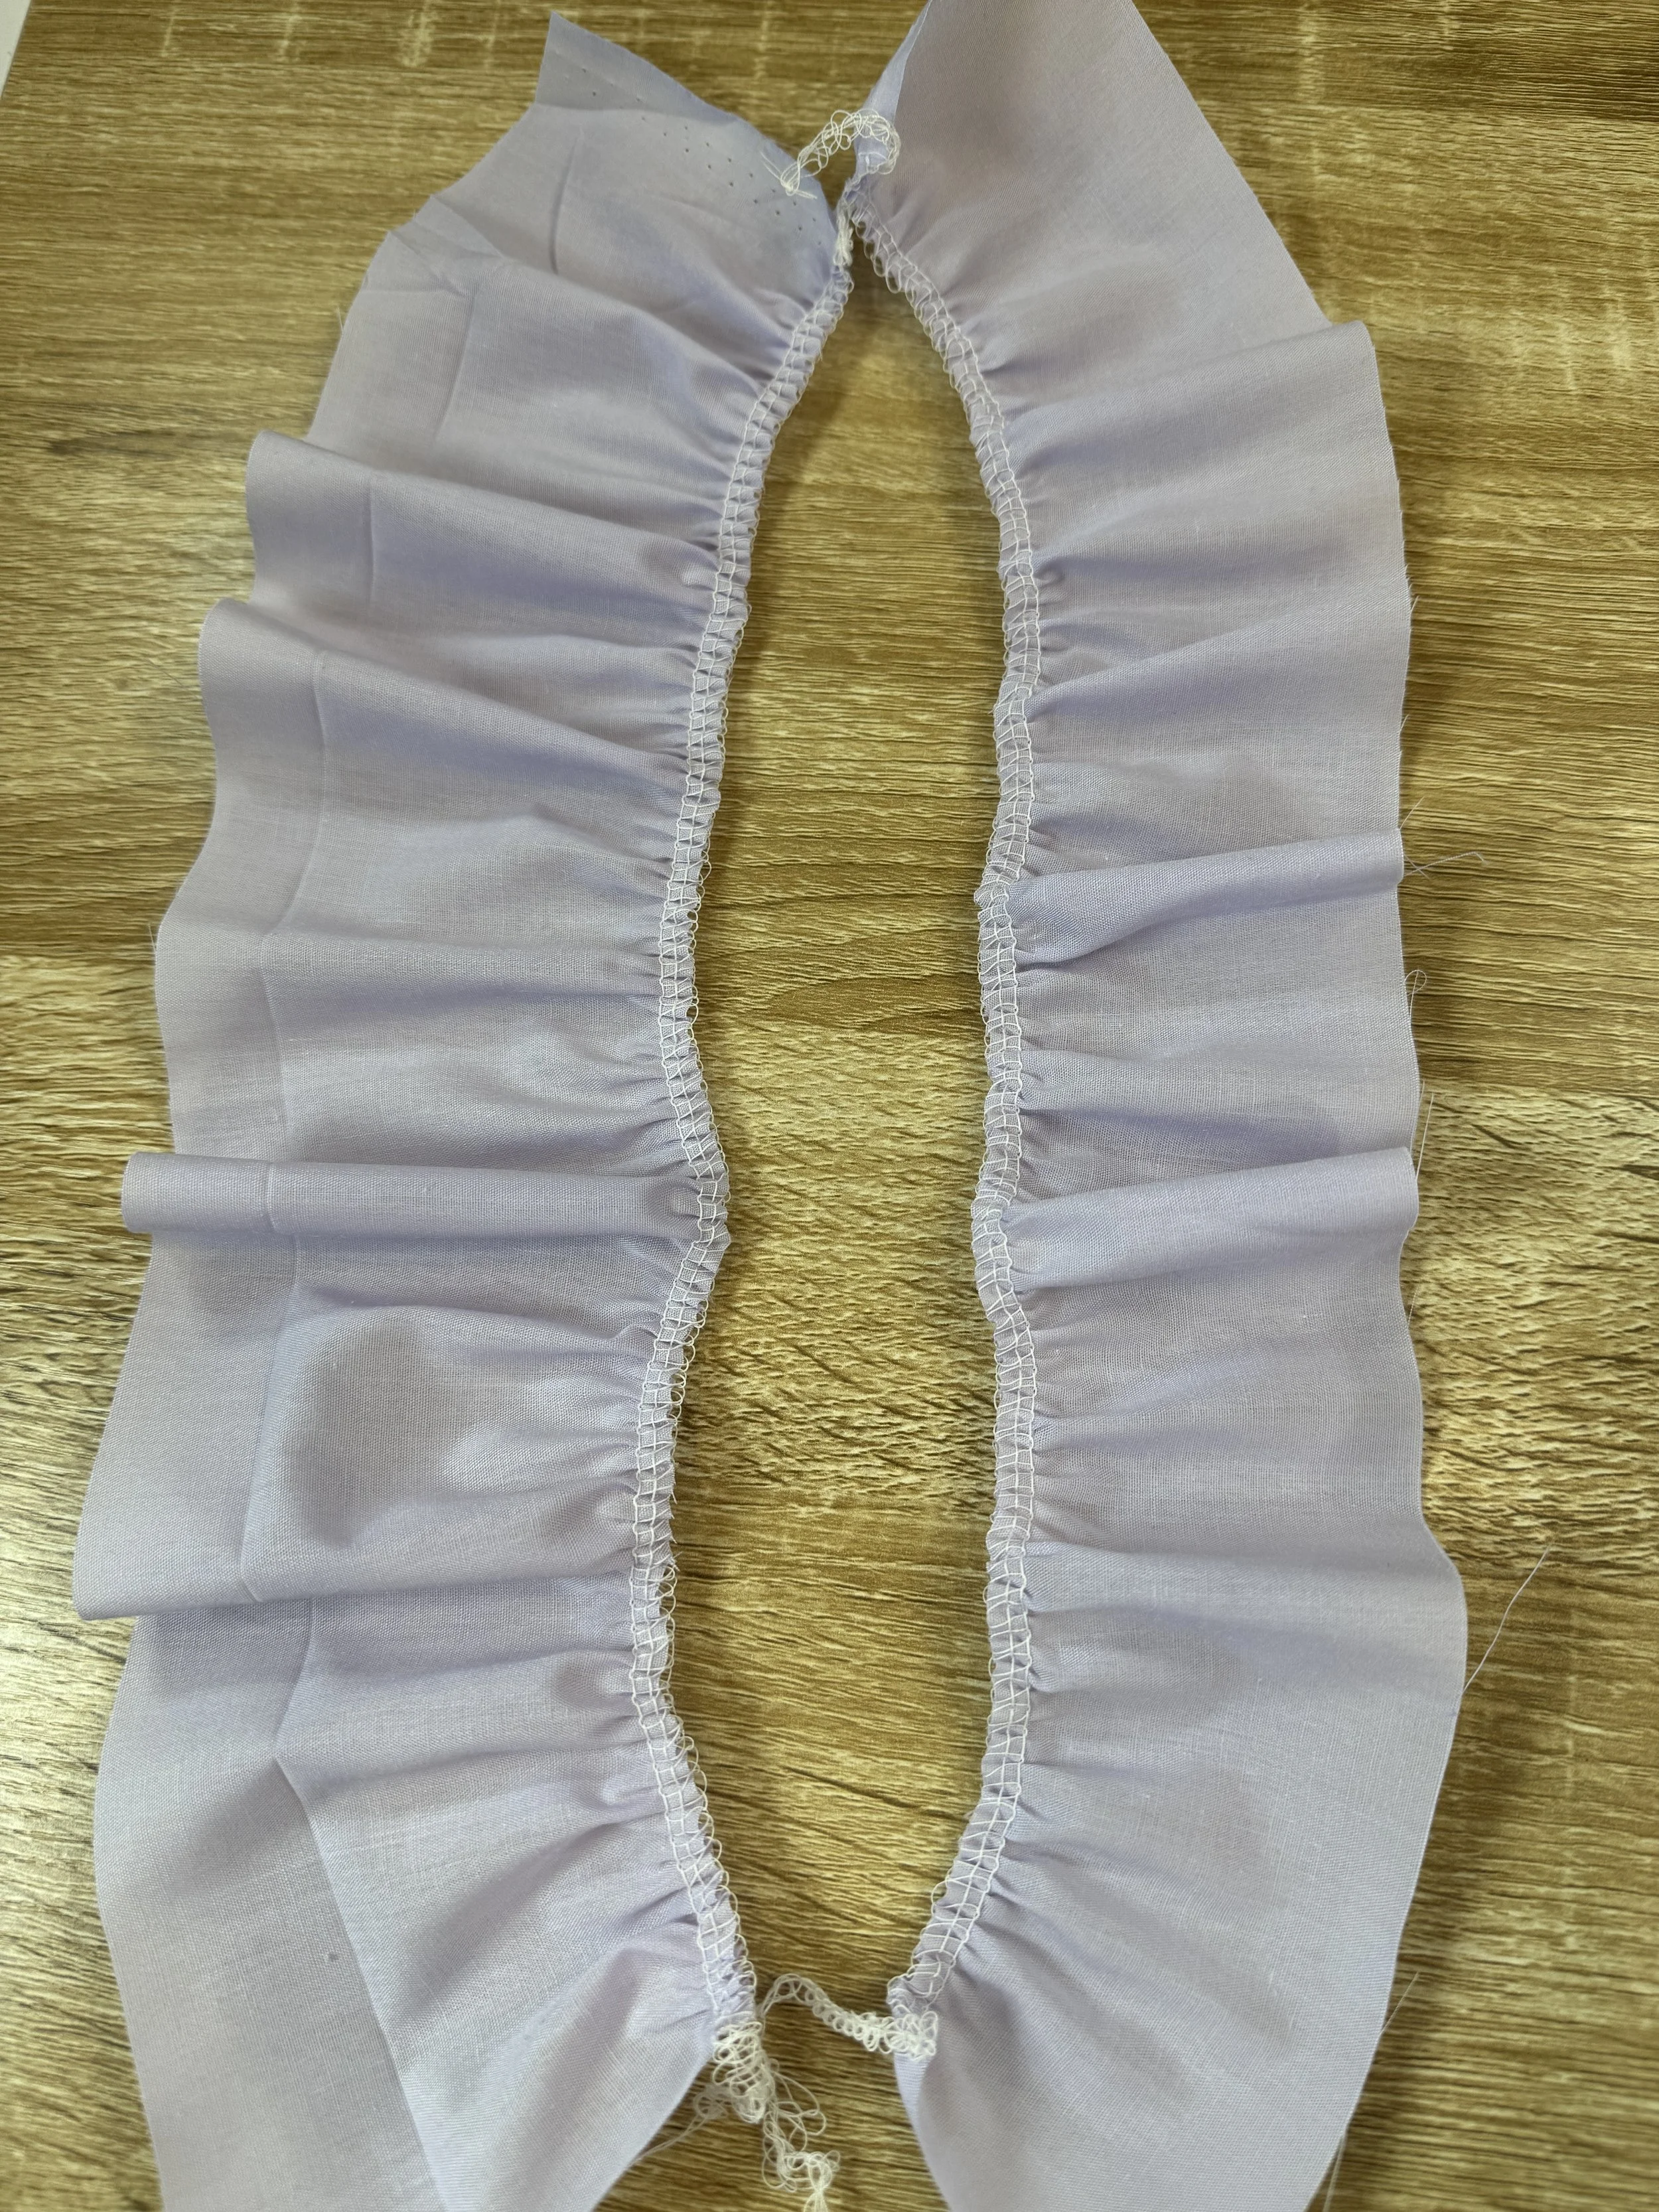
The gathered piece on the on the left was done with the grooved foot on the machine the piece on the right the flat sole foot with the same machine settings. The gathering on the left sits more like little pleats and has gathered more. The piece on the right has still gathered really well, however using the grooved foot will create the best results.
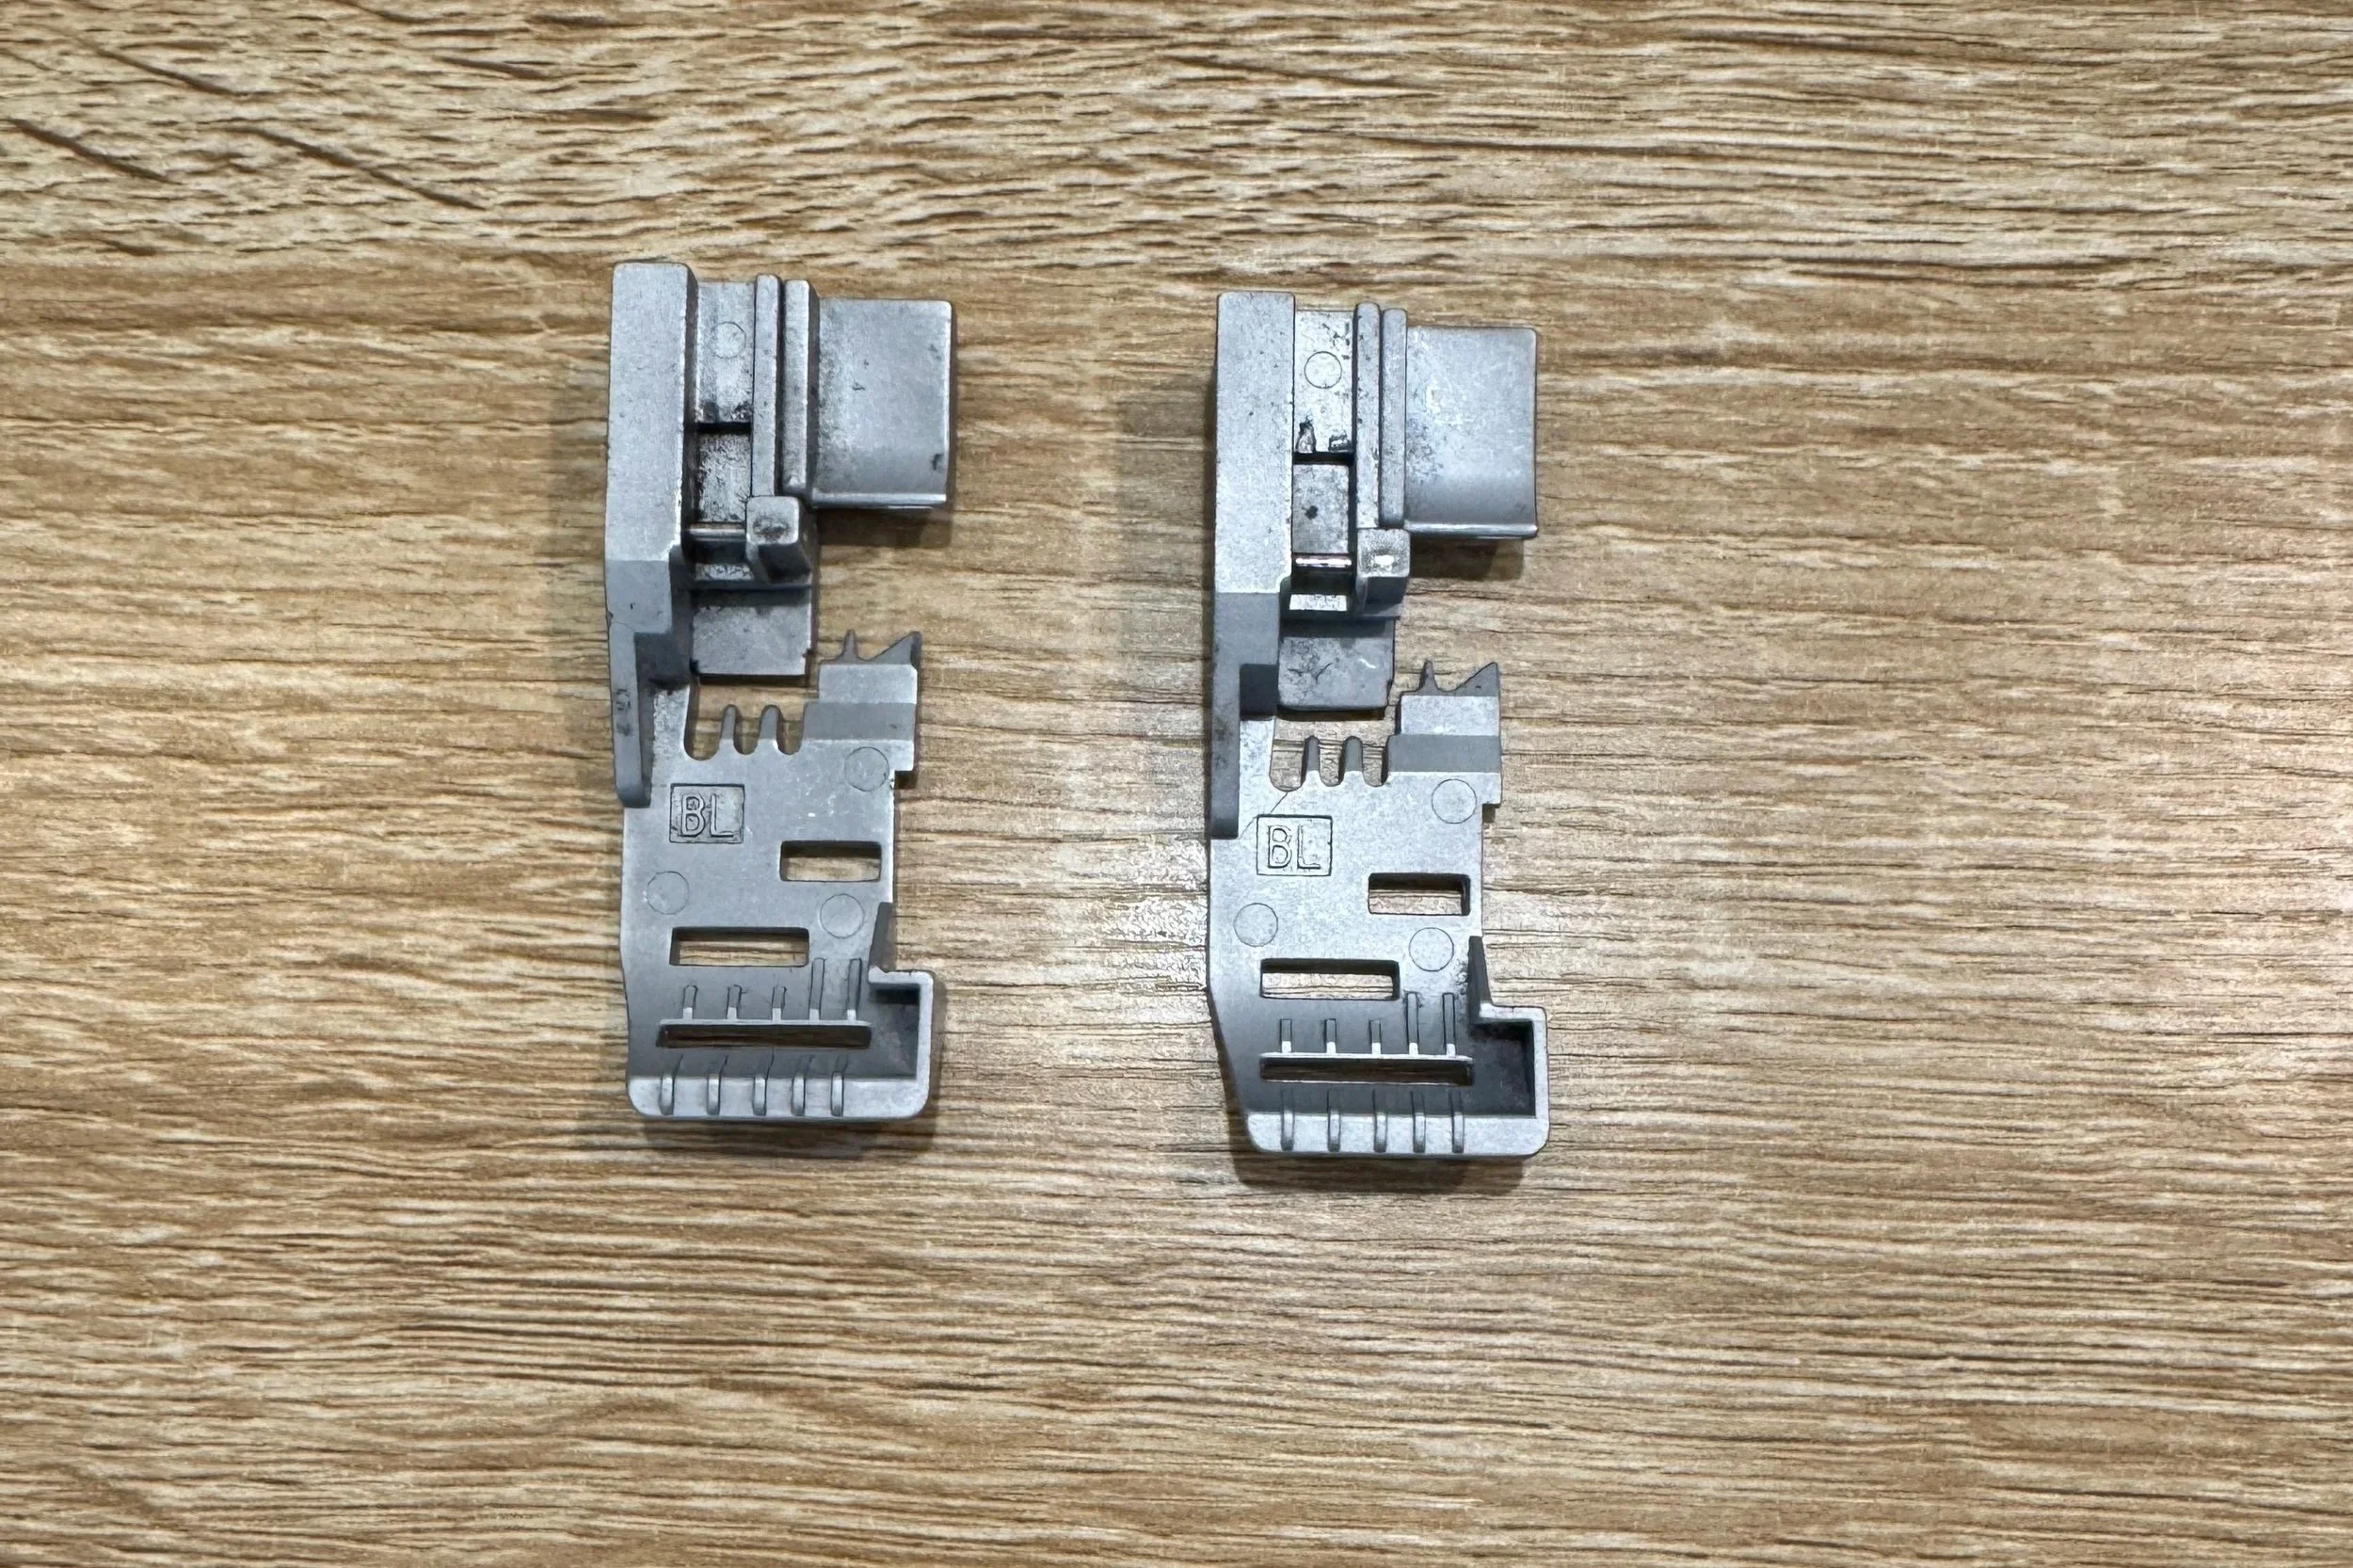
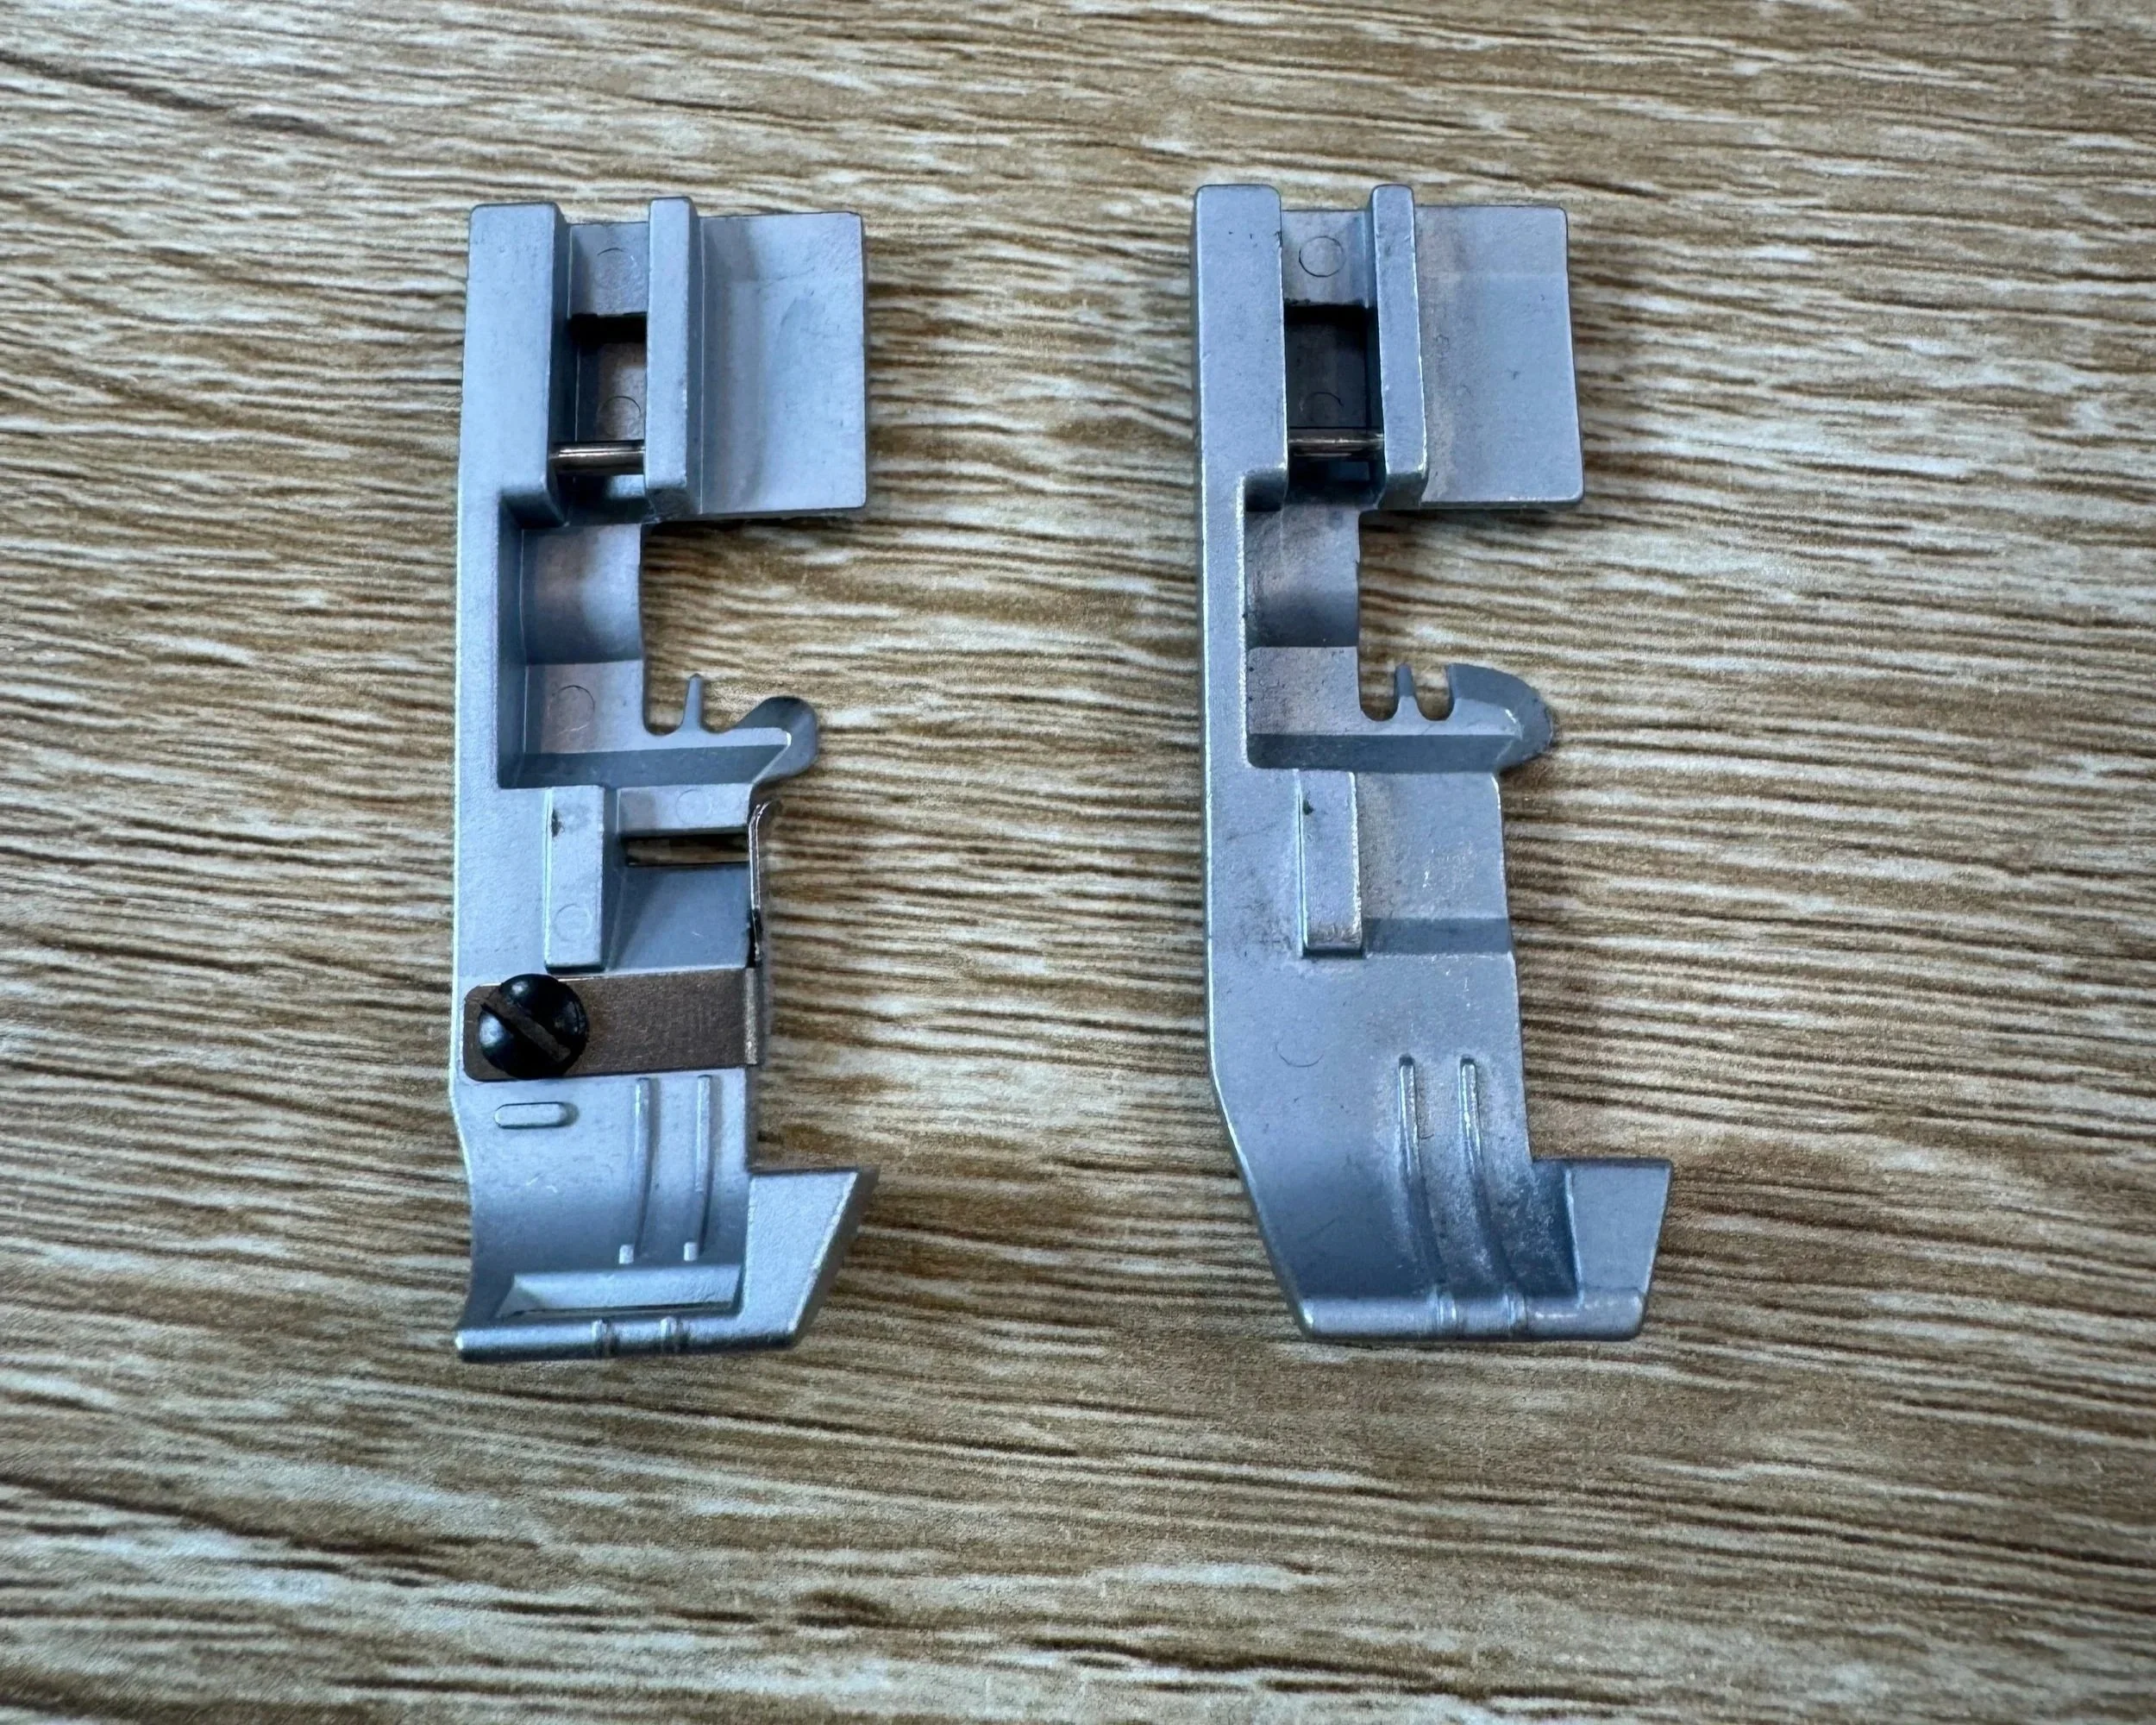
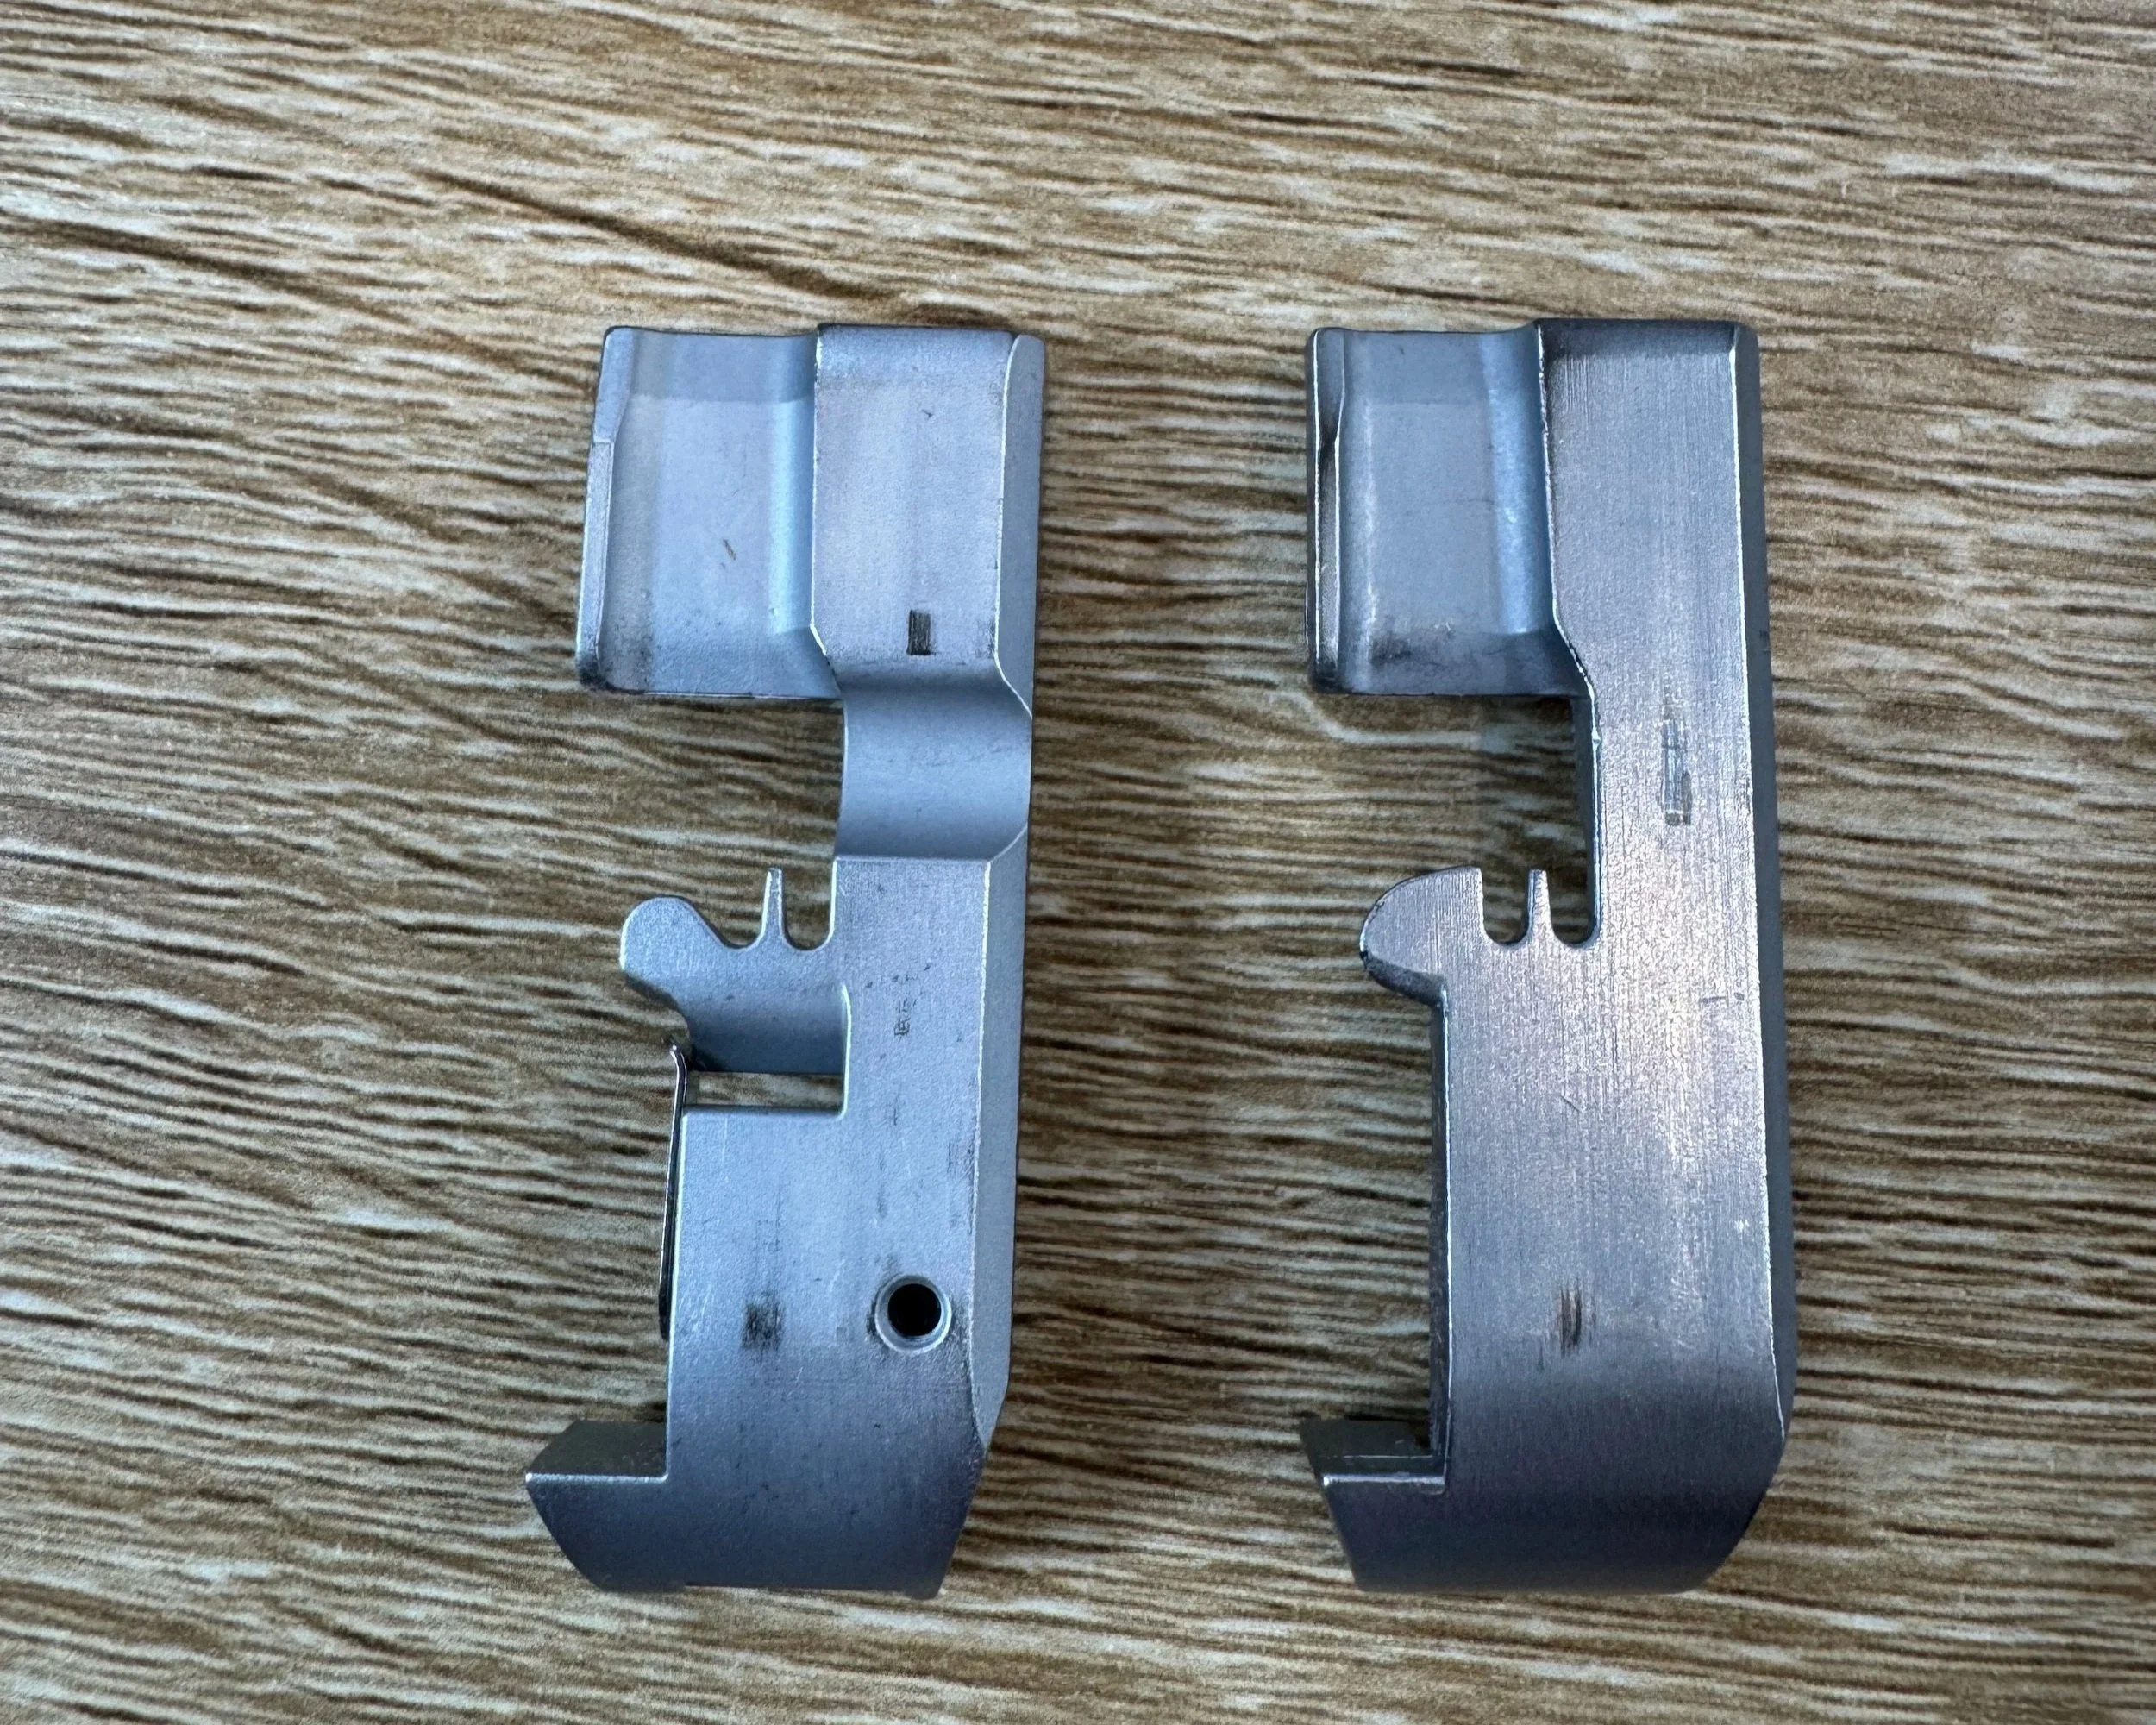
Eight thread feet from the top look the same, the only way to tell the difference is to turn them over, see the picture below.
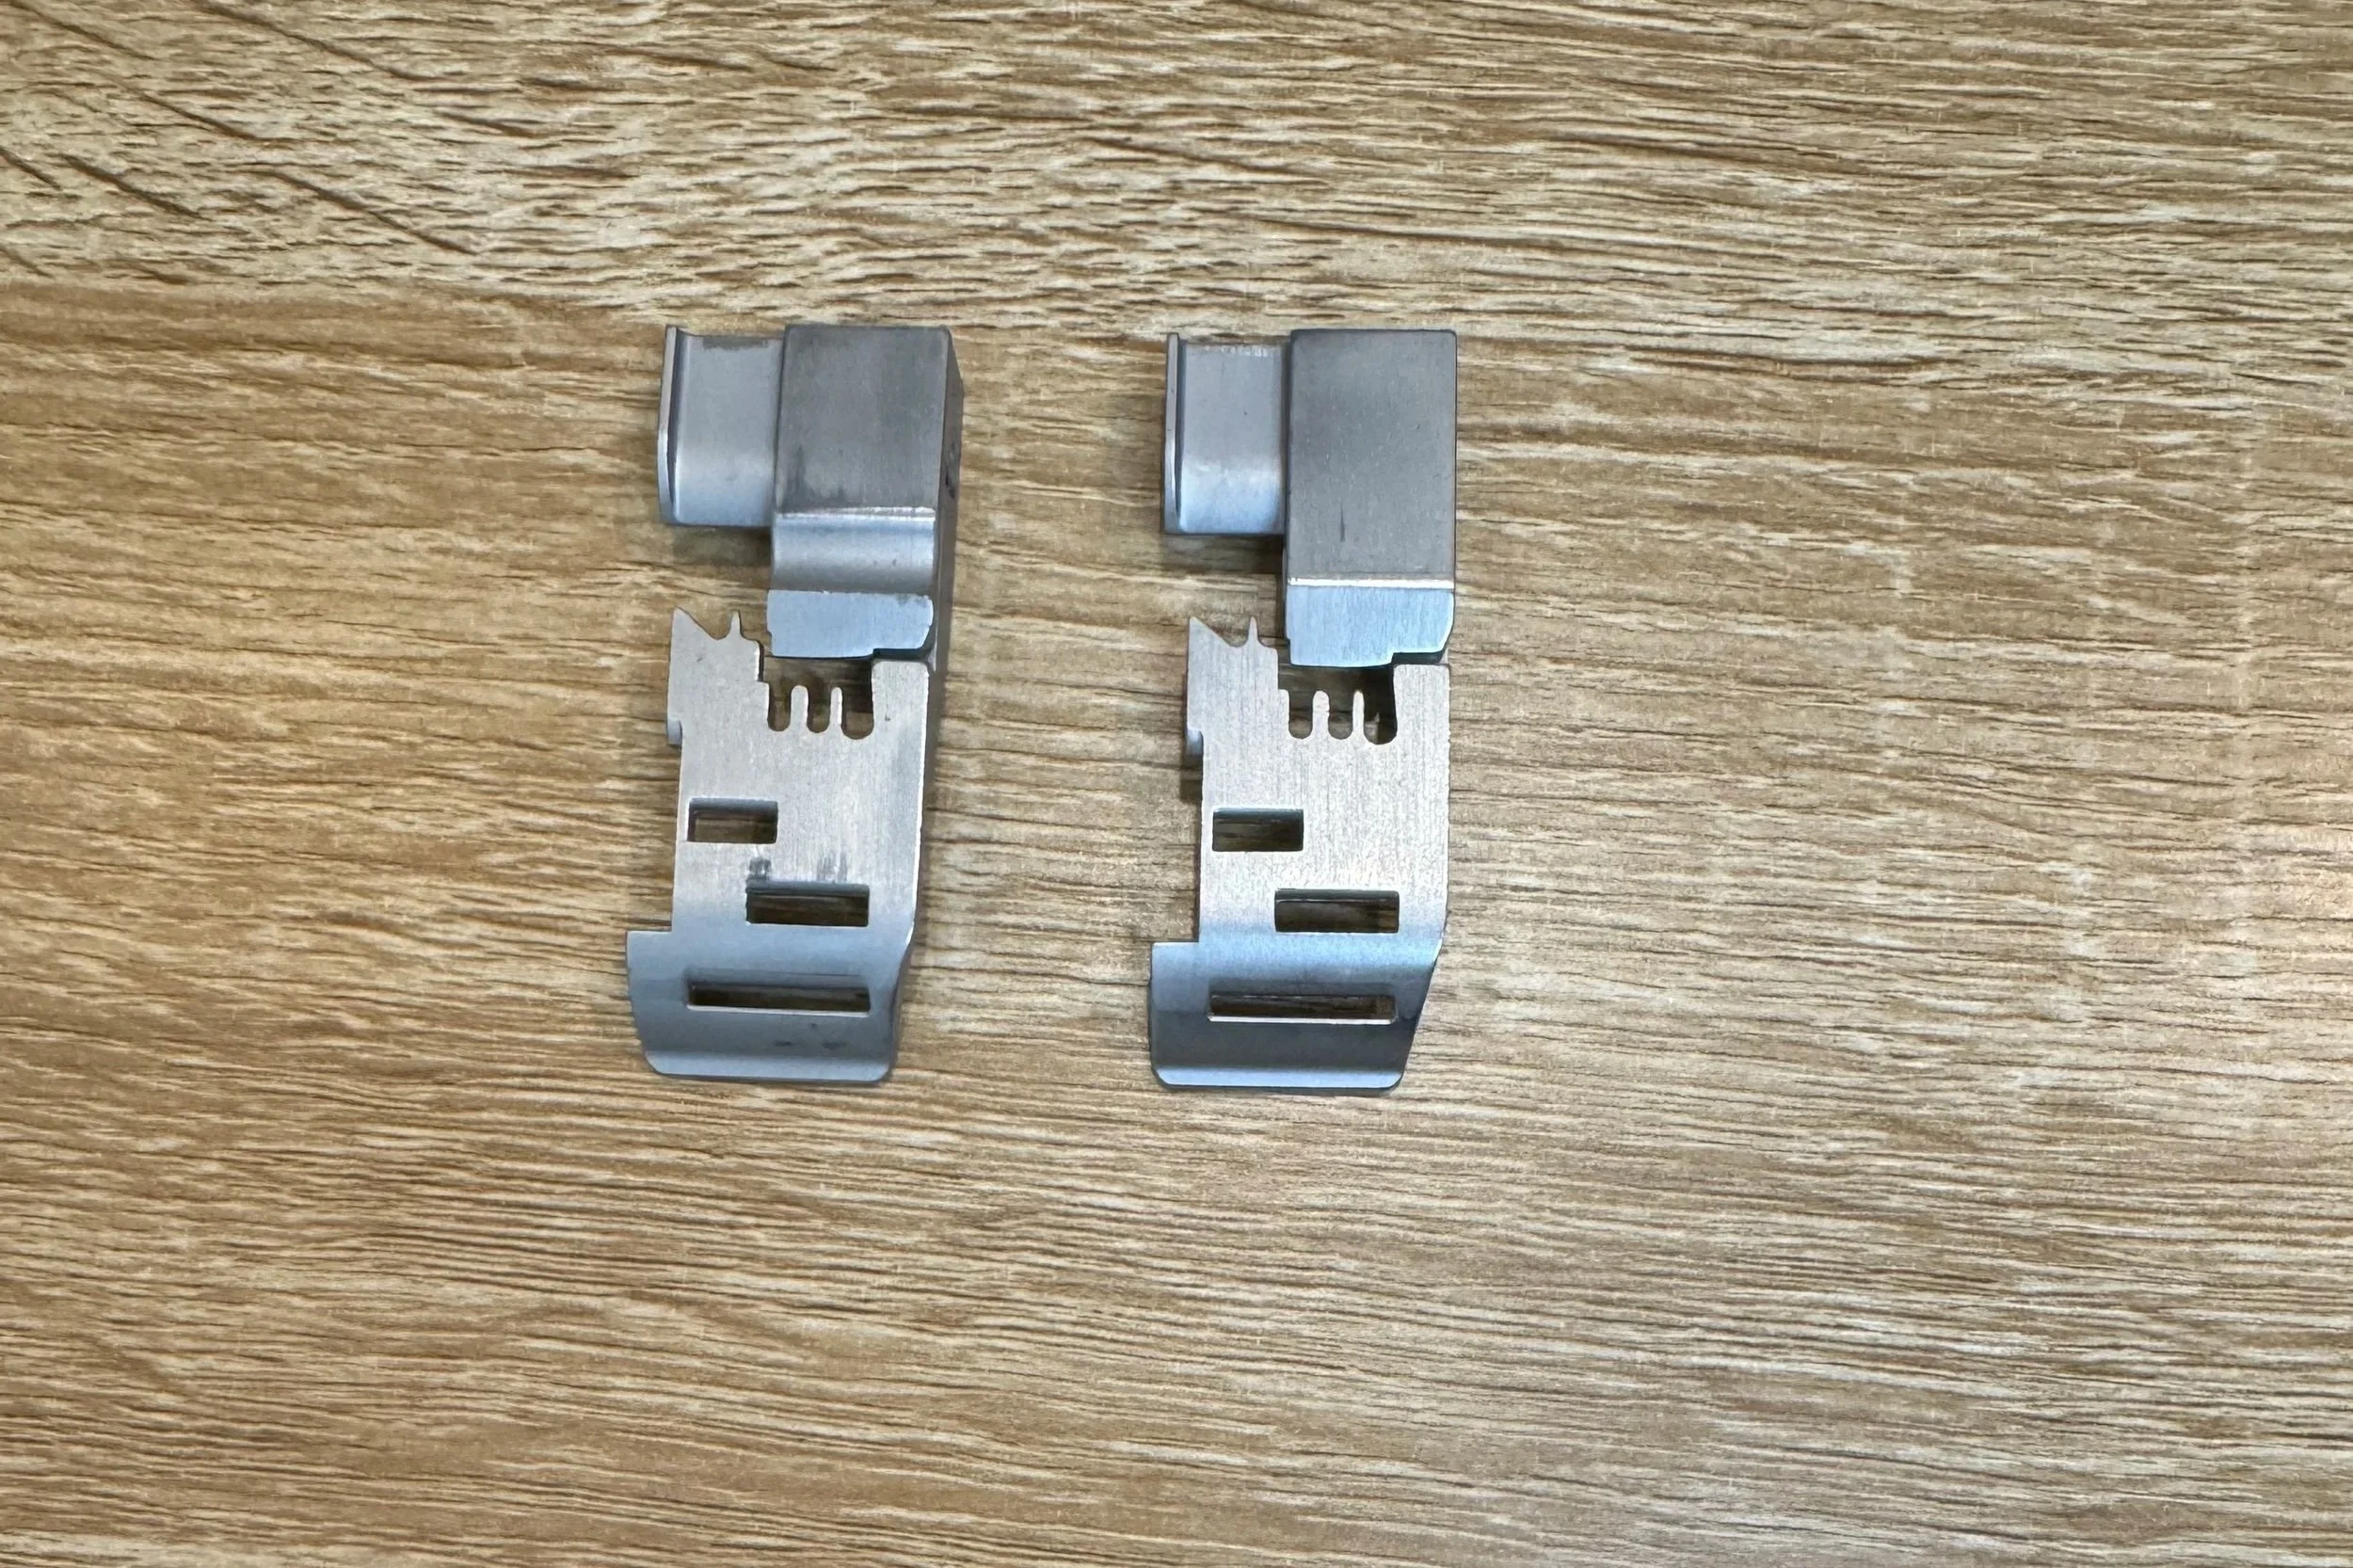
The reverse side of the eight thread machine standard /grooved feet and flatsole.
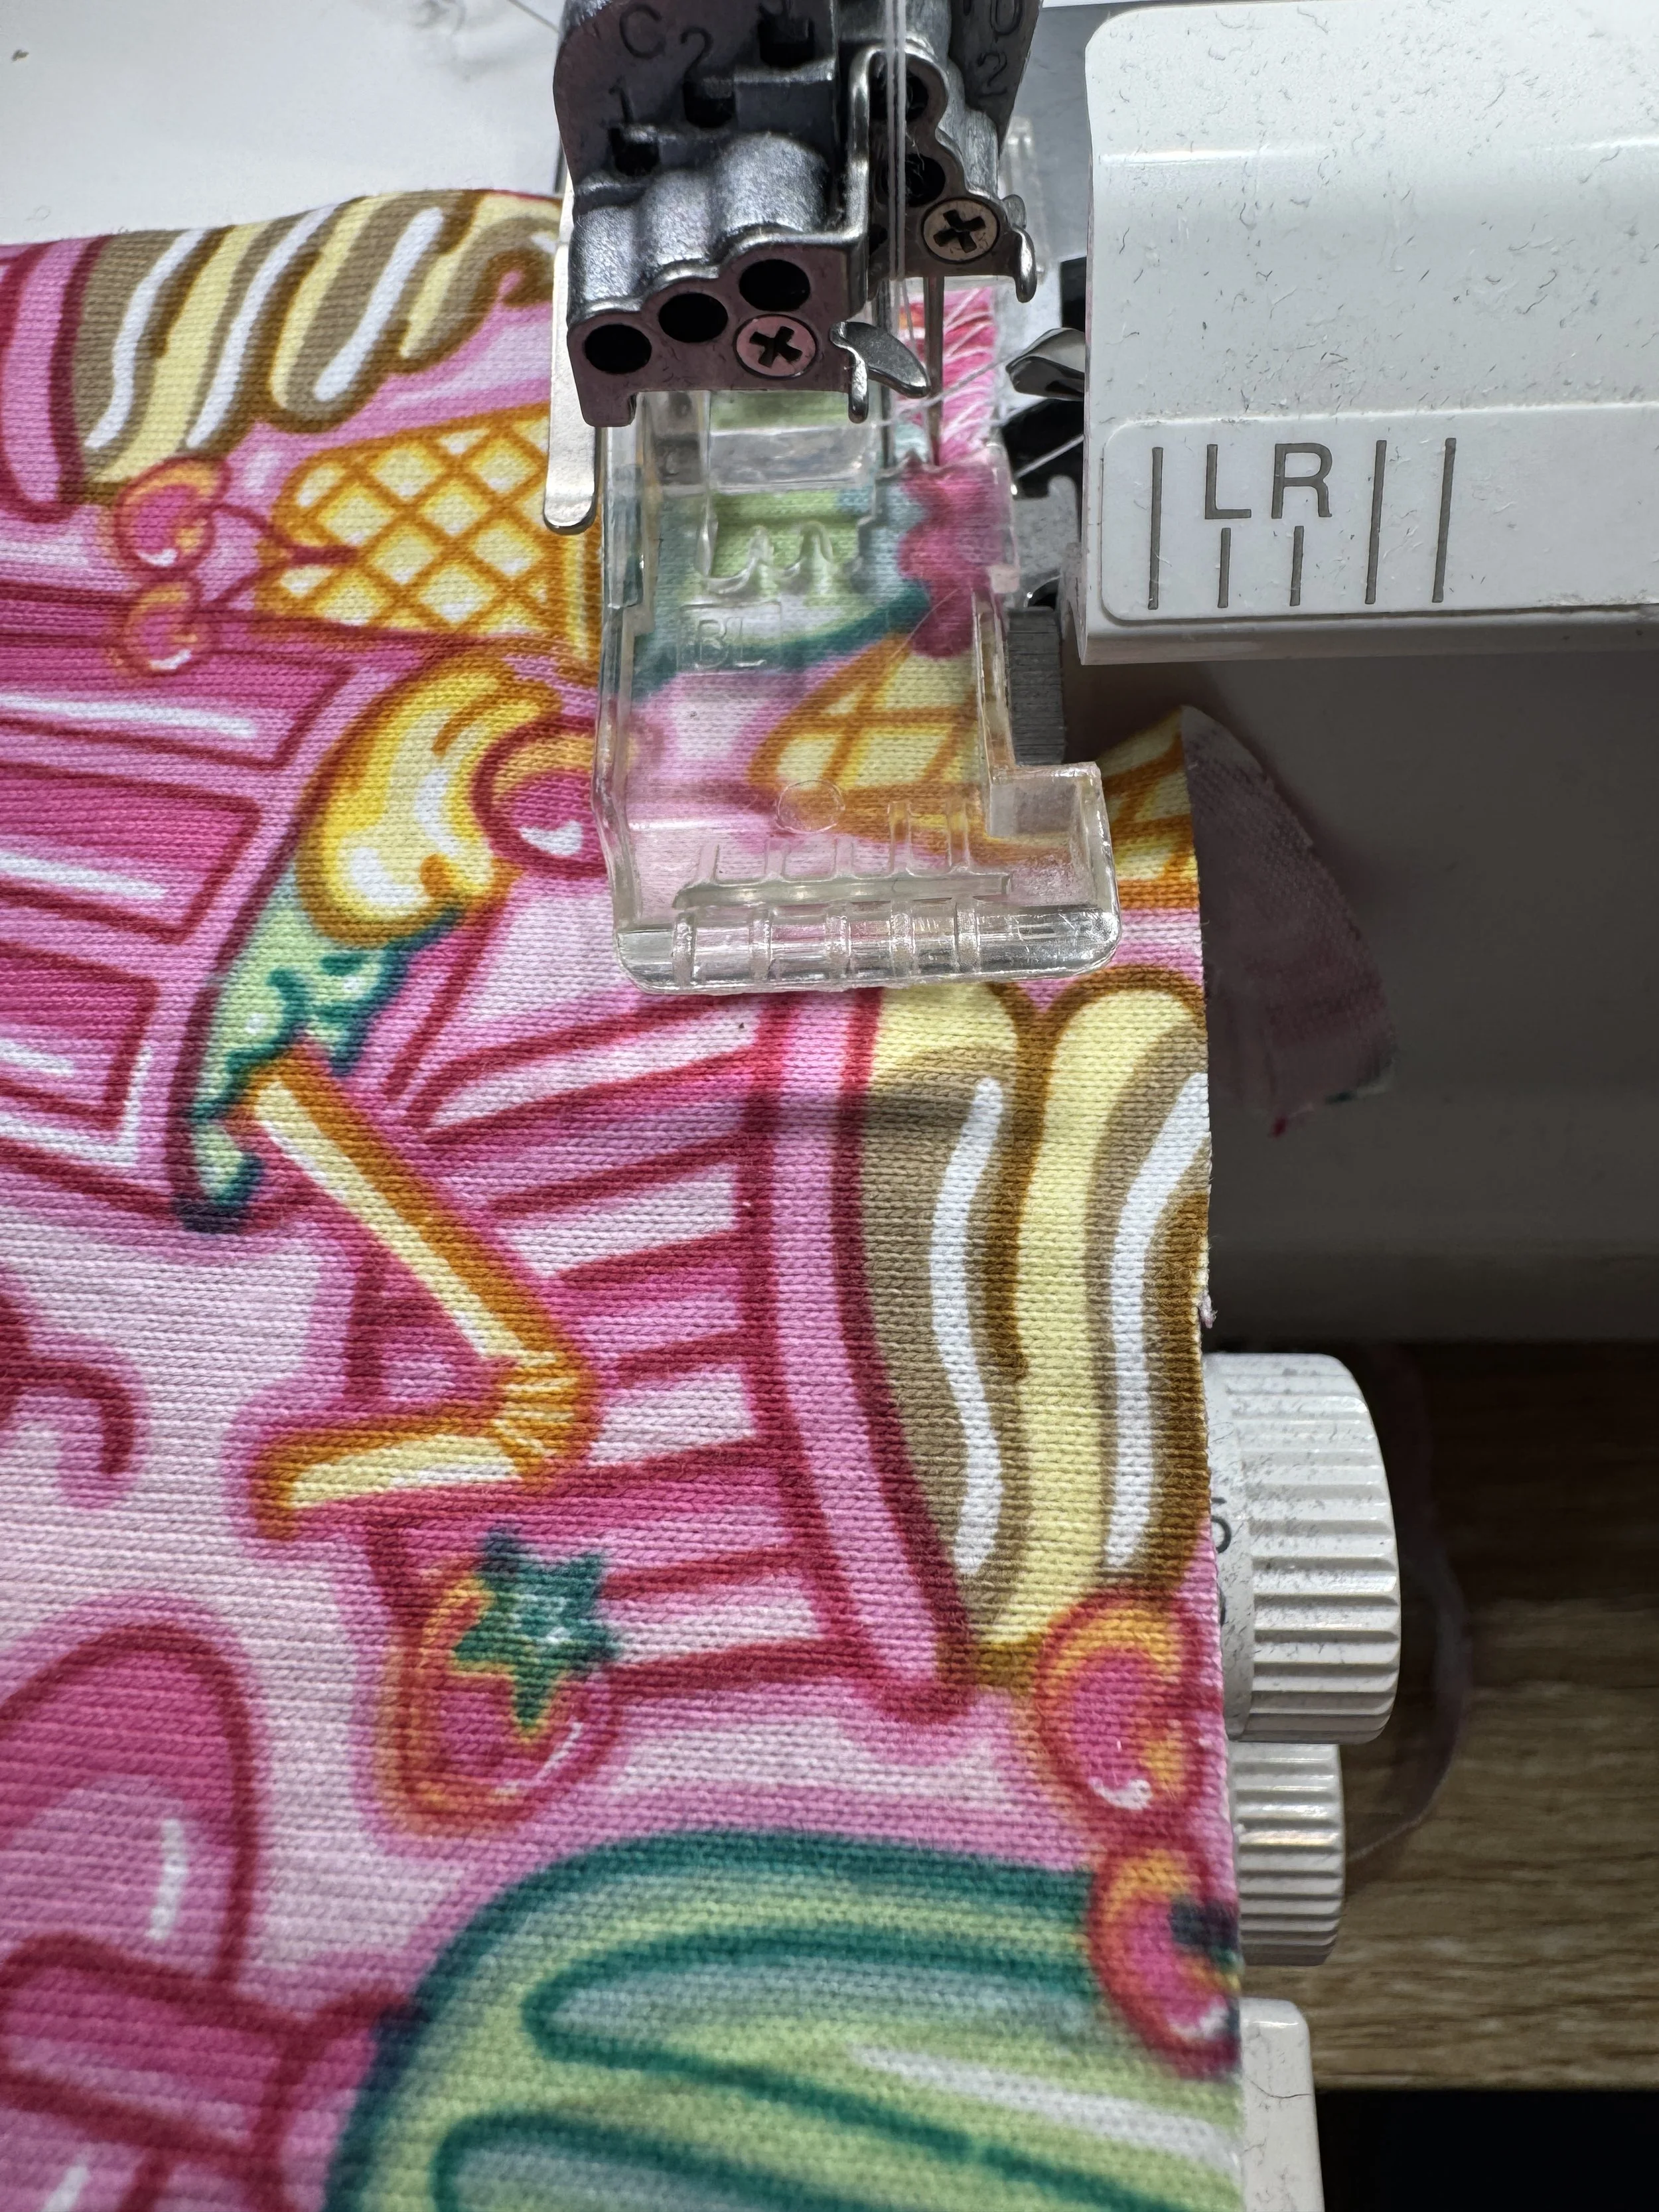
The clear foot is ideal to see your work all the way up to the needle, perfect for coverstitching hems or stitching in the round like adding neckband or cuff to a garment.
The curved foot is ideal when stitching curves as it is shorter. This foot should not be used as an everyday foot as the short distance does not connect fully with differential feed. The curved foot comes in solid and clear, it is fantastic when stitching circles and curves and doing creative coverstitch and chain stitch.
I hope this has helped you understand the difference between the feet available for your machine which will result in perfect stitches every time.