
Making Sneakers using a Sneaker Stitch Kit
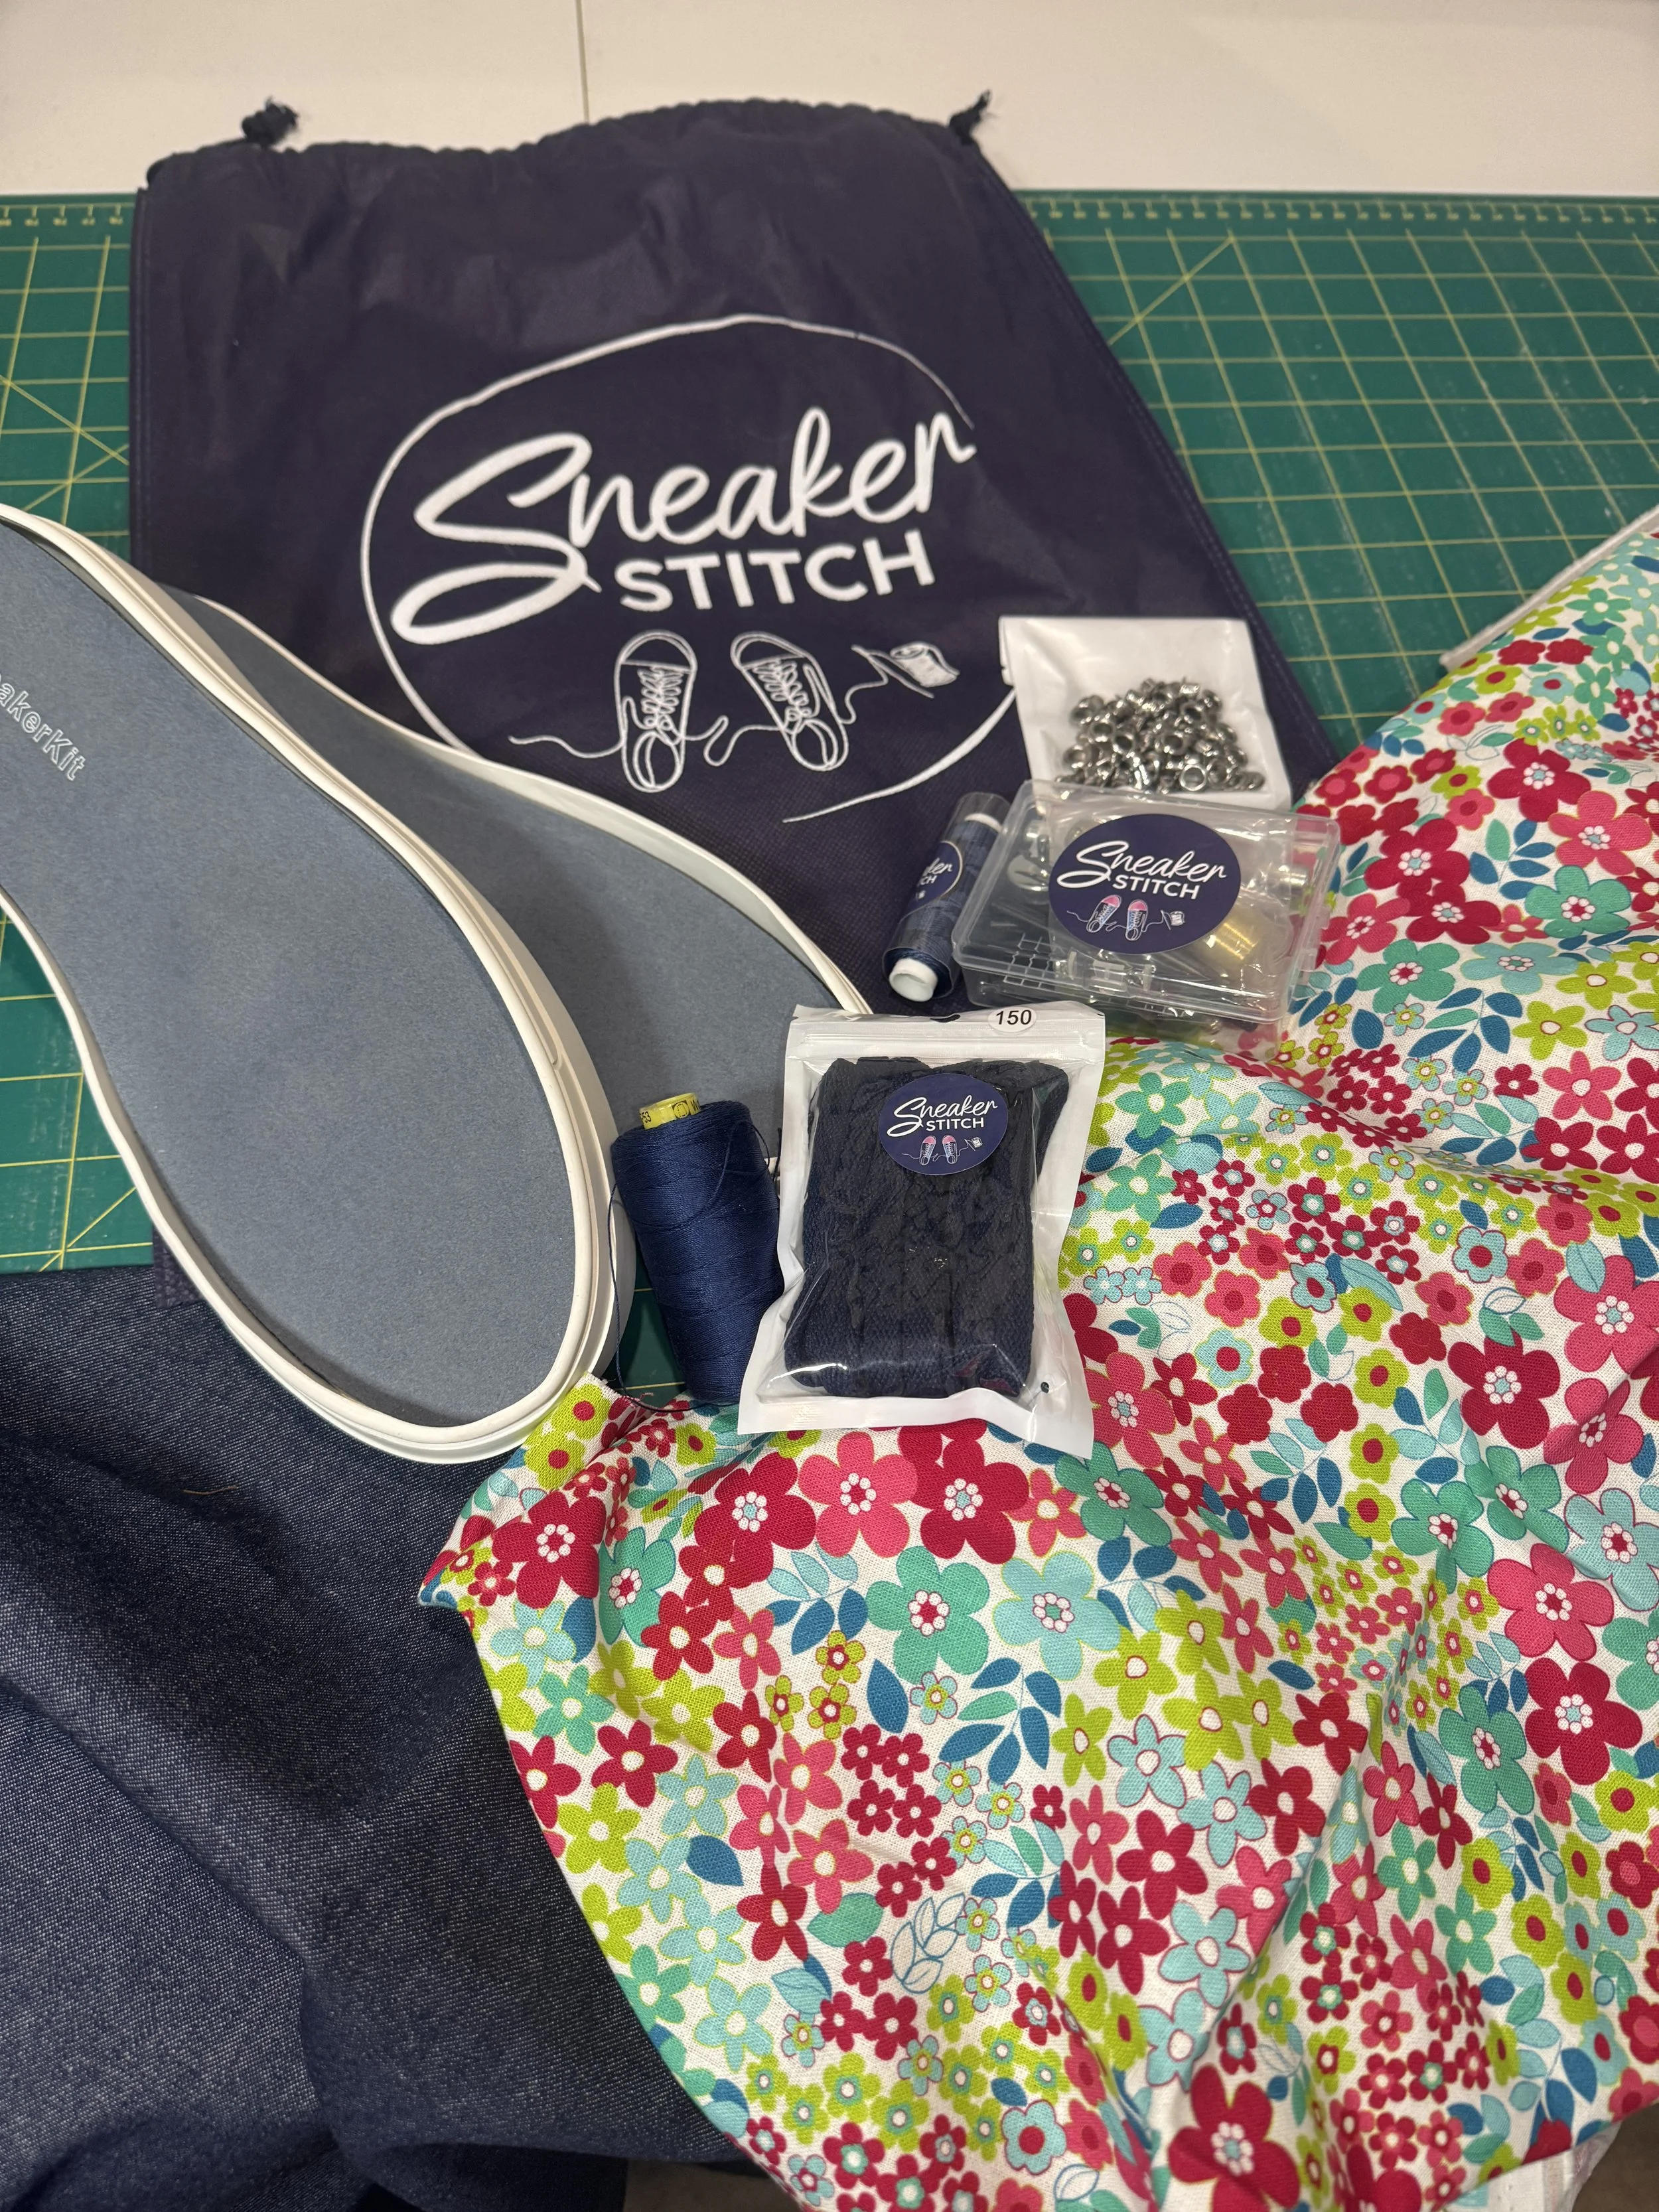
It is that weird time of year between Christmas and New Year, I am struggling to know what day and what date it is although that could also be attributed to the surgery I had mid December! I always have so many projects dancing around inside my head needing to be made however I decided to use this time make something entirely for me. I was lucky to get my hands on a Sneaker Stitch Kit at the Rockhampton Craft Alive show earlier this year and I thought it would be the perfect recovery project for me. I decided on the white soles at the time, I wasn’t sure what I wanted to create, but I wear a lot of denim so thought navy thread & laces should work and I went with silver grommets.
The soles are available in a range of colours and sizes, the pattern pieces and instructions are in digital form when you purchase the kits.
As you can imagine my fabric stash is rather substantial and varied, choosing the fabric took me longer than actually making the sneakers! I settled on the high top style (I had the 150 cm laces with that in mind) I knew it needed an overlocker/serger or coverstitch spin, I wanted bright and fun but also versatile. I settled on a floral with a denim lining and binding.
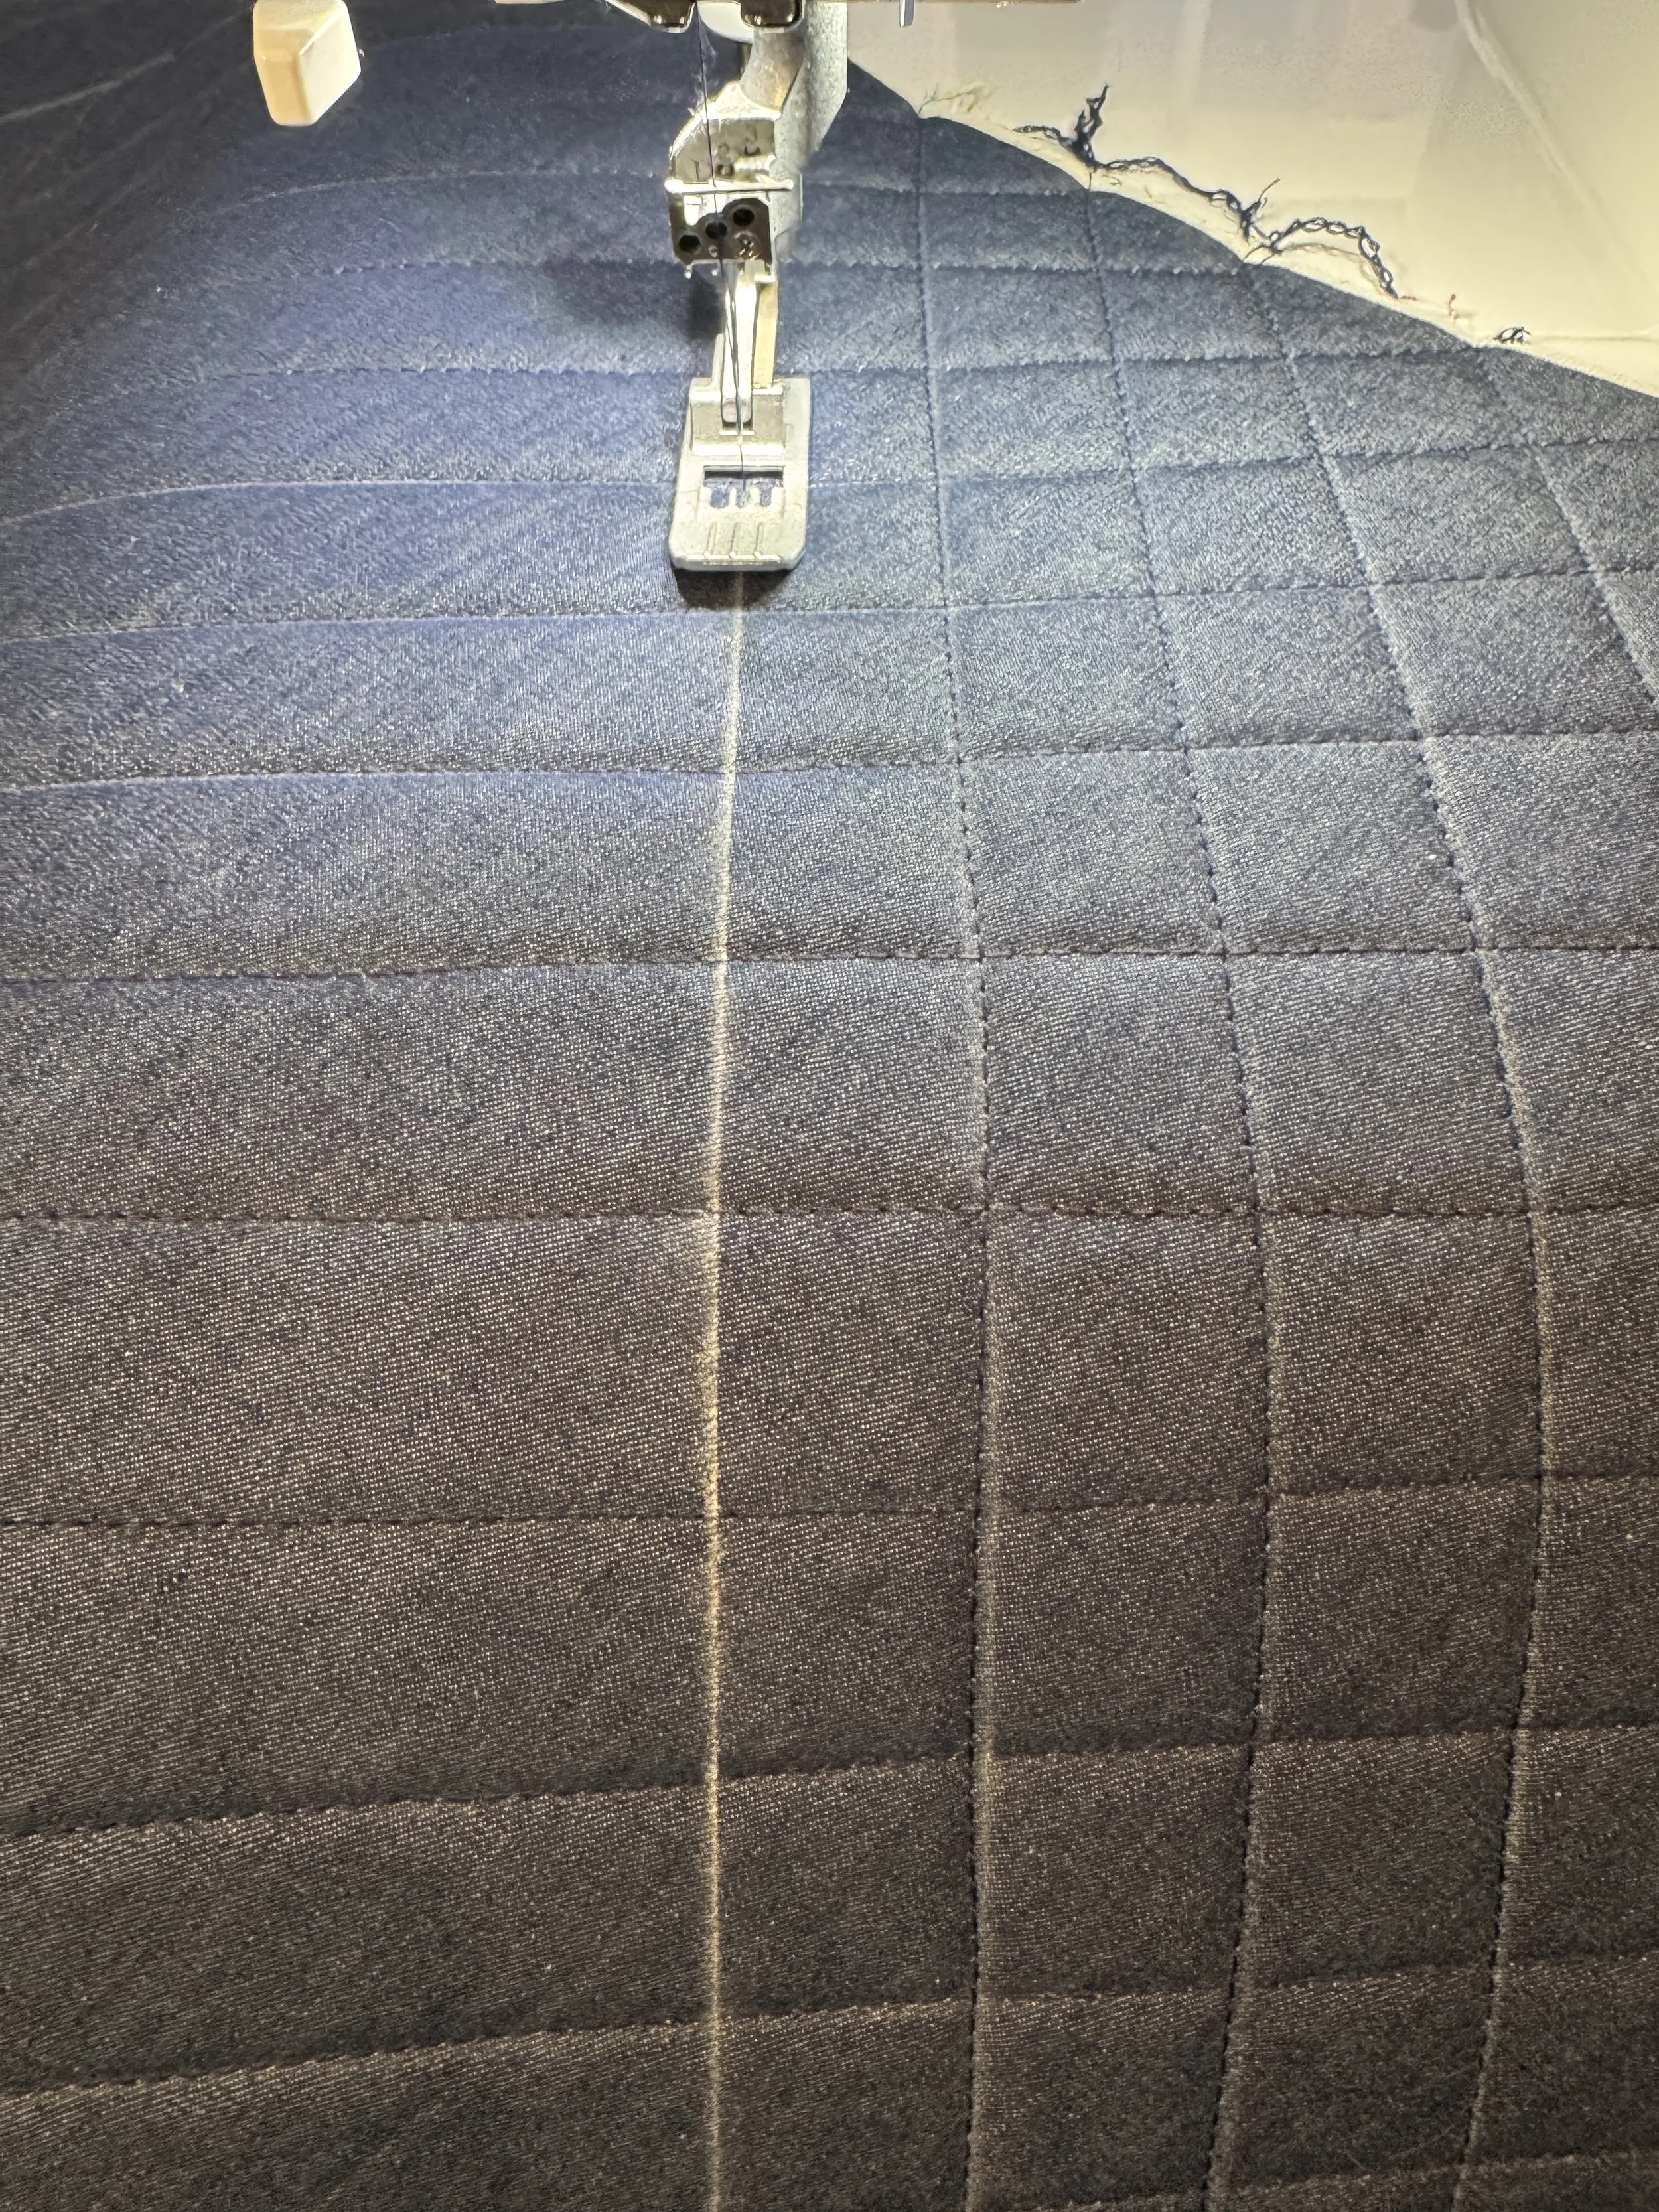
The first step was to prepare the fabric, the fabric needed to be quilted before cutting out the pieces, I used the Matilda’s Own double sided fusible foam, it was so easy fusing the fabric to the foam and stitching - no need to pin through the layers. I set my coverstitch machine up with navy WonderFil 12 weight Spagetti thread in the chain looper and navy designer thread in the needle. I had a size 14 needle in the centre needle position and a stitch length of 3. Drawing a 1” grid on the denim side made it easy to keep my quilting straight, I do actually have a quilting guide for my machine which I have used on the Ovation which is currently away getting a well earned rest and service. I’m guessing the screw that holds the guide in place is still in the Ovation, I need to order one for the Primo, this would have saved me the time of ruling all the stitching lines.

The Baby Lock Primo stitched through the layers effortlessly, which had me thinking why I don’t use this method to quilt more often! The chain stitch is such a beautiful stitch, using the 12 weight thread in the looper really makes the stitch a feature.
Once all the quilting was done I laid out the pattern pieces and cut them out, I tried to line up the quilting squares on the left and right pieces so the finished shoes would have the quilting pattern would look similar on both shoes.
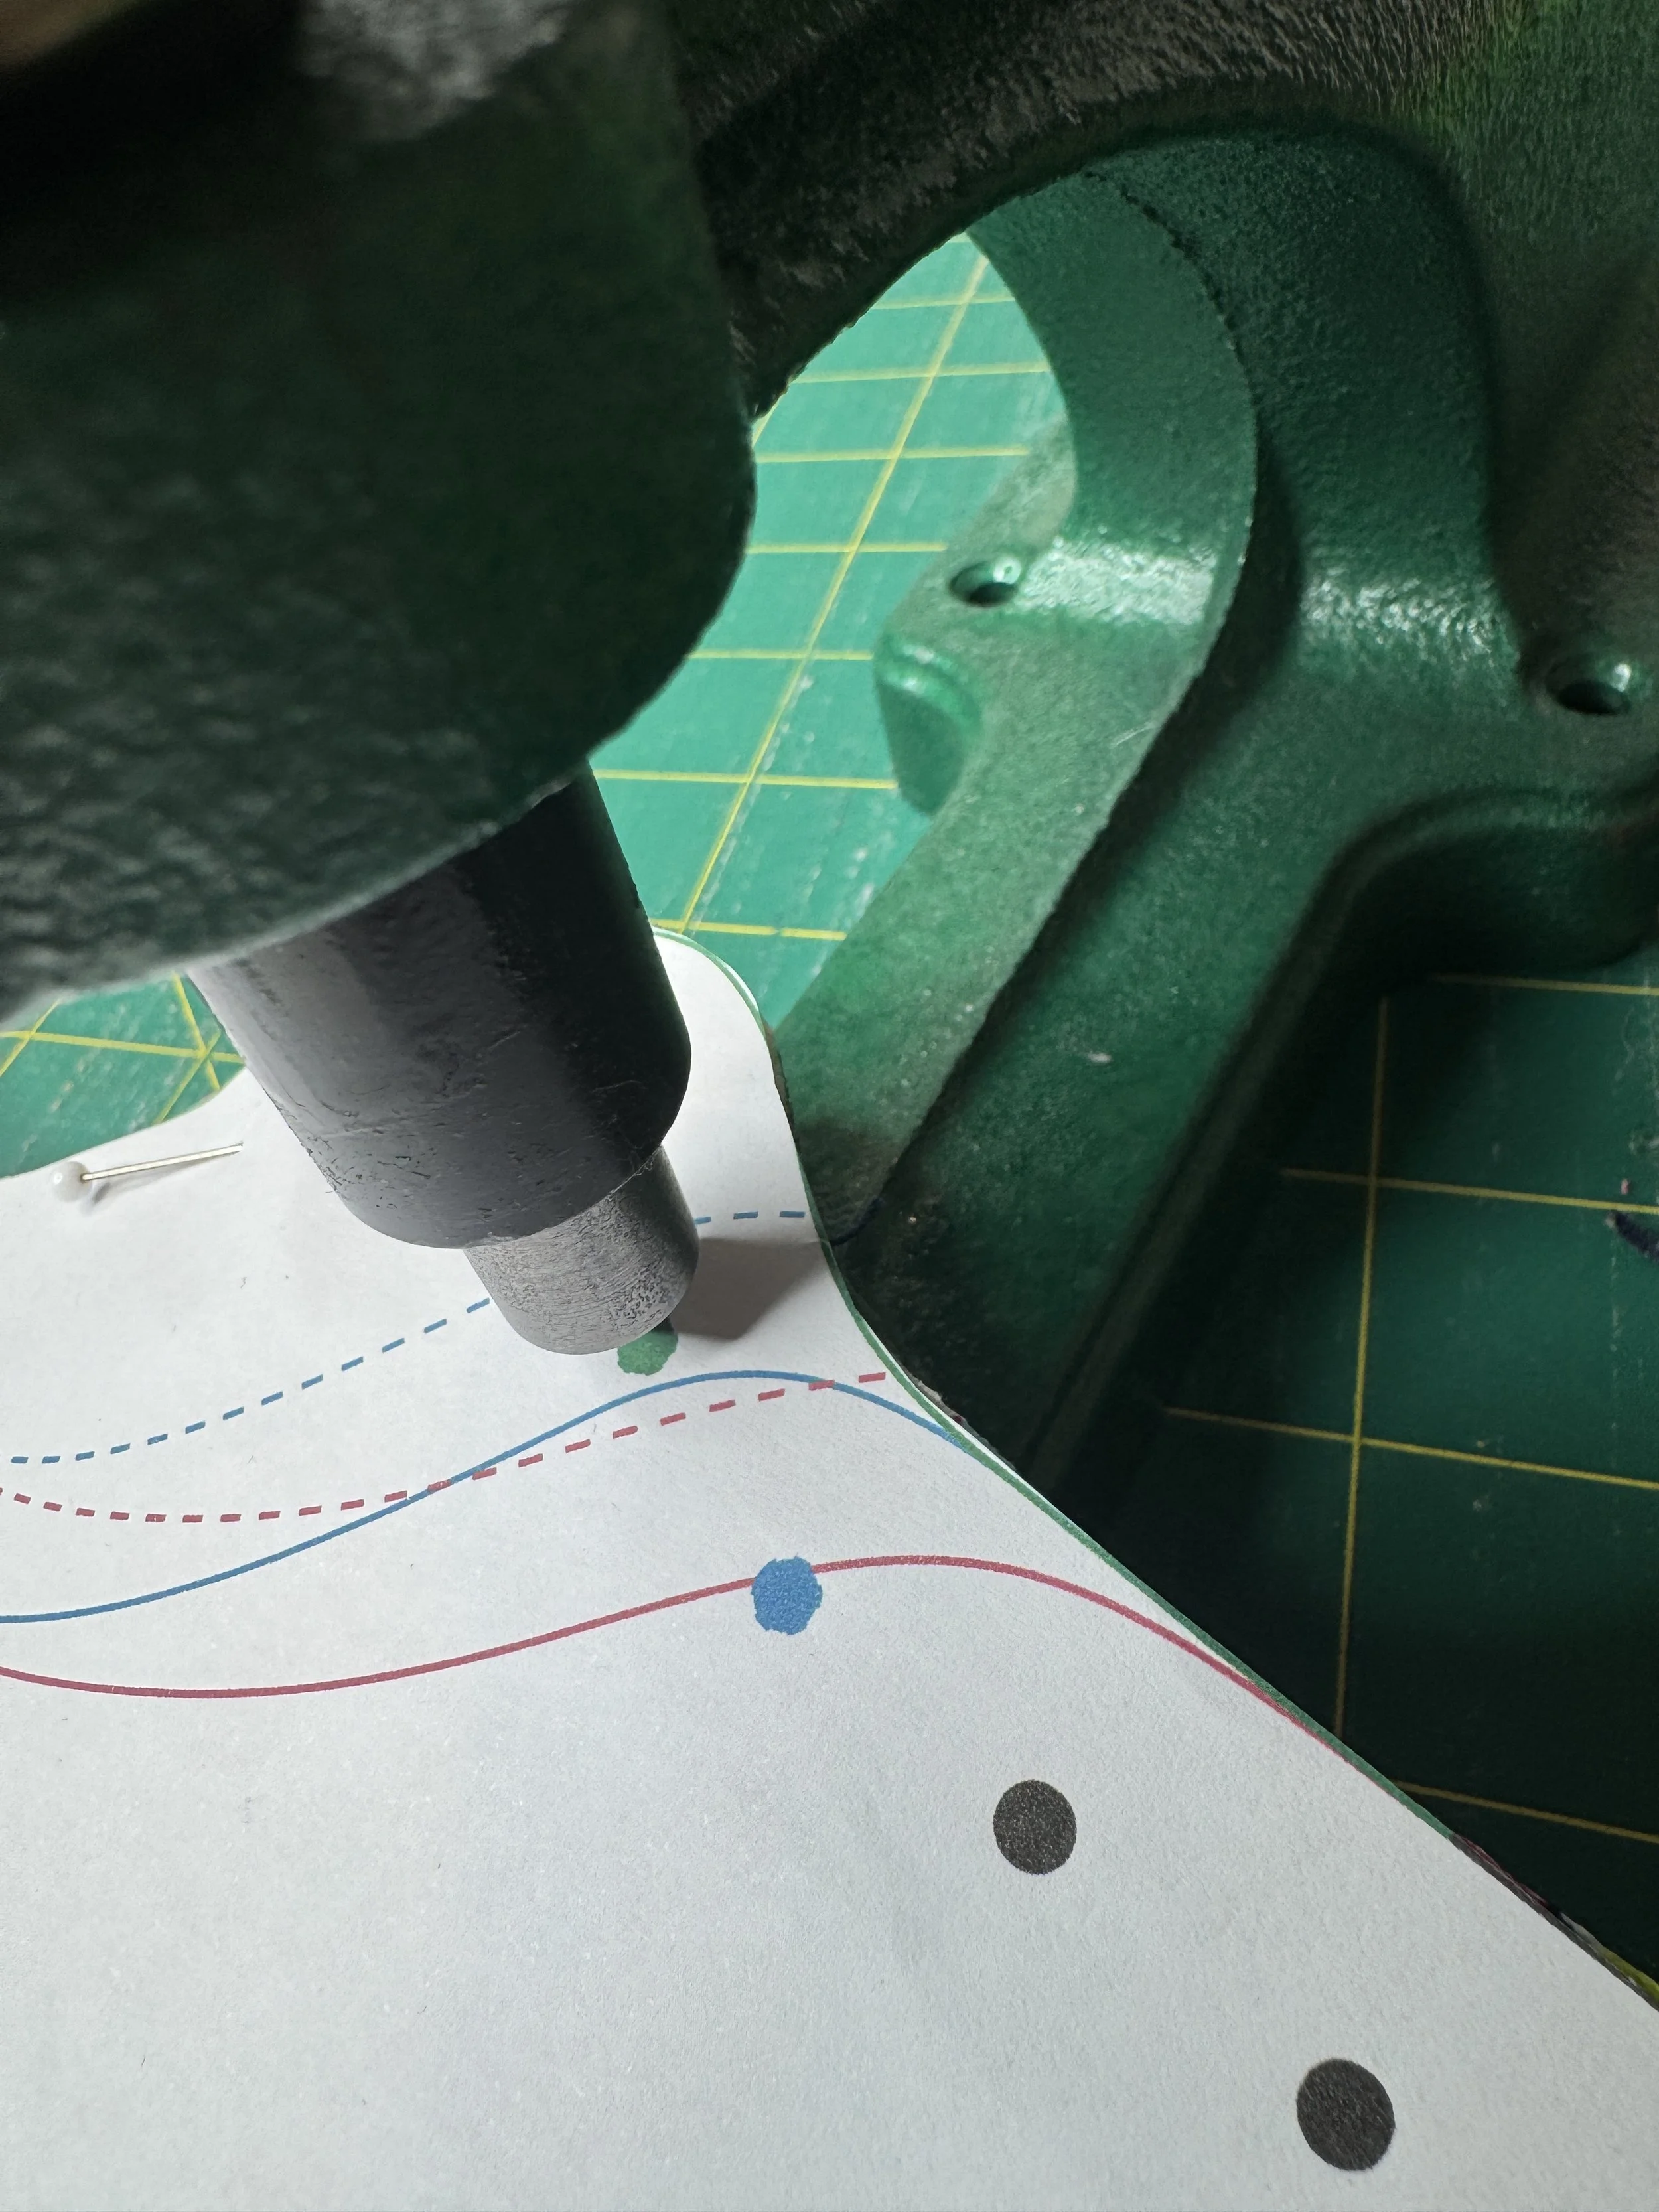
The next step is to punch the holes, Leesa at Sneaker Stitch has the dyes for the Kam press available or the tools to do it by hand, you dont need a press to make these sneakers. The holes for the grommets are larger than the holes to stitch the pieces to the soles. I love the method of punching through the pattern pieces to ensure the placement is accurate.
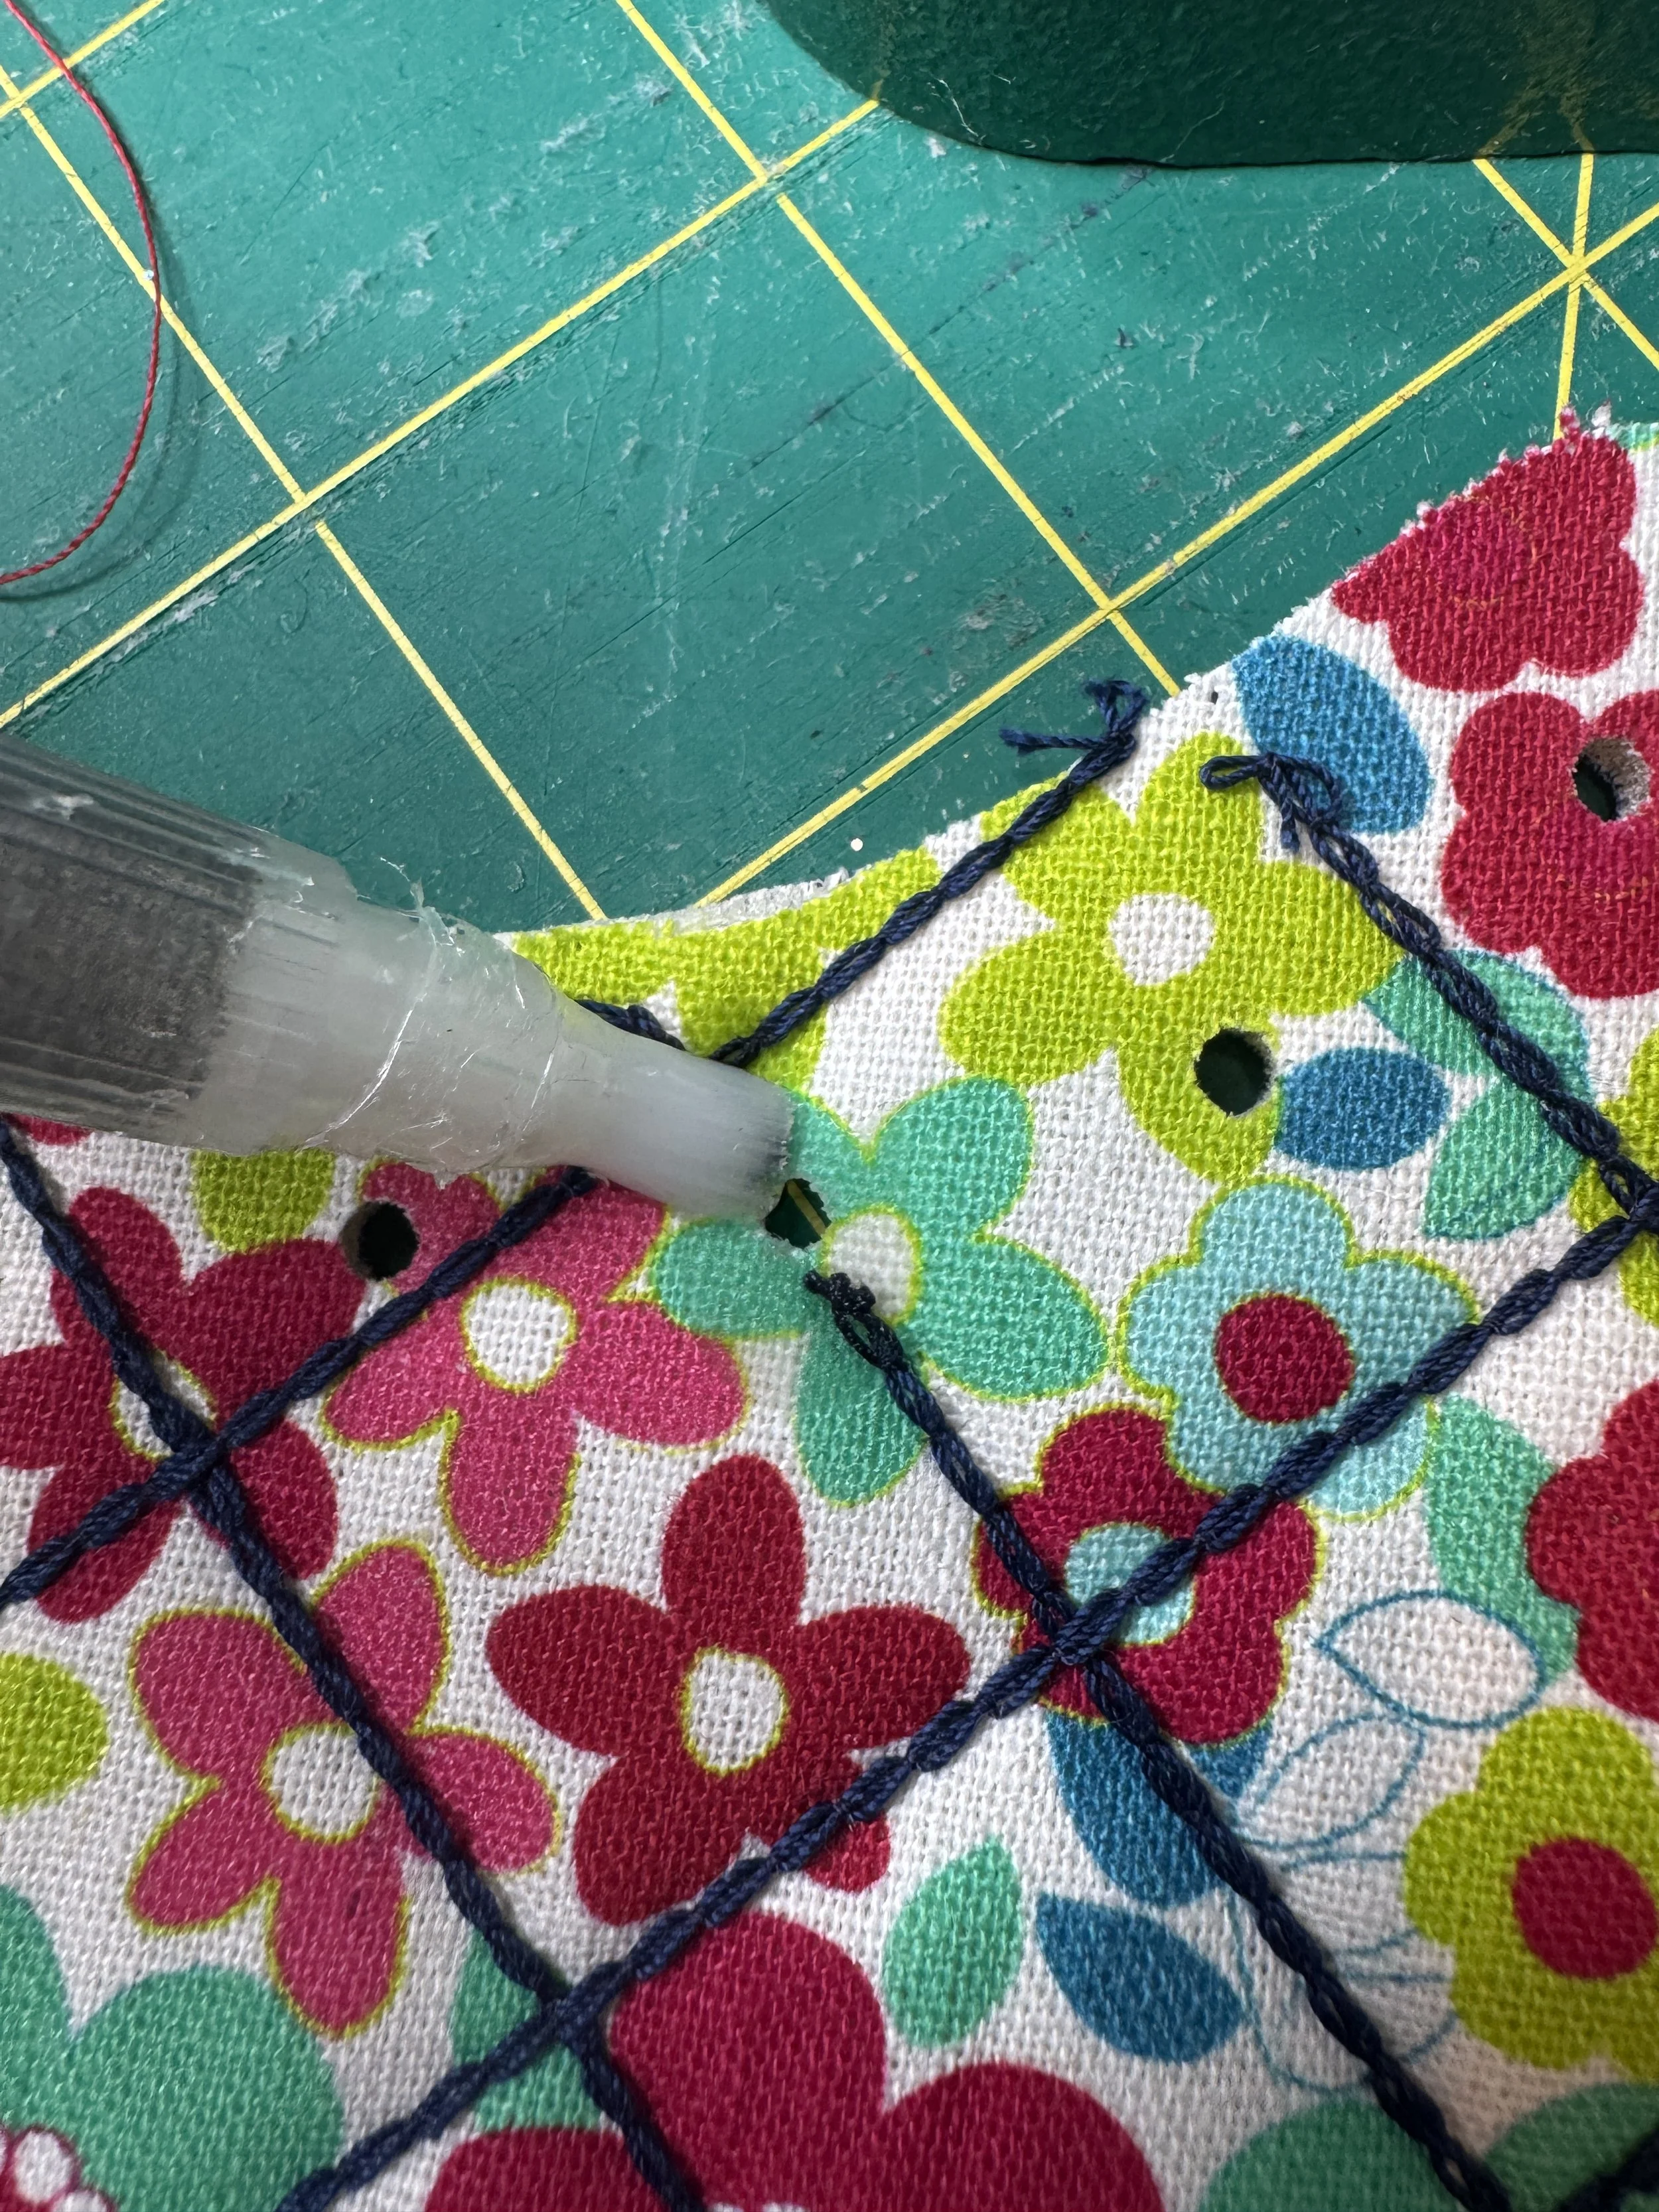
Once I removed the pattern pieces I heard my teaching voice in my head “chain stitch unravels easily from the end that you have finished stitching if the looper thread gets free”. In some places where the holes had punched, it had cut through my quilting stitches - something I hadn’t anticipated! *Note the above photo. I used fray stop on all these areas and in some places tacked down the ends to be extra secure.
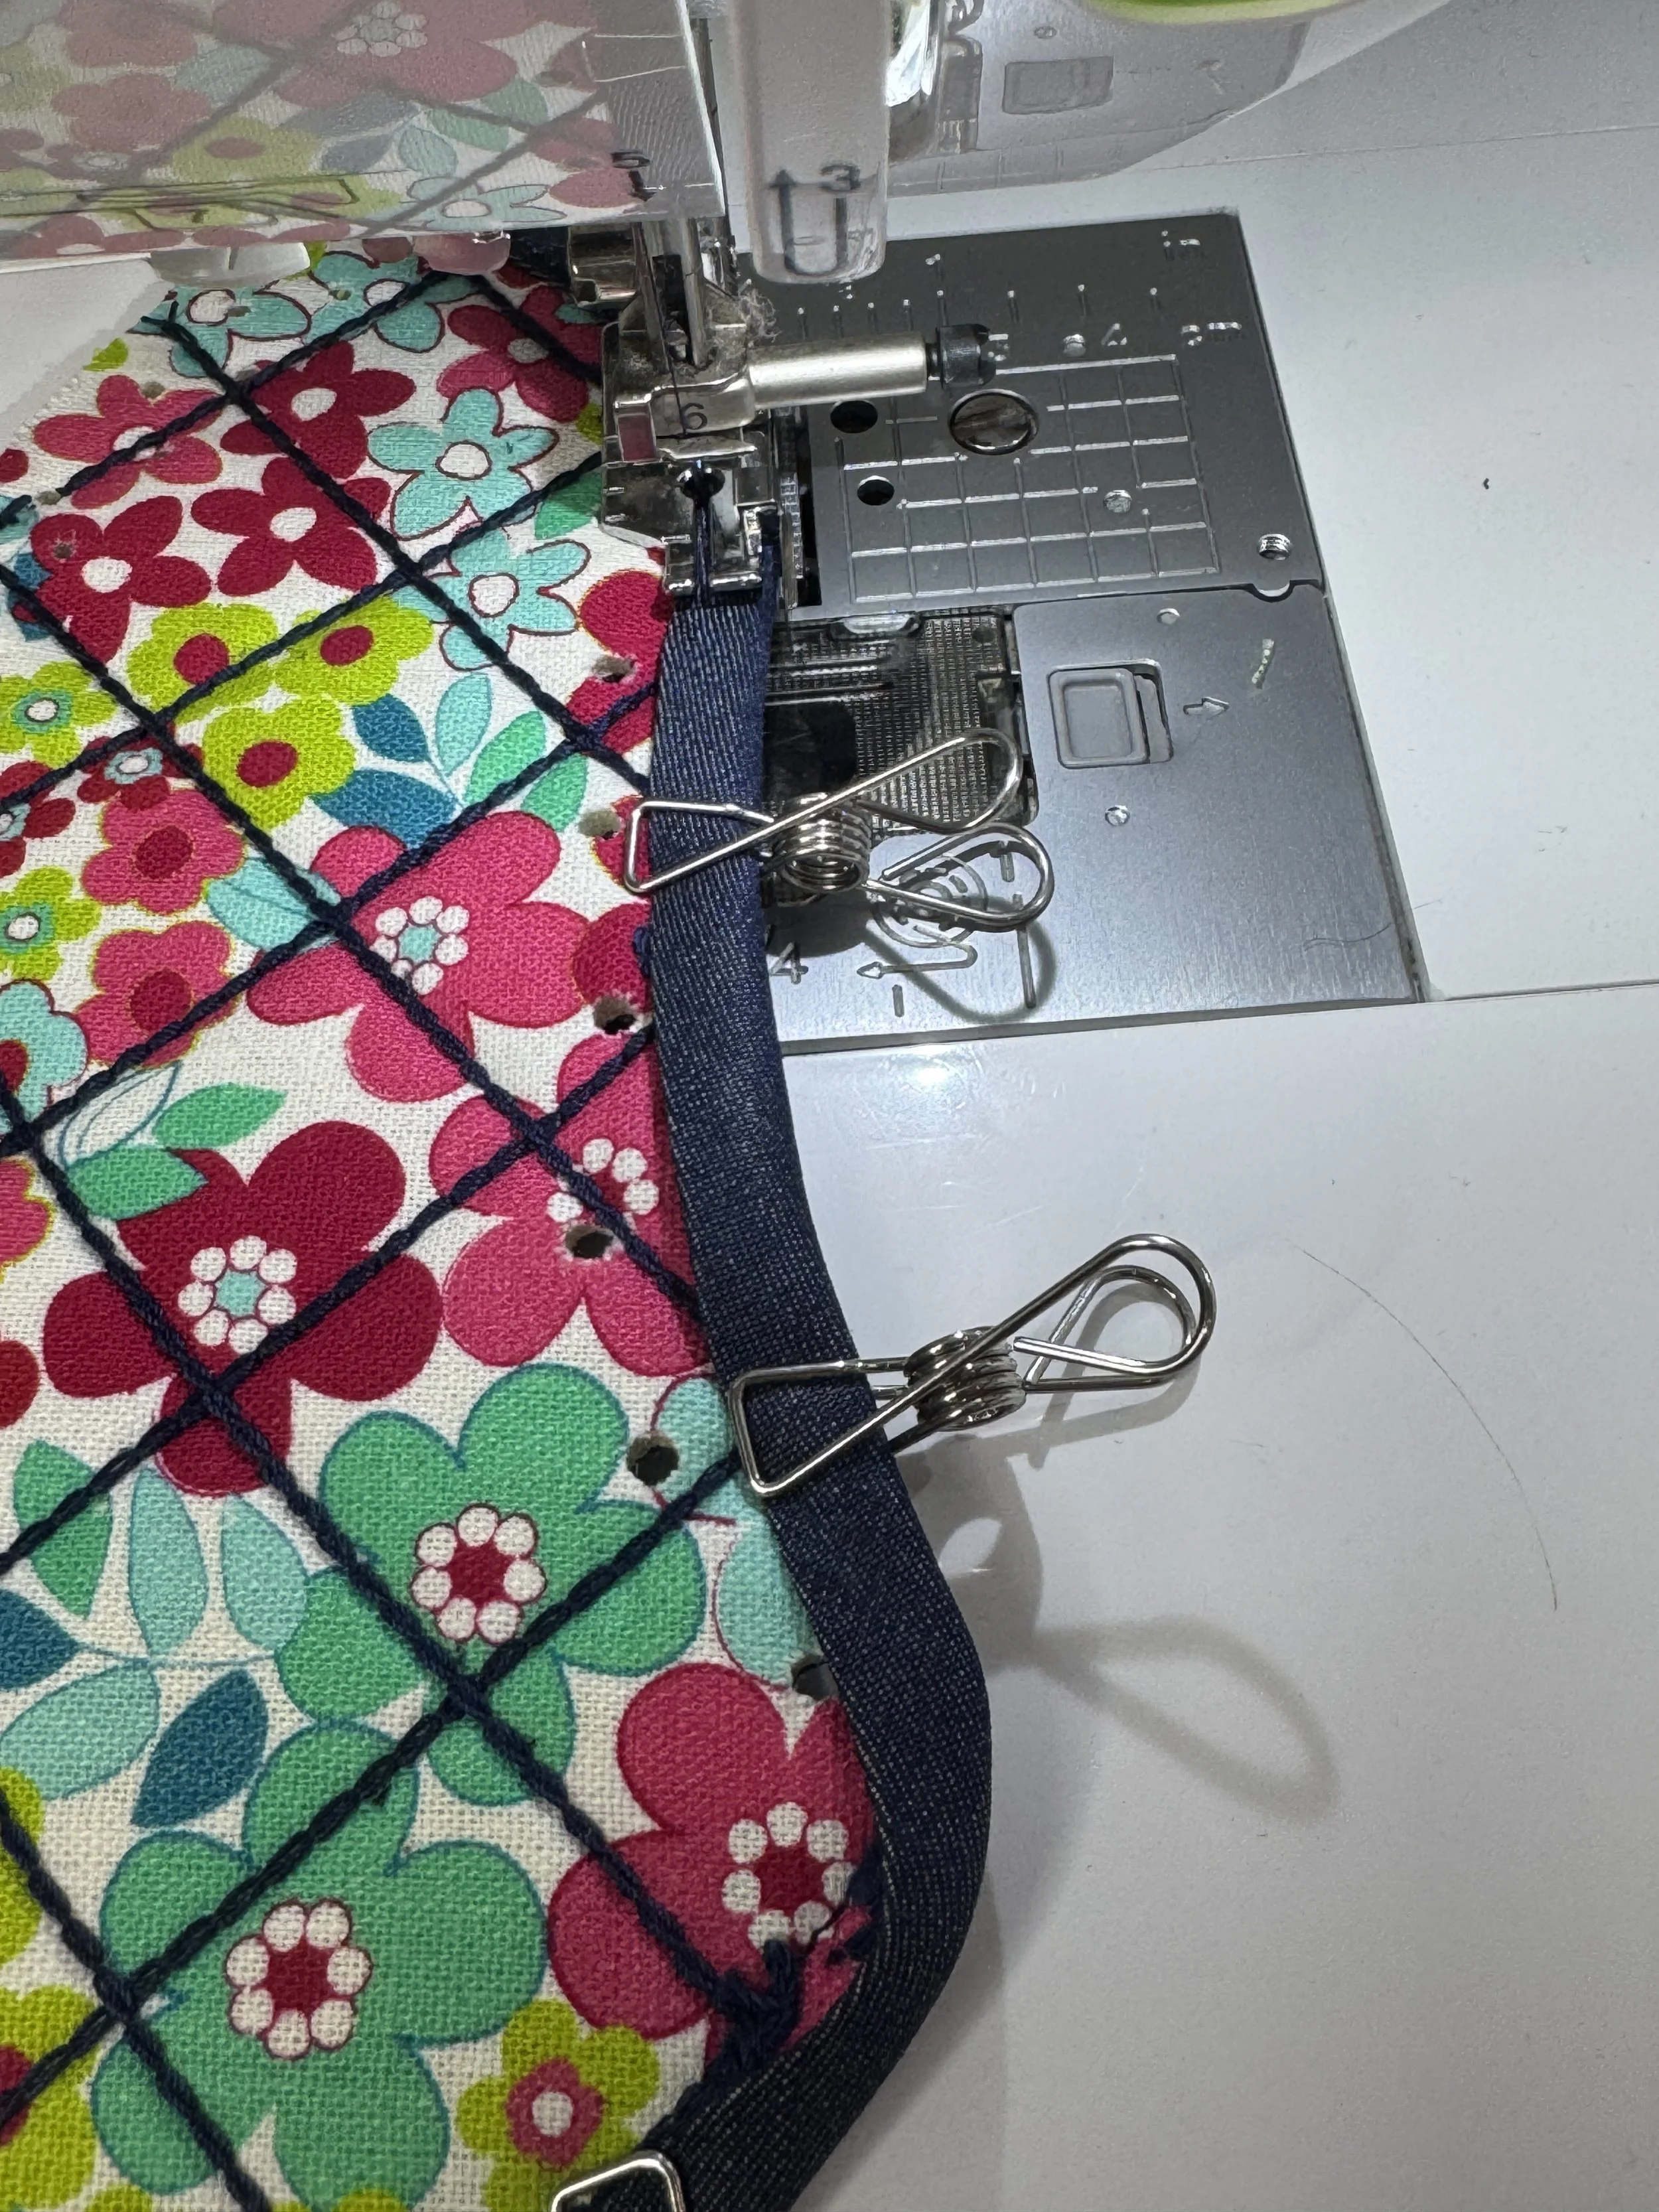
As I chose the style with binding, I thought I could be cleaver and bind the edges using my coverstitch machine and an 28mm double fold binder. It worked beautifully on a straight edge however the curves were too tight to negotiate so I had to dust off my sewing machine for this step. I do use it occasionally…….when I can’t overlock or coverstitch!
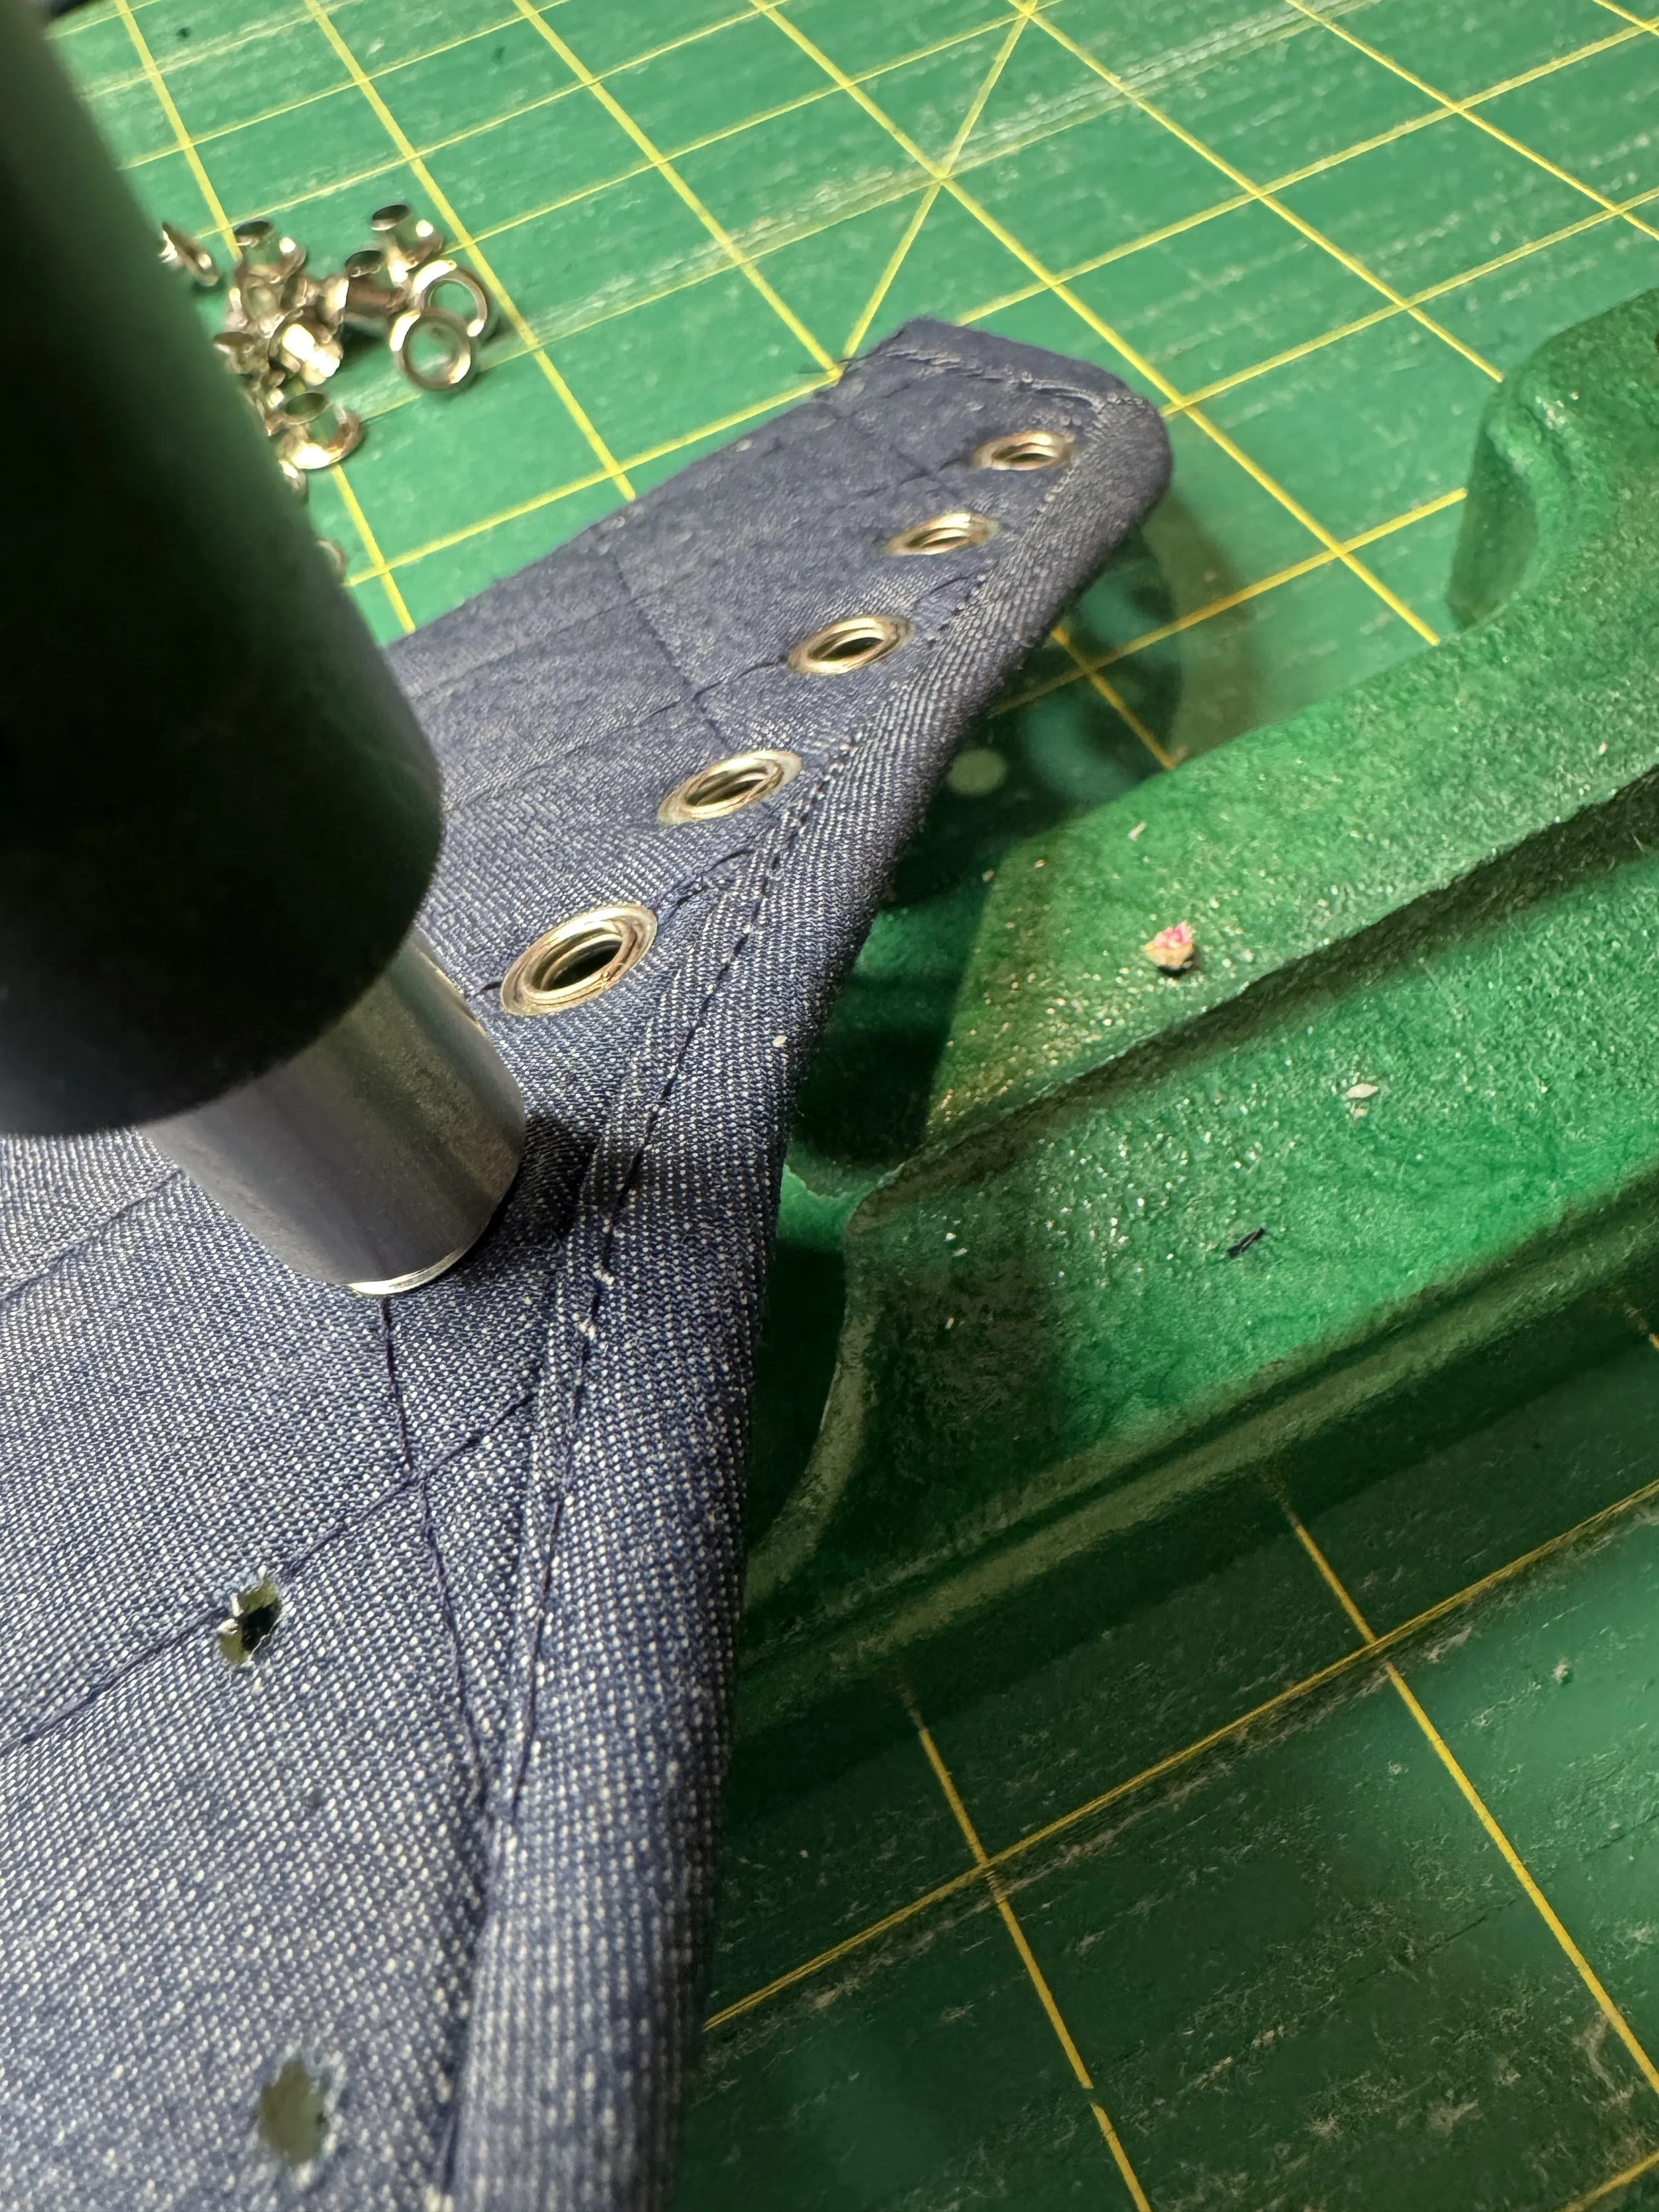
The Kam press is perfect for installing the grommets however you can do this with a tool and a mallet or a hand press as well. There are extra grommets in the kits, this gives you the opportunity to practice before tackling your project, this was really helpful for me.
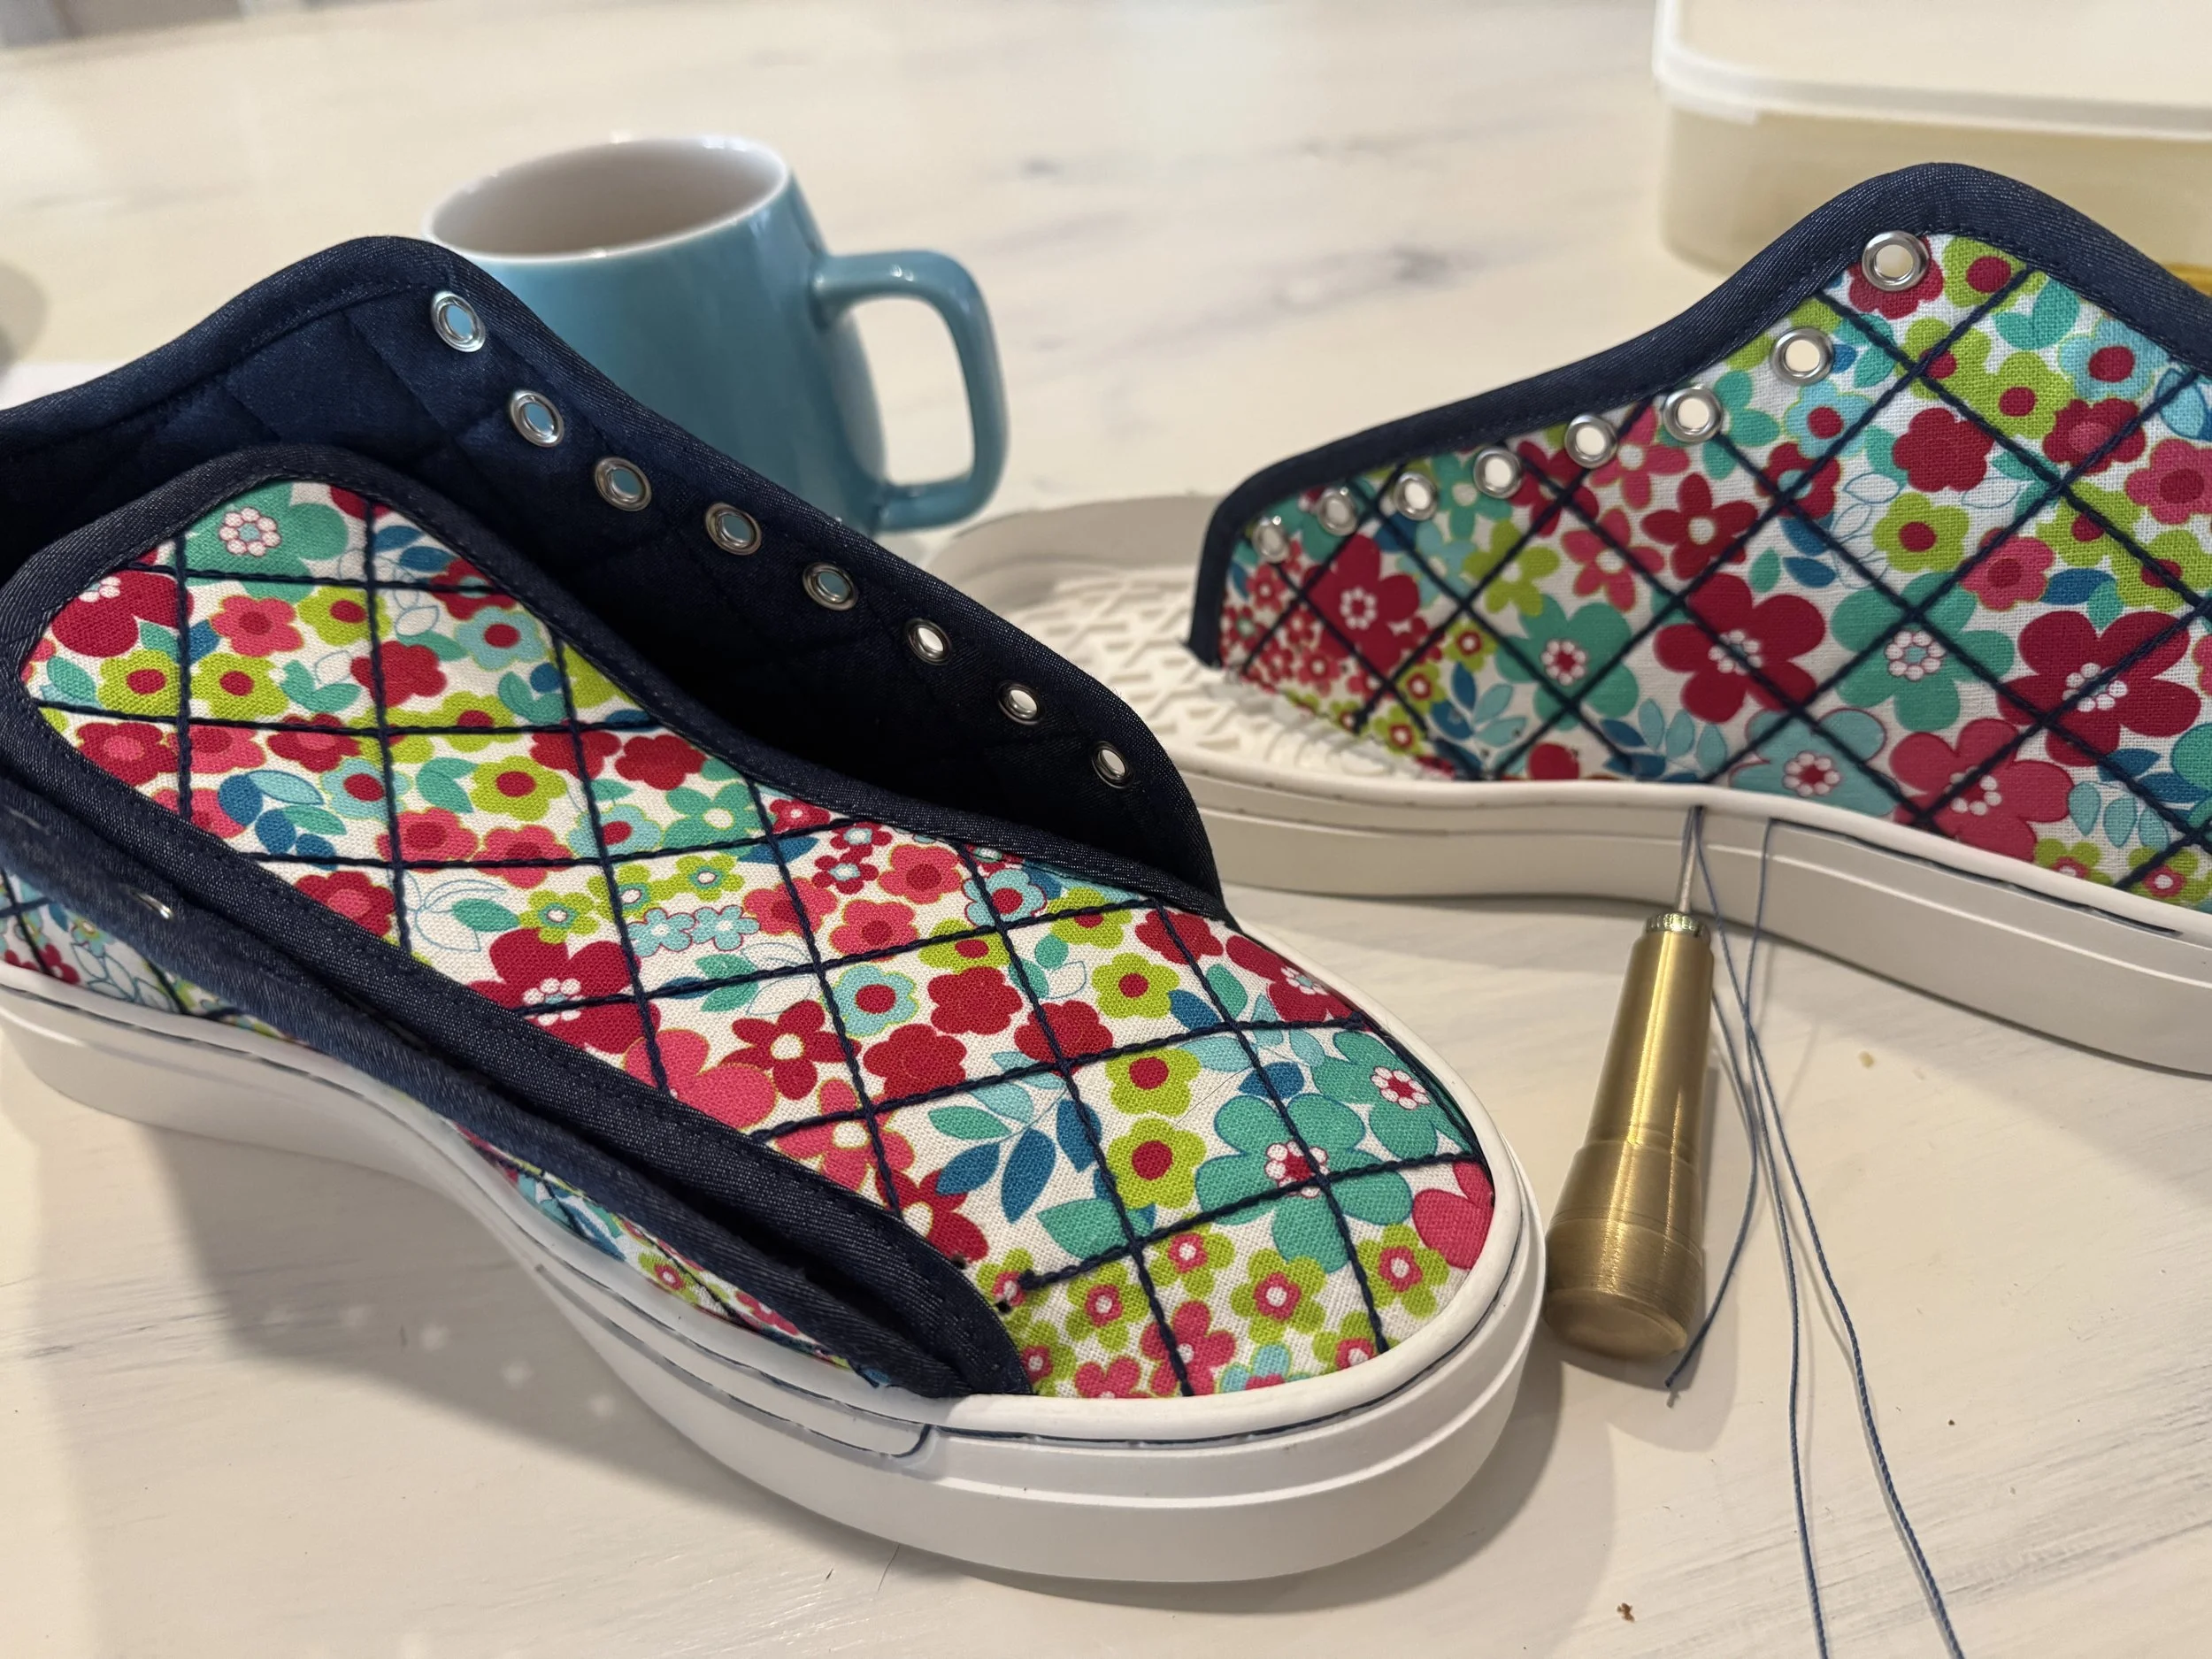
The next step was to use a wax thread to stitch the pieces to the soles. This was the most challenging part for me but once I got the hang of it it was actually quite therapeutic, mastering this technique and creating the correct tension was very satisfying.
The last step was to hand stitch the tongue to the side pieces and thread through the laces.
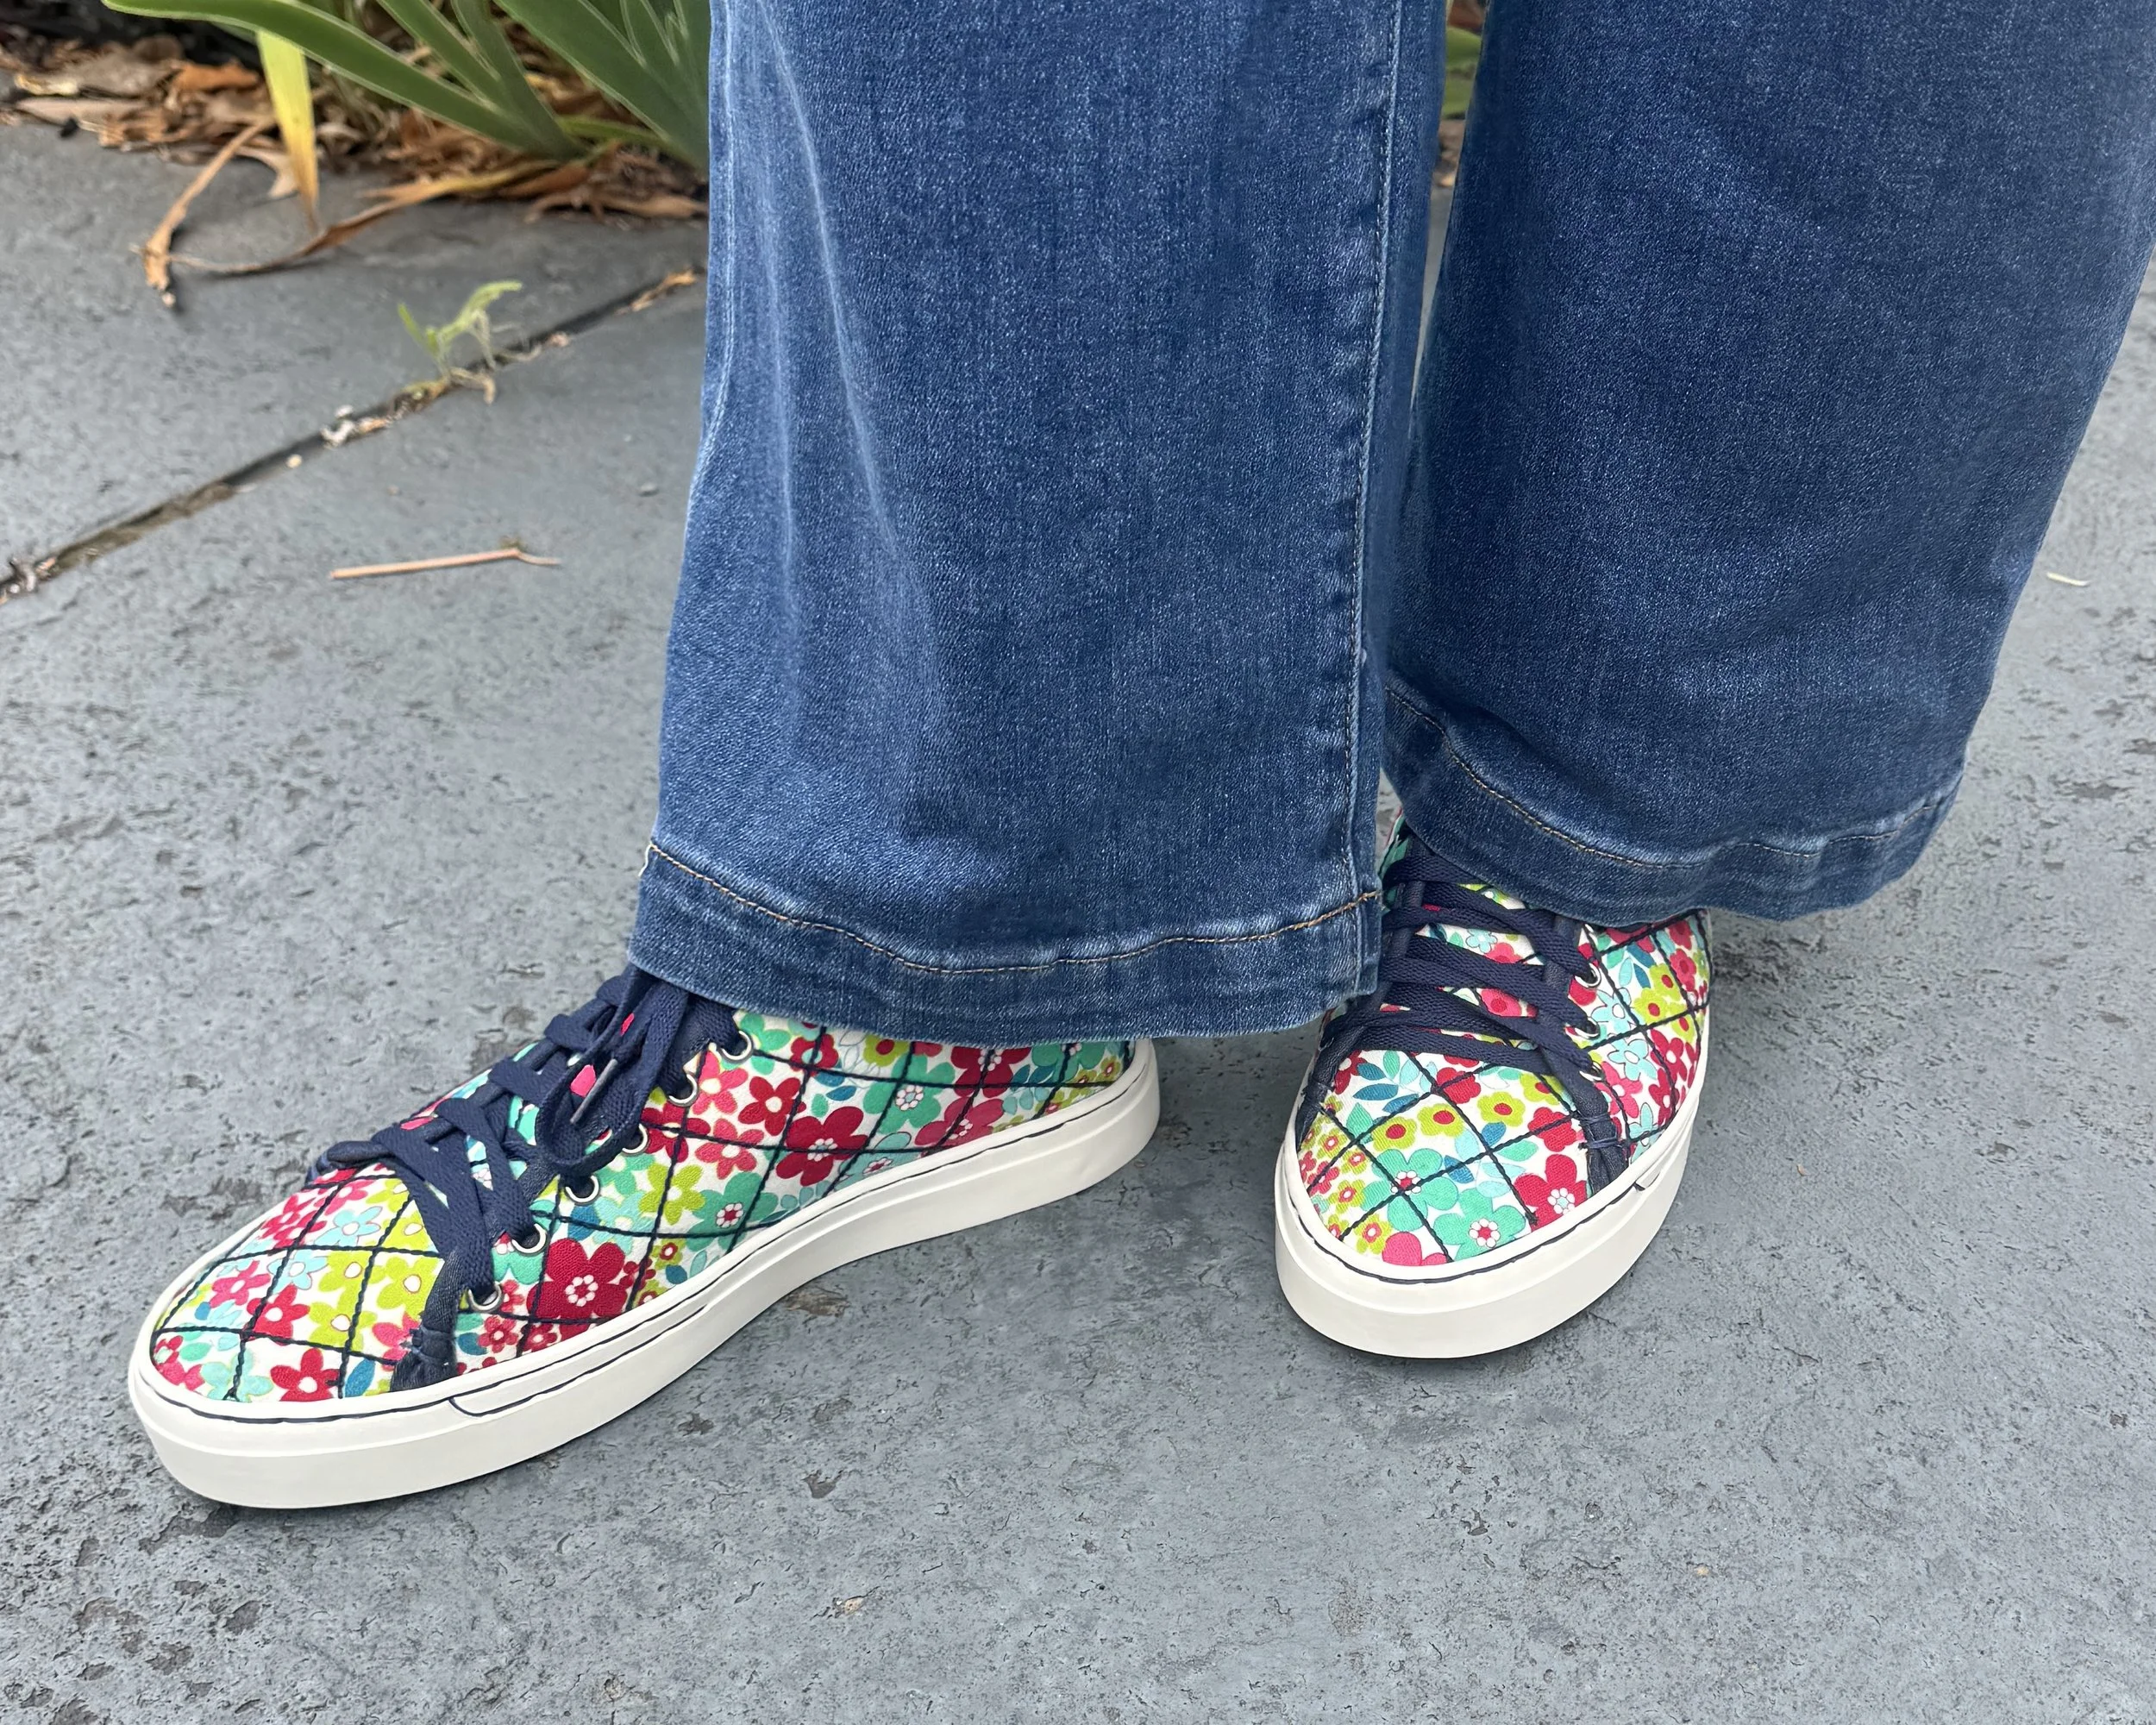
I’m completely in love with these and they are so comfortable. The size is exactly the shoe size that I purchase from a store and they fit like a glove. My only problem now is looking at at all the fabrics in my stash and wanting to make sneakers, I need to bring my focus back ! If you are after any info about Sneaker Stitch, you will find Leesa at https://www.sneakerstitch.com.au/
Until next time, happy overlocking/coverstitching and happy sneaker making.
Kate